Stay on target...
The Star Wars: X-Wing core set includes just enough components to give you a taste of what the broader game has to offer. It’s important to start slowly and learn the basic rules before you progress to advanced play and even more special conditions related to ships like the Rebellion Y-Wing or the Scum faction’s Slave-1.
The quick start setup is one you should come back to when introducing new players to the game. Here’s everything you need to know.
Once you’ve unboxed everything and punched out all of the tokens, it’s time to play your first game. The quick start guide instructs on which pilots to assign to each ship for a fair fight.
You’ll need:
Here’s what a TIE Fighter looks like when it’s fully assembled (minus the ID number tokens):

You’ll also need a pilot card correlating to the ship token. For second edition, Fantasy Flight has removed a lot of the complexity on the cards in favor of using a desktop and mobile app for squad building. More on that (much) later. For now, take a look at what one of these cards looks like:
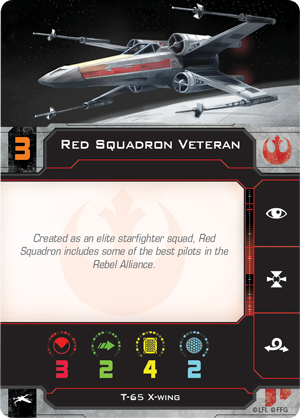
The key elements are the ship/pilot stats on the bottom. From left to right these are:
The orange number at the top left is the initiative number, which we’ll cover in a moment. The vertical bar on the right shows the actions a pilot can take. For our first game, we’re not going to use those, so ignore them for now.
The box in the middle of the Red Squadron Veteran has what’s known as “flavor text.” This is designed to give players a peek at Star Wars lore. Some pilots have ability text instead, giving them additional options in battle. None of the ships in your first game have ability text.
When you opened the box, you should have punched out a number of templates. Five are straight, three are curved, and an additional three are right angles. There’s also a long range ruler. You’ll need these for every game and, if you end up playing a lot, there are official plastic templates.
You’ll also need the movement dials. These are keyed to the ship, not the pilot, and represent the different types of maneuvers the ship is capable of in battle. You’ll notice that some of the maneuvers are marked in red and others in blue. We’ll ignore the colors for the first game.
Set up your play area according to the diagram in the quick start manual, except for asteroids and debris fields. Those require advanced rules, which we’ll discuss later. Order of play for your first game works like this:
1. Secretly plan how your ship(s) will move using the maneuver dial that corresponds to each vessel. For the first few games, we encourage you to measure out the different possible maneuvers using the template during planning.
Over time, you’ll get a better sense of them and won’t be able to use them to plot your turns. Once you’ve settled on your movement for the turn, place the dial(s) face-down next to your ship(s).

2. In ascending initiative order (the orange number on the pilot card and ship token), reveal your dial. Place the corresponding template between the front guides of your ship base (these are two plastic nubs). Once the template is flat against the playing surface, lift your ship up and place it at the other end of the template, using the rear guides to insure correct orientation.
If another ship is in your way, use the placeholder token (it looks like an L) at one corner of the obstructing ship’s base, move that ship out of the way, lay the template down, move your ship, remove the template, and replace the obstructing ship. You can fly through opposing ships, but you can’t finish your move with overlapping bases. If you overlap, simply move your ship back along the template until you are touching, but not overlapping, the opposing ship.
3. Once all ships have moved, the engagement phase begins. This time, we start with the pilot with the highest initiative and go backward.
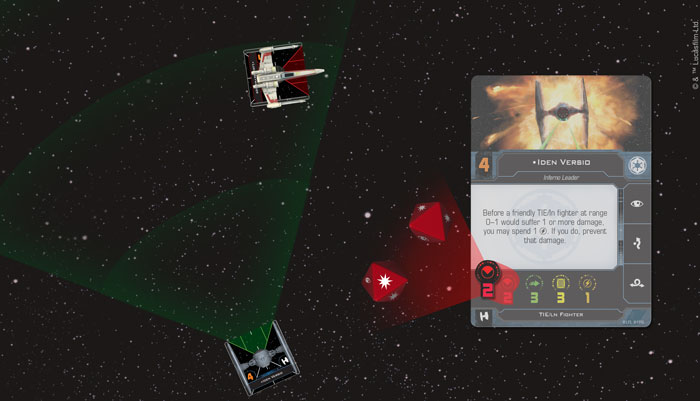
In order to fire at another ship, that ship must be in your firing arc (noted by the triangle at the front of the ship token) AND be in range. The range ruler is broken up into three segments. As long as the two ships aren’t any further apart than the range ruler (from any point on their bases) AND the enemy ship is in your firing arc, you can shoot. You can’t attack a ship if it’s touching your ship’s base (called “Range 0”).
4. If you can attack, look at the red number on your pilot card and roll that many red dice (plus one if you’re at Range 1). The red dice have three symbols on them: an eye, a filled-in hit, and an outlined hit. There’s also the chance of rolling a blank. For our first game, we’re ignoring the eye symbol and there is no difference between the two kinds of blast symbols. Count the number of blasts.

5. The defender now rolls green dice. These also have two symbols: an eye and an evade symbol (a curved arrow around a dot). There is also the chance of rolling a blank. For our first game, we’re ignoring the eye symbol. Count up the evade symbols.
6. Each evade symbol cancels one hit. If there are any leftover hits, they do damage to the defending ship. If the ship has shields, first flip any shield tokens from the blue side to the red side. If a ship has no remaining shields, it takes damage to its hull. Draw cards from the damage deck equalling the number of successful hits and place them next to the pilot card face-down. We will discuss the face-up sides later. When a ship has damage cards equal to or greater than its yellow hull value, it is destroyed and removed from play. Ships are also destroyed if any part of the base leaves the play area.
After all ships have fired, the round ends. Start a new round with the planning phase (Step 1). Continue play until one player has lost all their ships. Then, switch sides to get a feel for how the different ships maneuver and attack.
There’s still much more to do with the core set. In our next installment, we’ll discuss advanced rules that deepen the complexity and enjoyment of the game.
For experienced tabletop gamers, it might be tempting to skip ahead to the advanced rules in the manual. However, if you’re teaching someone who has never played a game like X-Wing, start slow. Introducing rules slowly is the best way to keep a new player engaged and happy. Overwhelmed players, especially young ones, benefit greatly from a stepped approach.
In its simplest format, X-Wing is an easy game to grasp: move, check firing arc and range, roll dice, repeat. It’s important to tailor the experience to your young player’s skill level. Don’t be afraid to experiment by adding a new advanced rule here and there, but remember the goal is for everyone to have a good time. Take it slow, and you’ll create a tabletop fan for life.
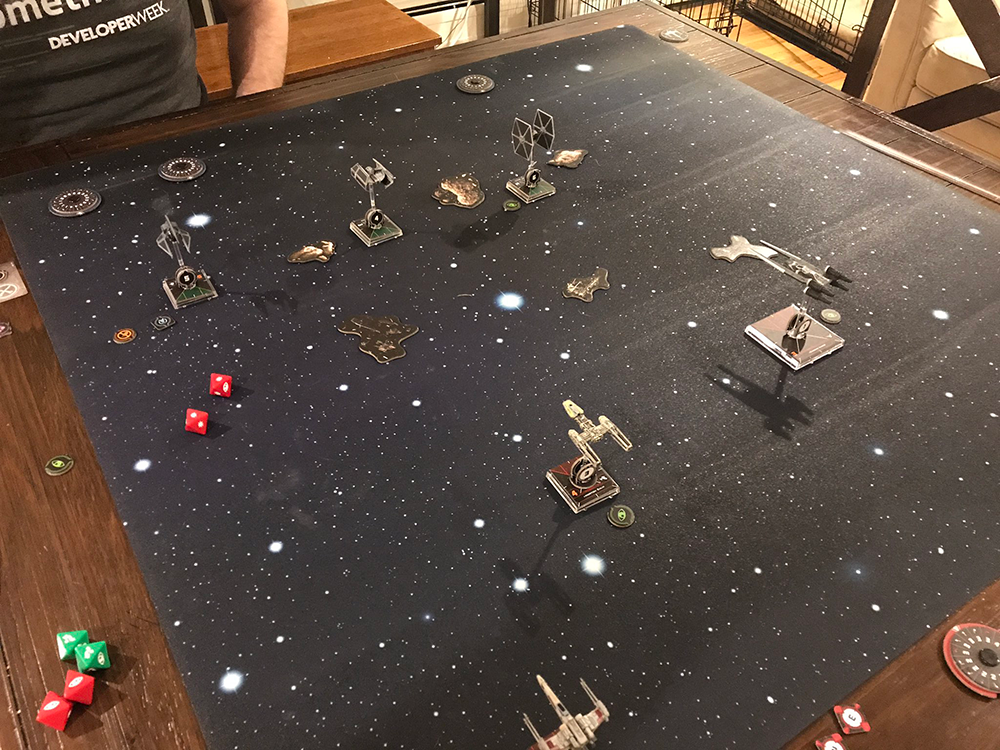
It won’t be too long before you’re playing full games that look like this…