Here's where to find all 11 Lucky Emblems in San Fransokyo.
One of the later worlds you’ll visit on your journey through Kingdom Hearts 3 is San Fransokyo, based on the Disney film Big Hero 6. There are 11 Lucky Emblems (hidden Mickeys) to photograph in San Fransokyo, and we’re here to help you find them all.
Check out the video guide below to see where all 11 Lucky Emblems are located, or keep reading for a picture and text description related to finding each one.
Please keep in mind that San Fransokyo is comprised of city streets and buildings that all look pretty similar. If you need help finding a Lucky Emblem, look at the mini-map in the top-right corner of the pictures below to see each Emblem’s precise location, or refer to our video guide, as we’ll show you a walking path to take to reach all 11.
San Fransokyo Lucky Emblem No. 1
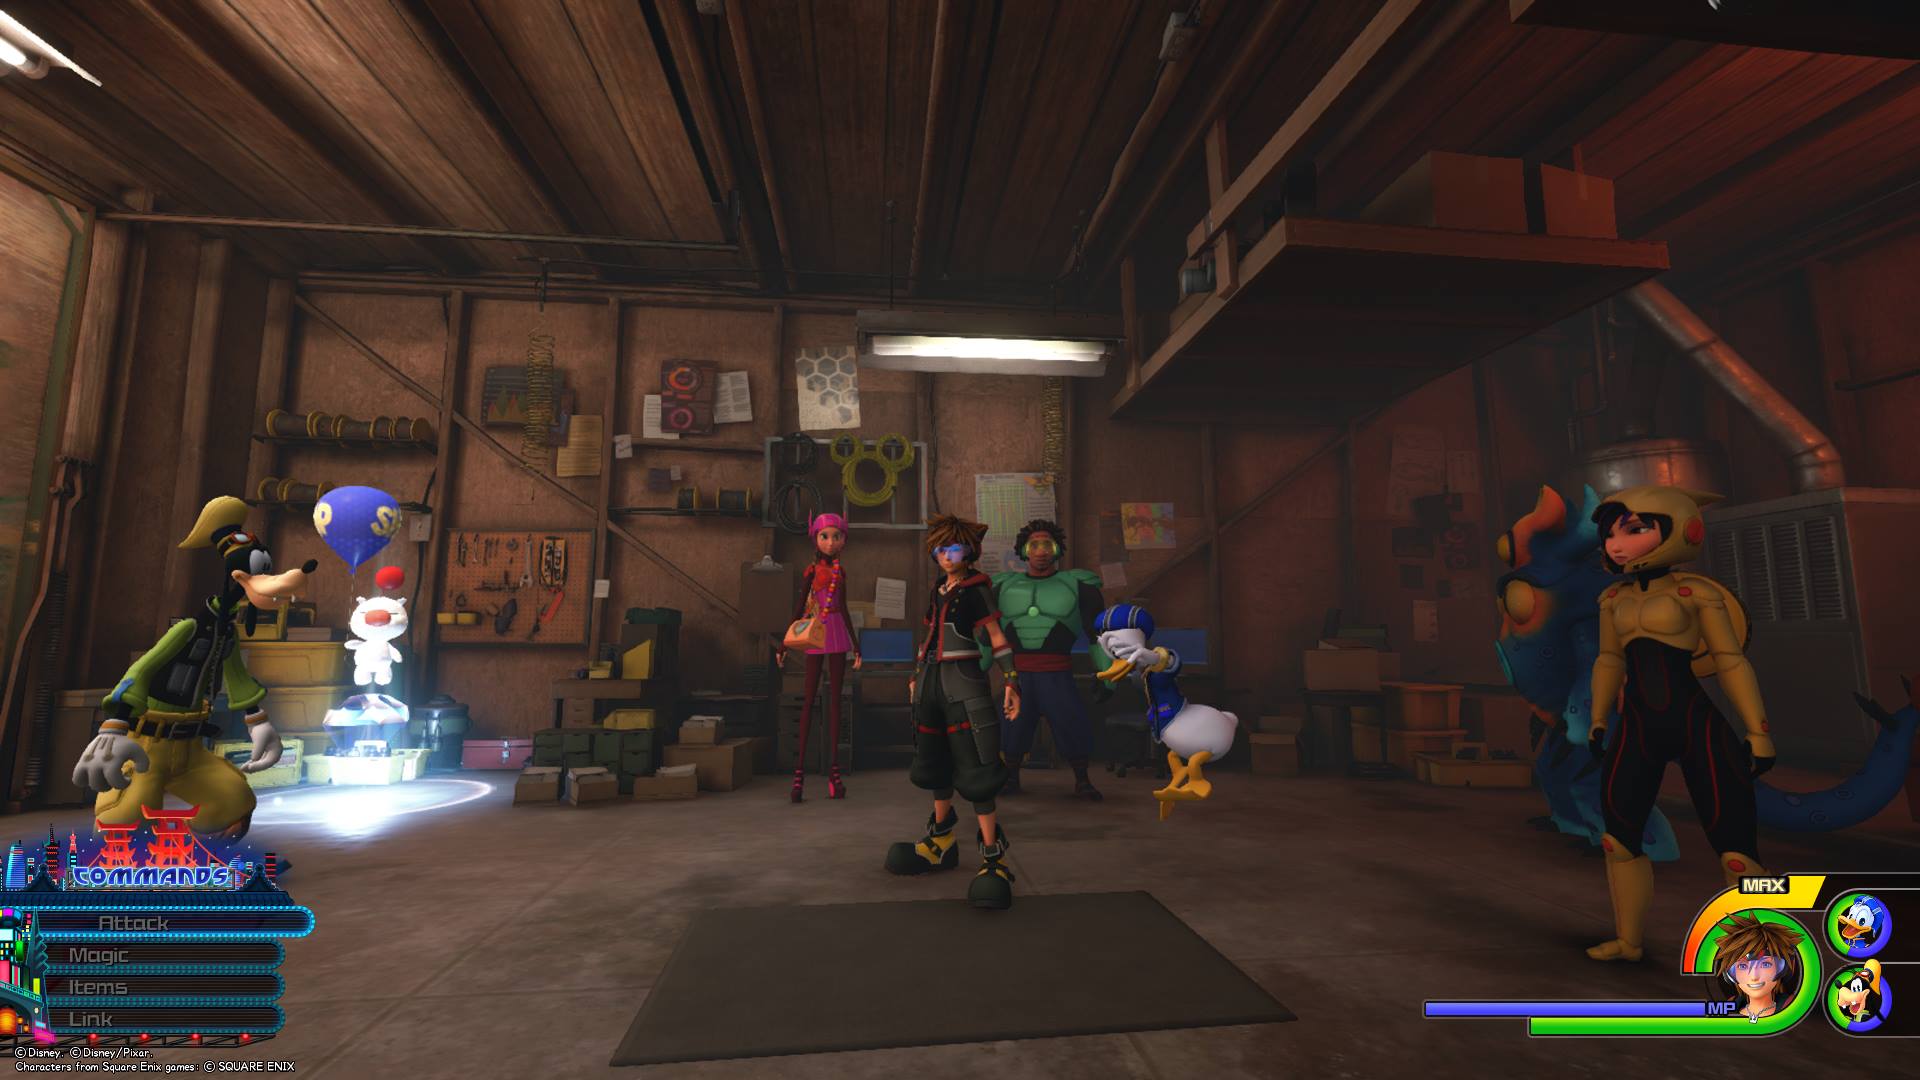
The first Lucky Emblem can be found in Hiro’s Garage. Look at the wall behind the Moogle Shop, and you’ll see the Lucky Emblem formed out of cables hanging on the wall.
San Fransokyo Lucky Emblem No. 2
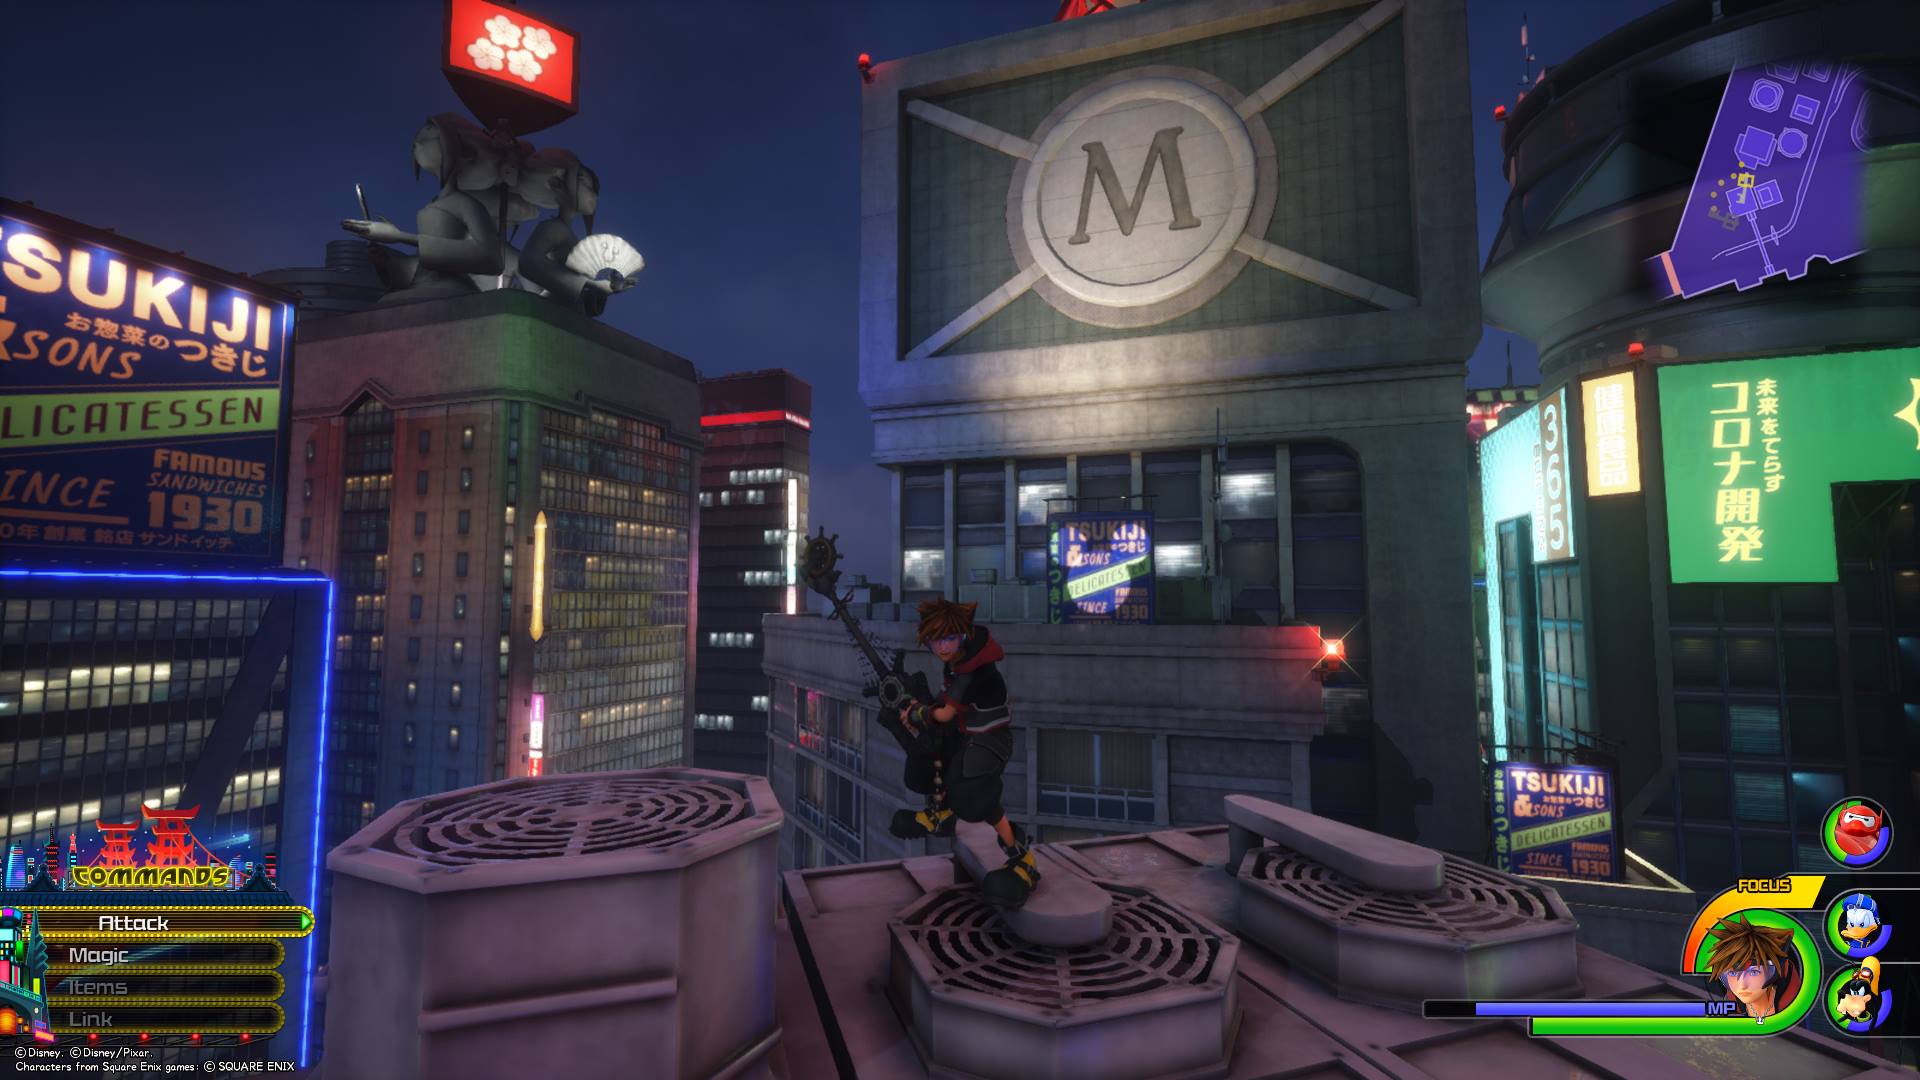
After snapping a picture of the first Lucky Emblem, use the save spot in Hiro’s Garage to warp to the South District: Night save spot. As AllGamers pointed out, the second Lucky Emblem can only be found at night.
When you spawn, turn around and climb the building with the “John’s Fashion Center” sign on it. When you get to the top, you’ll see a building with a large “M” on it in front of you (to the left of the large red billboard). Walk toward this “M” building, but don’t leave the rooftop you’re on. Instead, when you get to the edge of the roof, look for the second Lucky Emblem formed by a spotlight shining on a billboard on the “M” building.
San Fransokyo Lucky Emblem No. 3
From Lucky Emblem No. 2, return to the South District: Night save spot, and warp to South District: Day. You’ll wind up in the same spot, but it will be daytime rather than nighttime.
Once you spawn, turn around and once again climb to the top of the John’s Fashion Center building. Look to the right, and you’ll see a second building with an “M” on top of it. This building is connected to the John’s Fashion Center building via a sky bridge. Run to the middle of the sky bridge and look down to the left. You’ll see an animated chef statue. You need to get to the top of the statue’s head, so carefully jump off of the bridge so that you land on it.
When you make it onto the statue, make sure you’re standing so that the chef’s knife is on Sora’s right. Look down and you can spot the third Lucky Emblem formed out of red bushes in a grassy area on the ground.
San Fransokyo Lucky Emblem No. 4
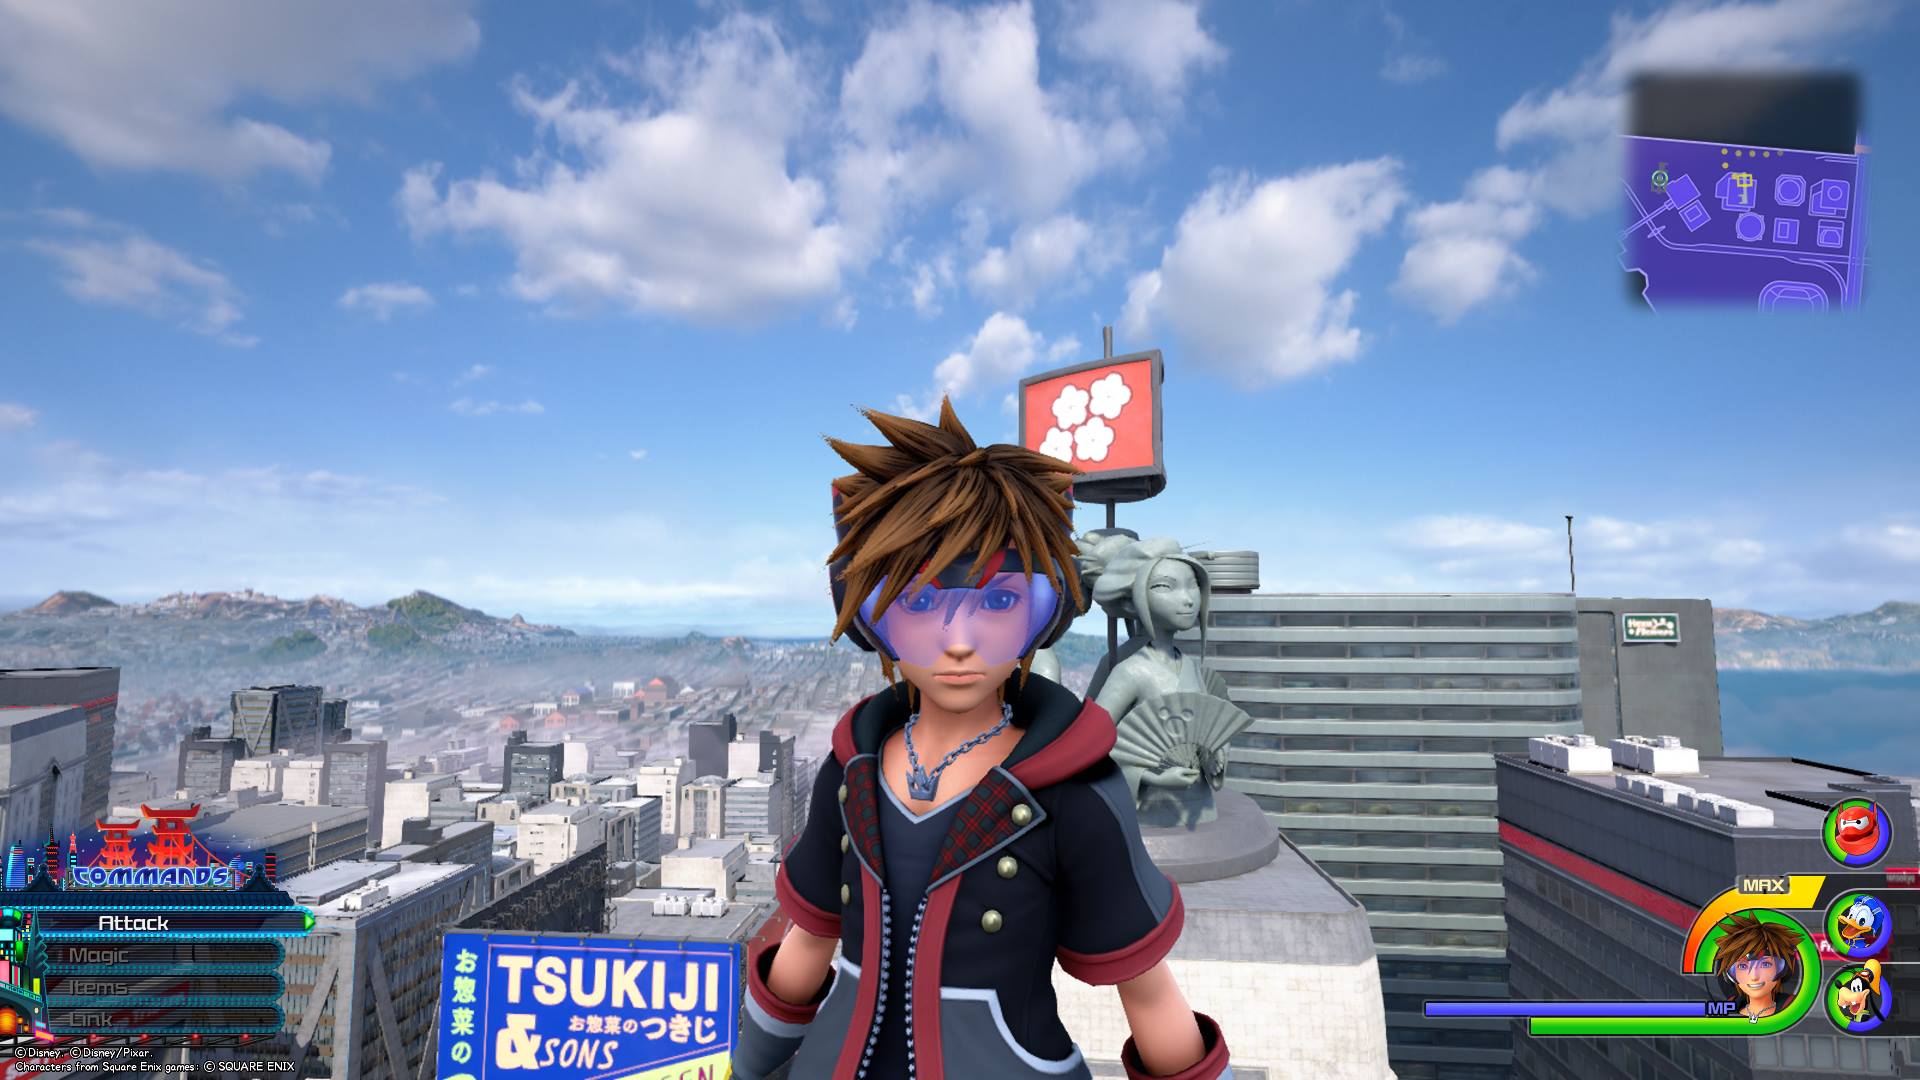
From Lucky Emblem No. 3, return to the roof of the John’s Fashion Center building (yes, one more time). A few buildings away, you should spot a building with a large statue of three women on top. Once you have the statue in your sights, make your way to the roof of the “M” building we referenced during the hunt for the second Lucky Emblem (it has a large radio tower on top).
When you get there, look at the statue of the three women and you can spot the fourth Lucky Emblem on the fan one of the women is holding.
San Fransokyo Lucky Emblem No. 5
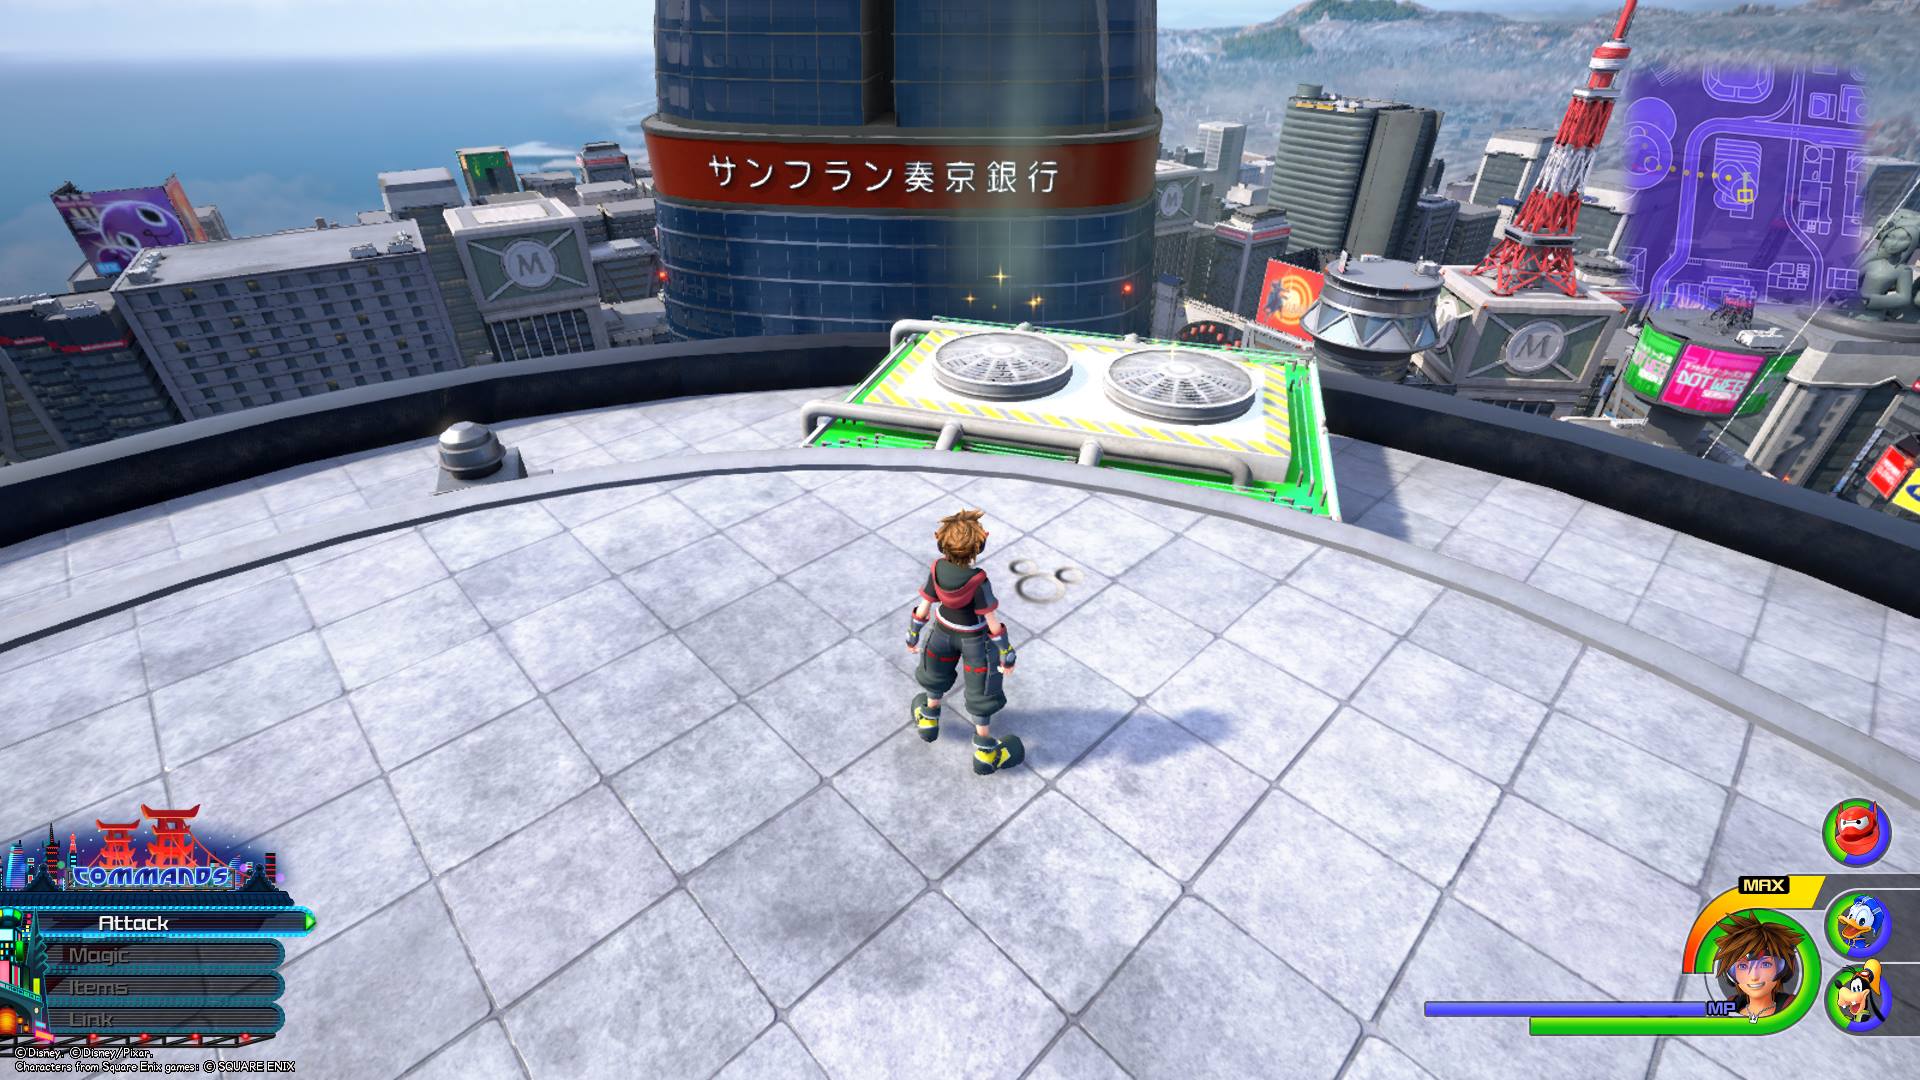
After photographing Lucky Emblem No. 4, turn to the right and look in the direction of the green and pink billboard. To the right of the billboard, and off in the distance, look for a building with “balloons” flying above it, which has roofs at two different heights. Make your way to the tallest portion of this building. Note: You’ll know you’re going the right way if the game tells you you’re in the “Central District” when you’re almost there.
When you reach the roof, look down at the tiles next to one of the green air vents. The fifth Lucky Emblem is embedded in a roof tile.
San Fransokyo Lucky Emblem No. 6
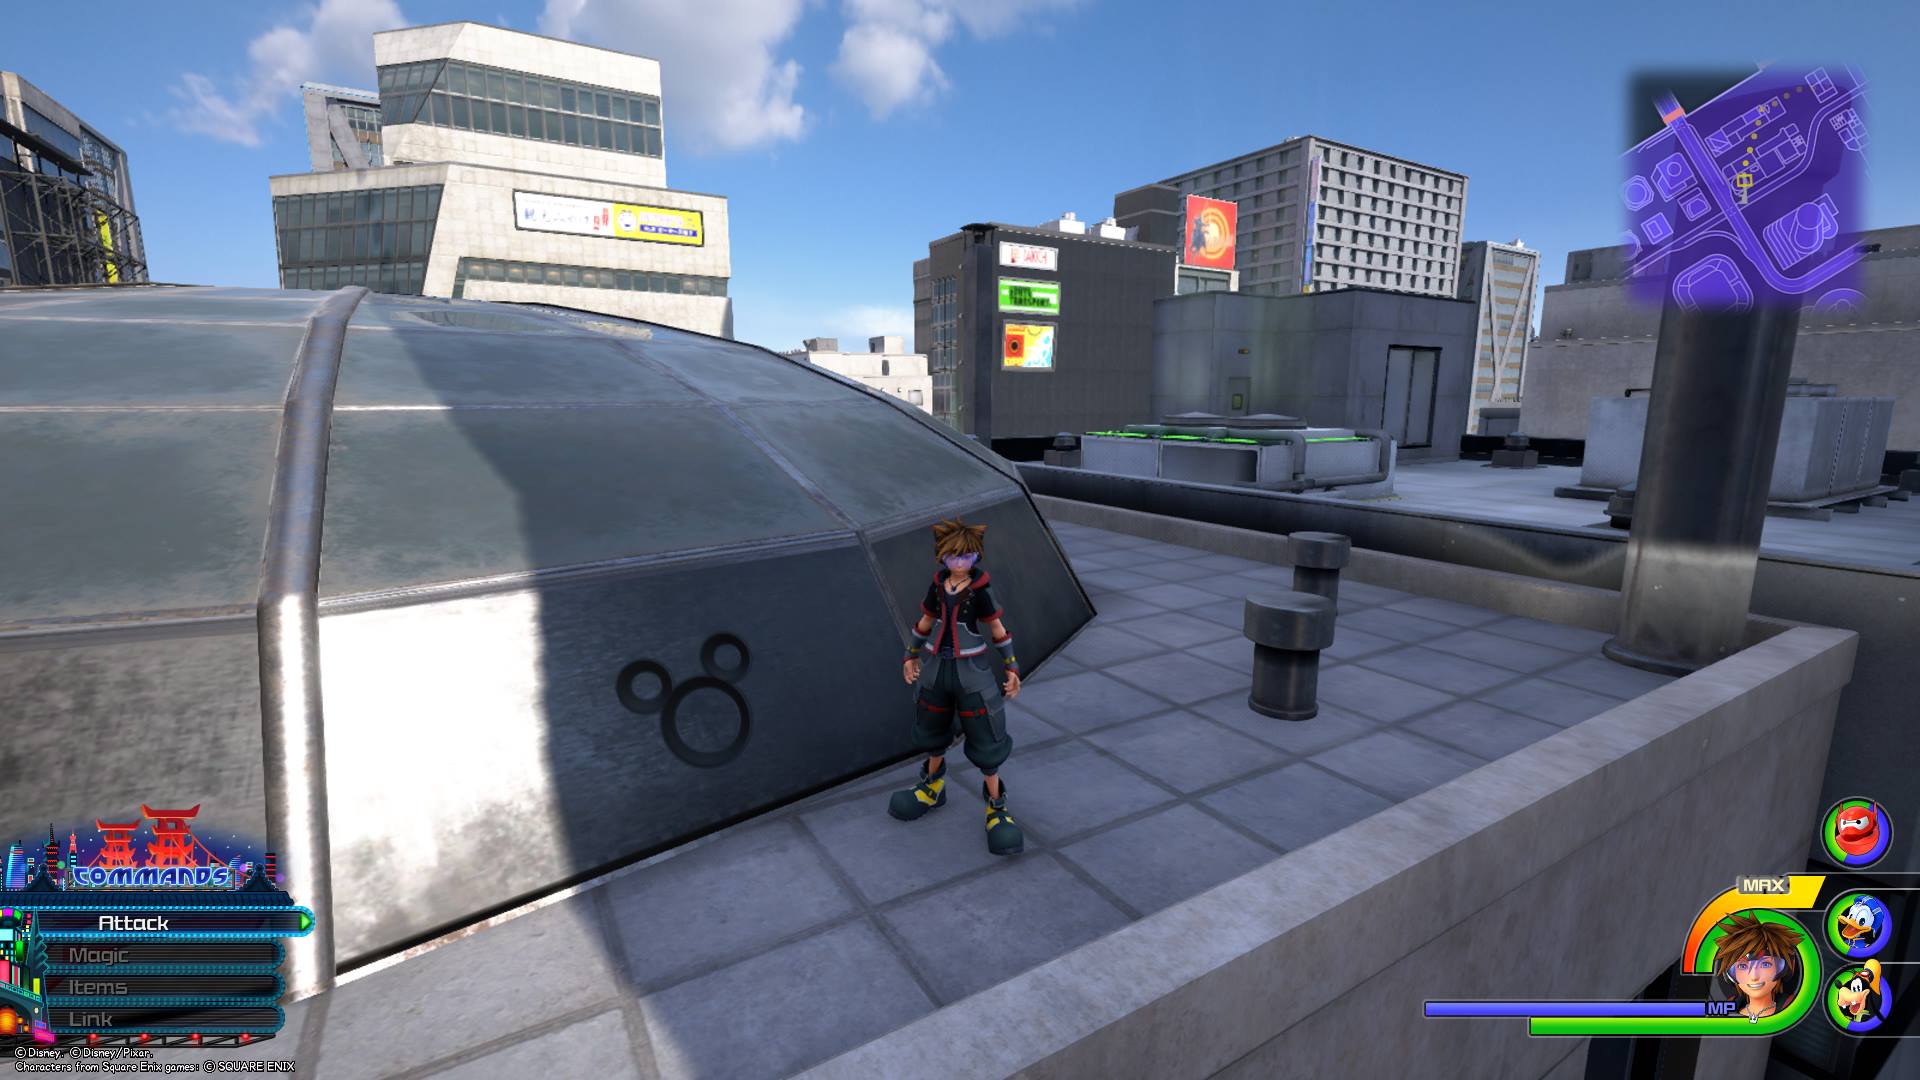
From Lucky Emblem No. 5, turn slightly to the right so that you’re looking at two large “balloons” floating in the air. Jump off of the building in that direction, and look for a building with a dome on the roof on your way down. Land on the roof of this building (or climb up to the roof, if you hit the ground). The sixth Lucky Emblem can be found on the side of the dome that’s facing the building you just jumped off of.
San Fransokyo Lucky Emblem No. 7
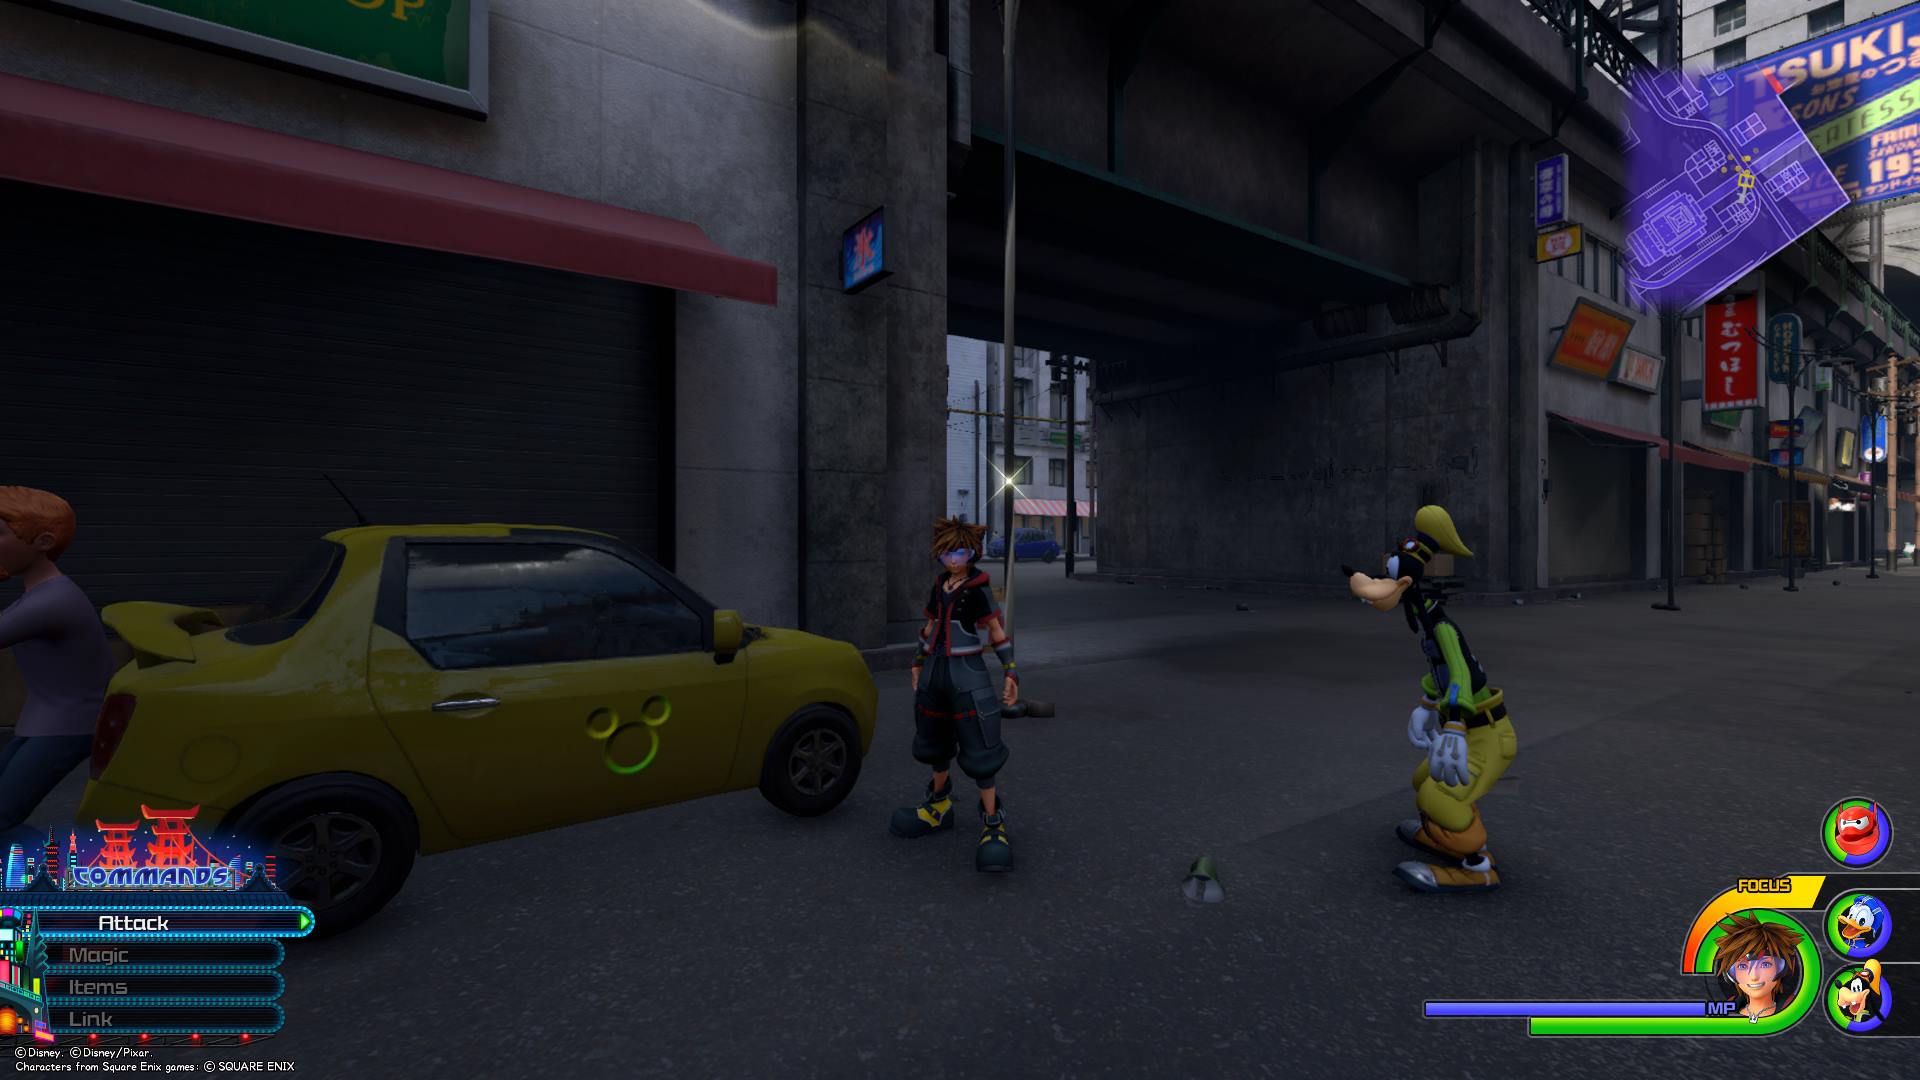
Once you’ve taken a picture of Lucky Emblem No. 6, turn to the right and look for the elevated street that runs alongside your current location. Jump off of the building and follow the road toward the city’s North District. Keep walking underneath the road, following its path until the game actually tells you that you’re in the North District
At this point, you’ll be in a shadow-filled part of town, with a short tunnel in front of you formed by the railway that runs overhead. Run through the tunnel and turn to the right. The next Lucky Emblem is on the side of a yellow car next to the tunnel.
San Fransokyo Lucky Emblem No. 8
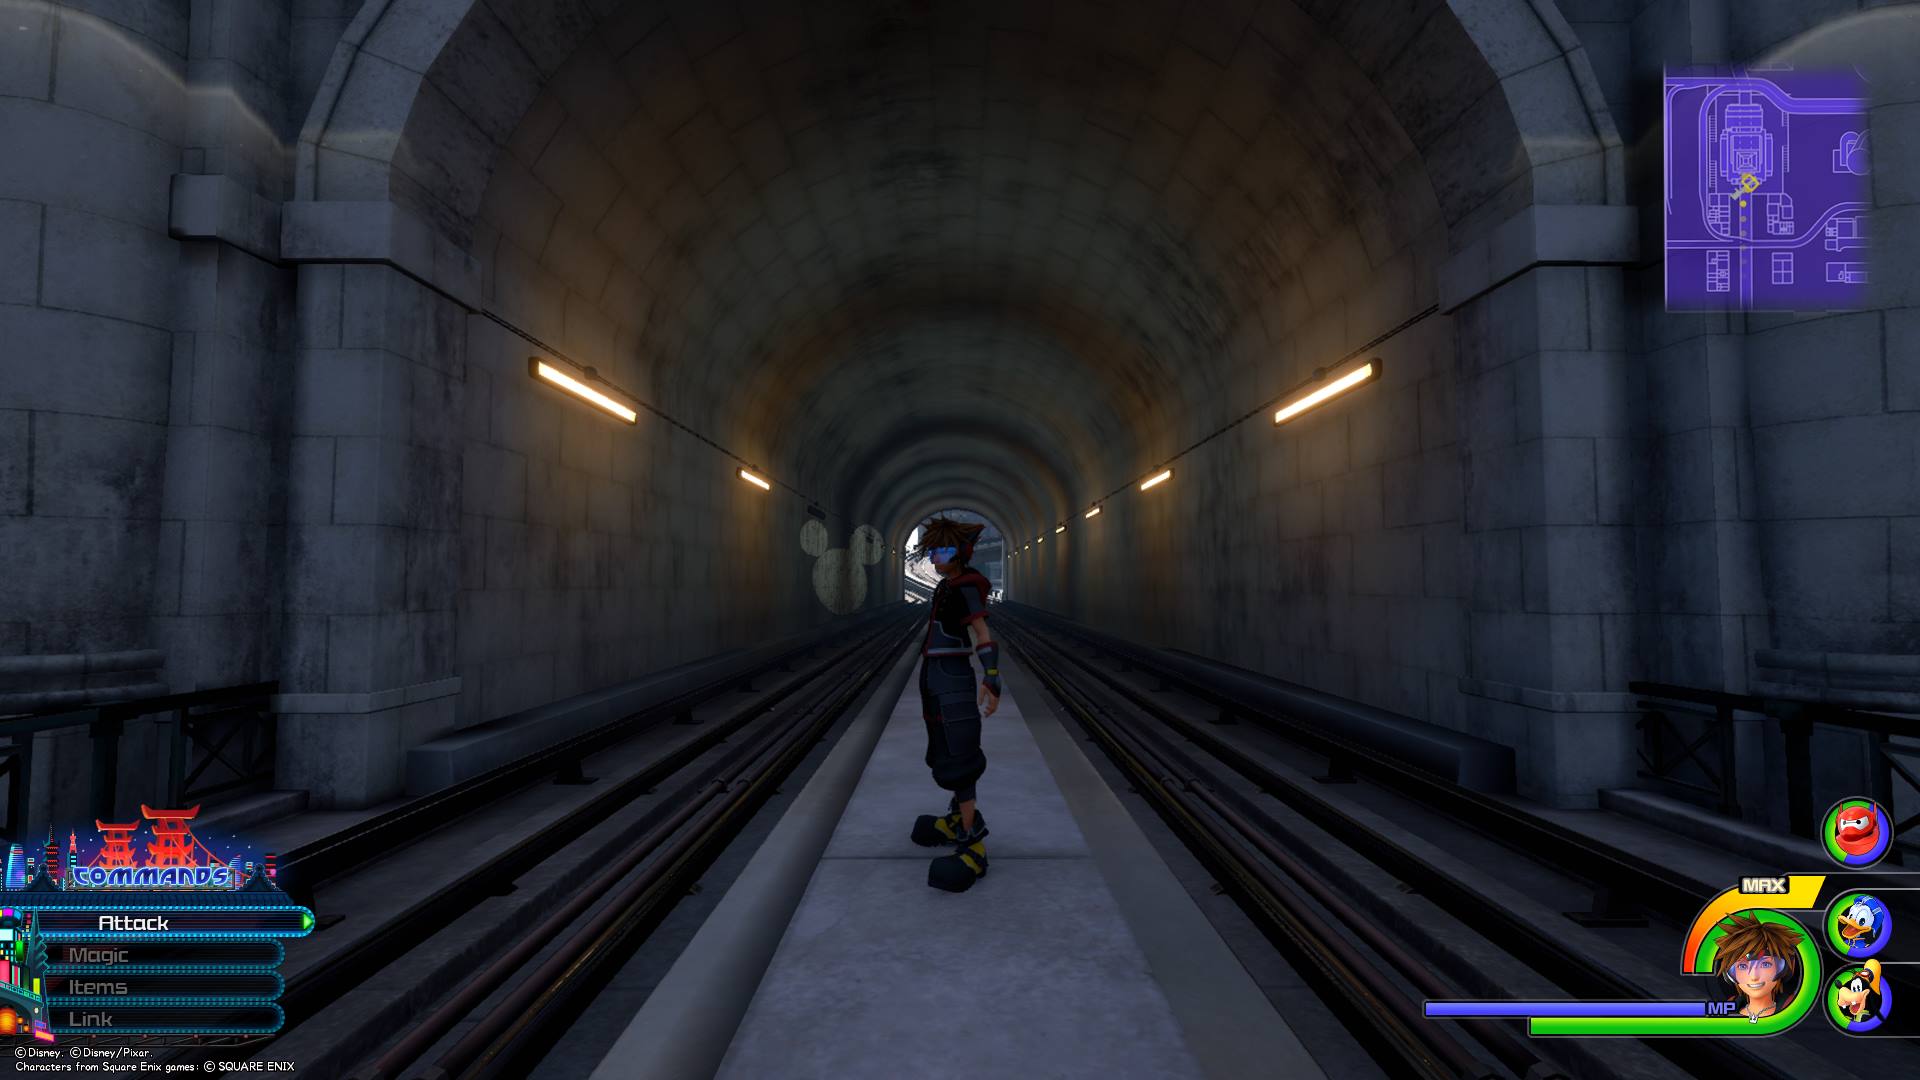
From Lucky Emblem No. 7, climb the building across the street from the yellow car and then turn around so that you can jump onto the railway grind rails. Head to the left and either stop running or jump off of the rail once you enter a tunnel. The next Lucky Emblem can be found on the left wall of the tunnel. You’ll need to stand on the raised platform in the middle of the two rail lines to accurately line up your shot.
San Fransokyo Lucky Emblem No. 9
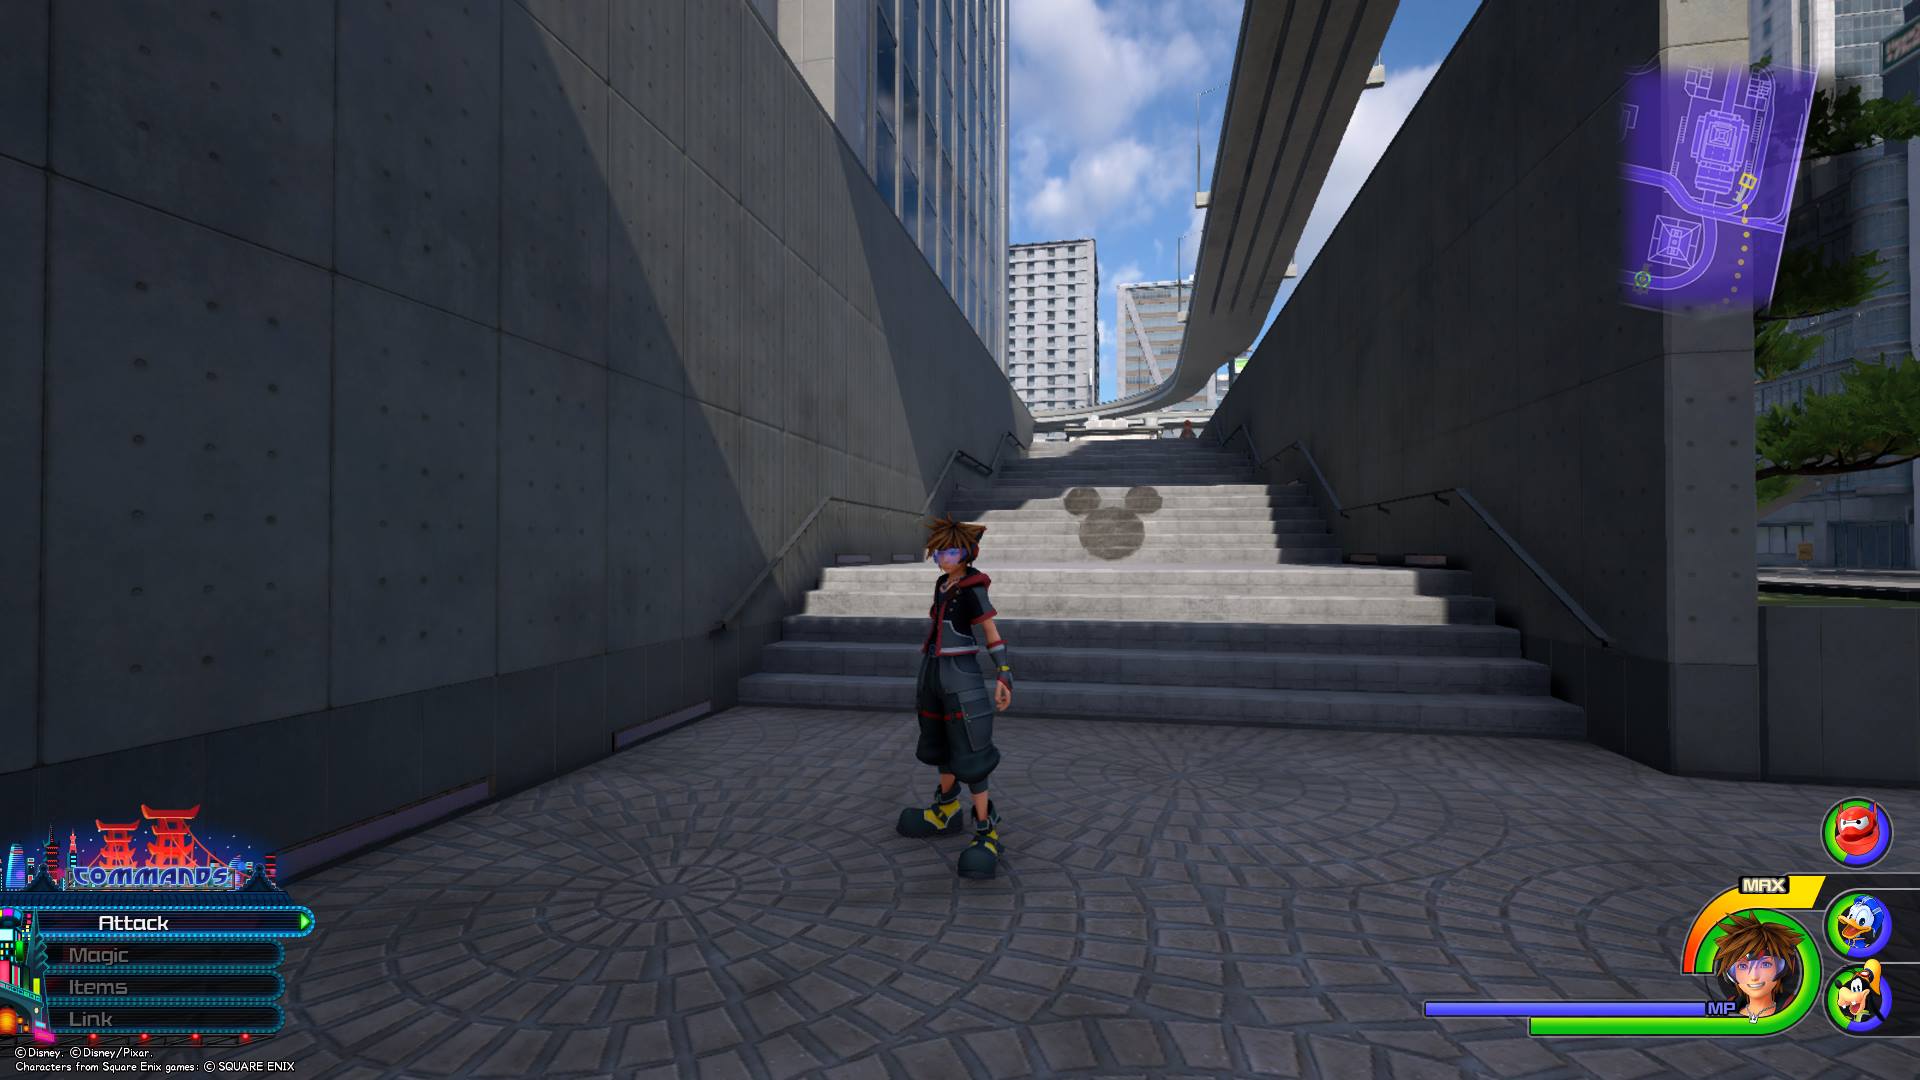
After the last Lucky Emblem, keep following the railway until you make it out of the tunnel. Head to the left. Run past some red and green bushes on Sora’s right and jump off of the elevated platform to land near some trees. Turn left and you’ll see Lucky Emblem No. 9 imprinted on a stairway that leads to the elevated area you just left.
San Fransokyo Lucky Emblem No. 10
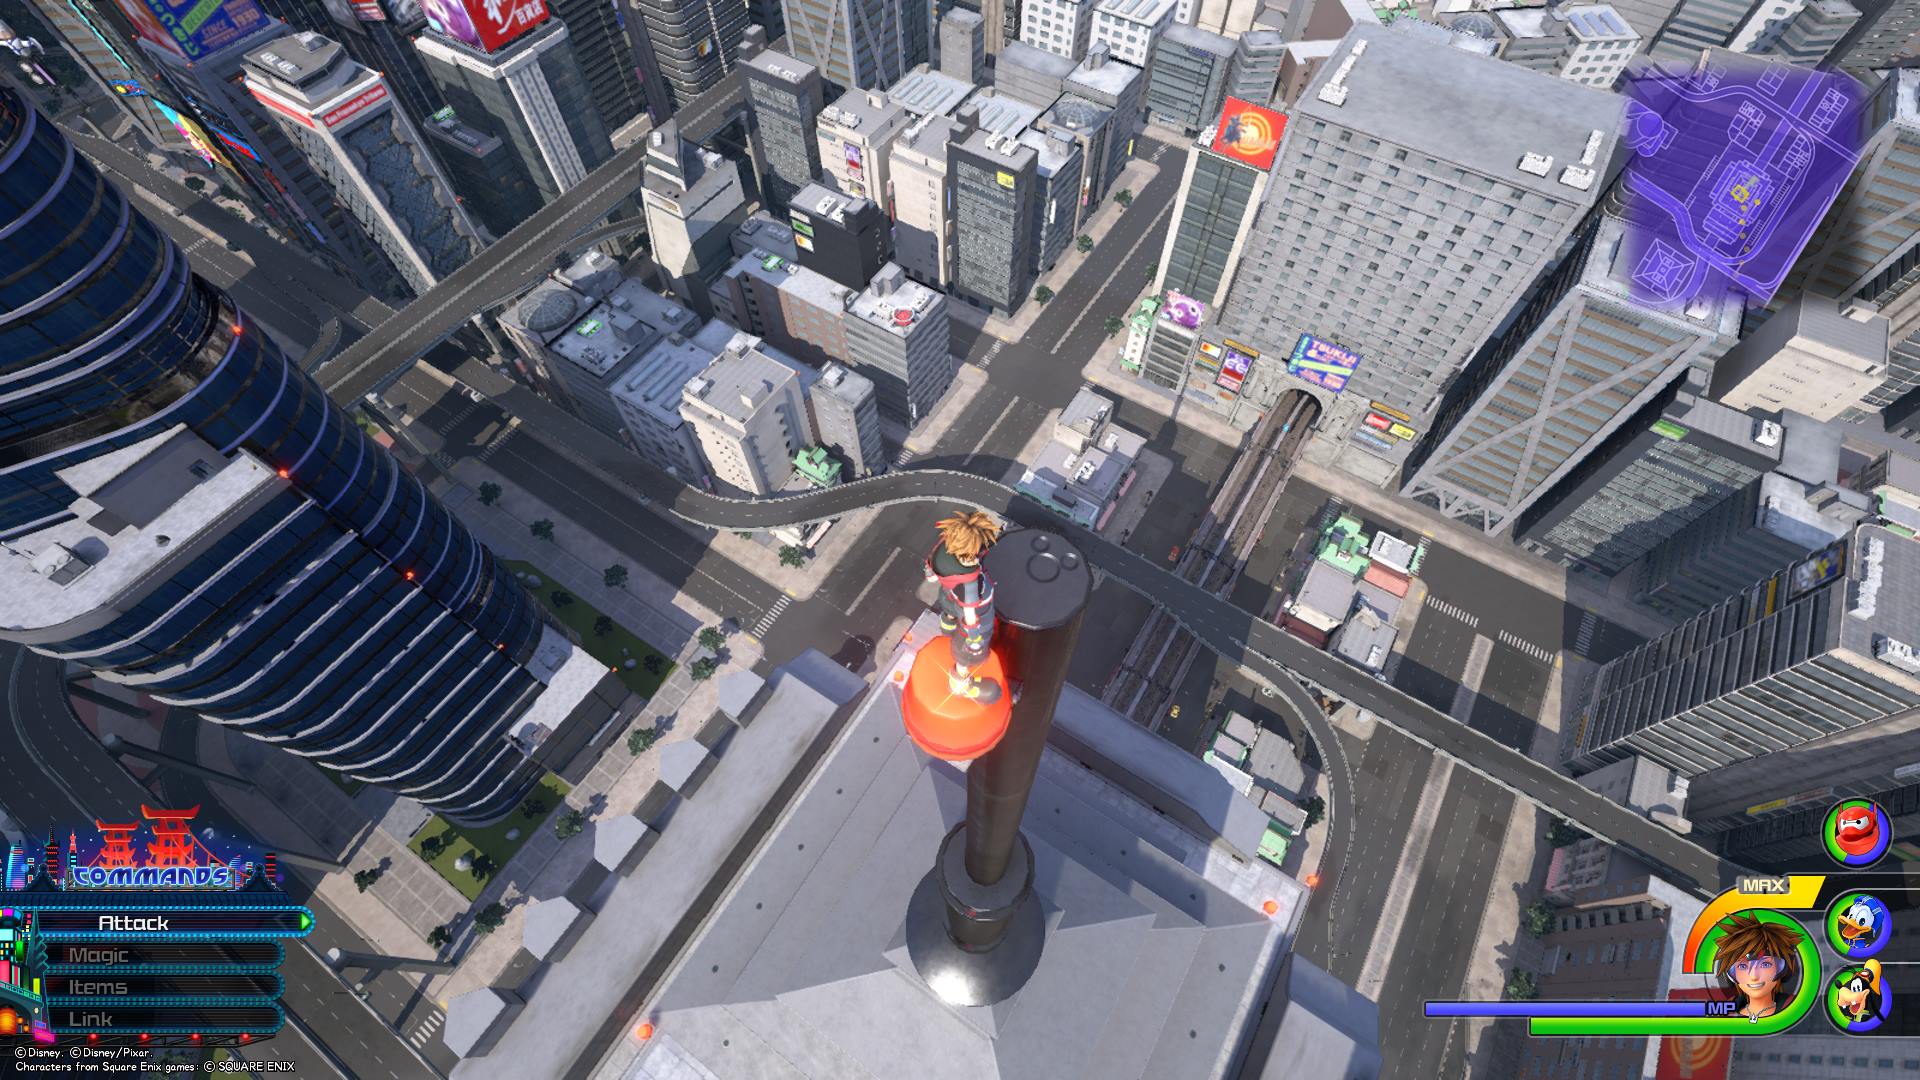
While looking at Lucky Emblem No. 9, turn left and climb the tall gray building in front of you. When you get near the top, you’ll see a thin black pole sticking up from the highest portion of the roof. Use Sora’s Airstep ability to quickly make your way to the top of this black pole. Look down and you’ll see the next Lucky Emblem on the top of the pole.
San Fransokyo Lucky Emblem No. 11
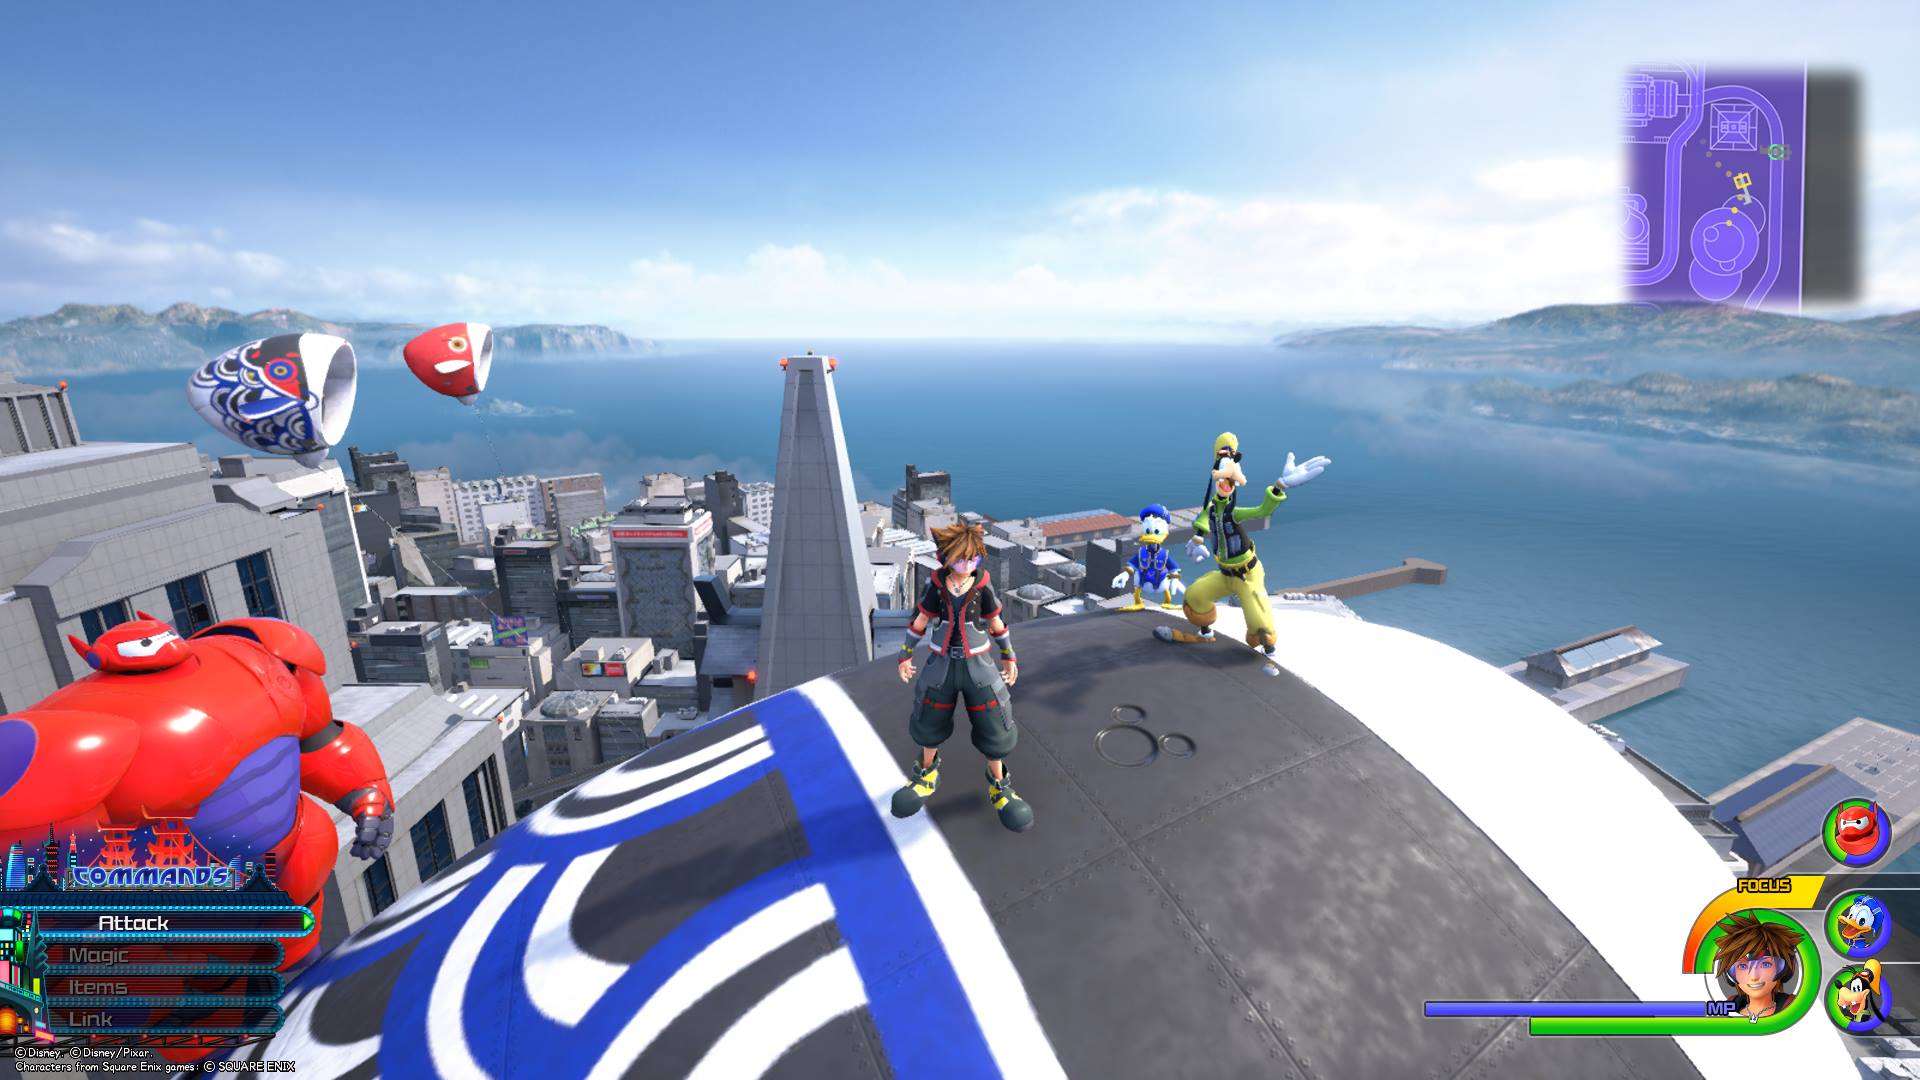
While still standing on the pole you had to climb for Lucky Emblem No. 10, turn around so that Sora’s back is to the Lucky Emblem, and look for “balloons” in the distance. You should see a red balloon closest to Sora, and two blue and white balloons that are farther away. You need to make it to the blue and white balloon that’s farthest away. It’s to the left of a tall circular building.
You may find it easiest to jump over to the first blue and white balloon, and then jump to the second from there. You can also use Sora’s Airstep ability to move around more quickly. When you reach the top of the second blue and white balloon, look down and you’ll see the last Lucky Emblem on top of the balloon.