Our guide will show you where to find all 11 Lucky Emblems in the world of Monsters, Inc.
On your adventure through Kingdom Hearts 3, you’ll take a trip to Monstropolis, home of Sully and Mike from the Disney Pixar franchise Monsters, Inc. There are 11 Lucky Emblems (hidden Mickeys) to photograph in Monstropolis, and we’re here to help you find every one.
Check out the video below to see where all 11 Lucky Emblems are located in Monstropolis, or keep reading to see a picture and text description for each one.
Note: Our guide begins at the Lobby & Offices save point in Monstropolis.
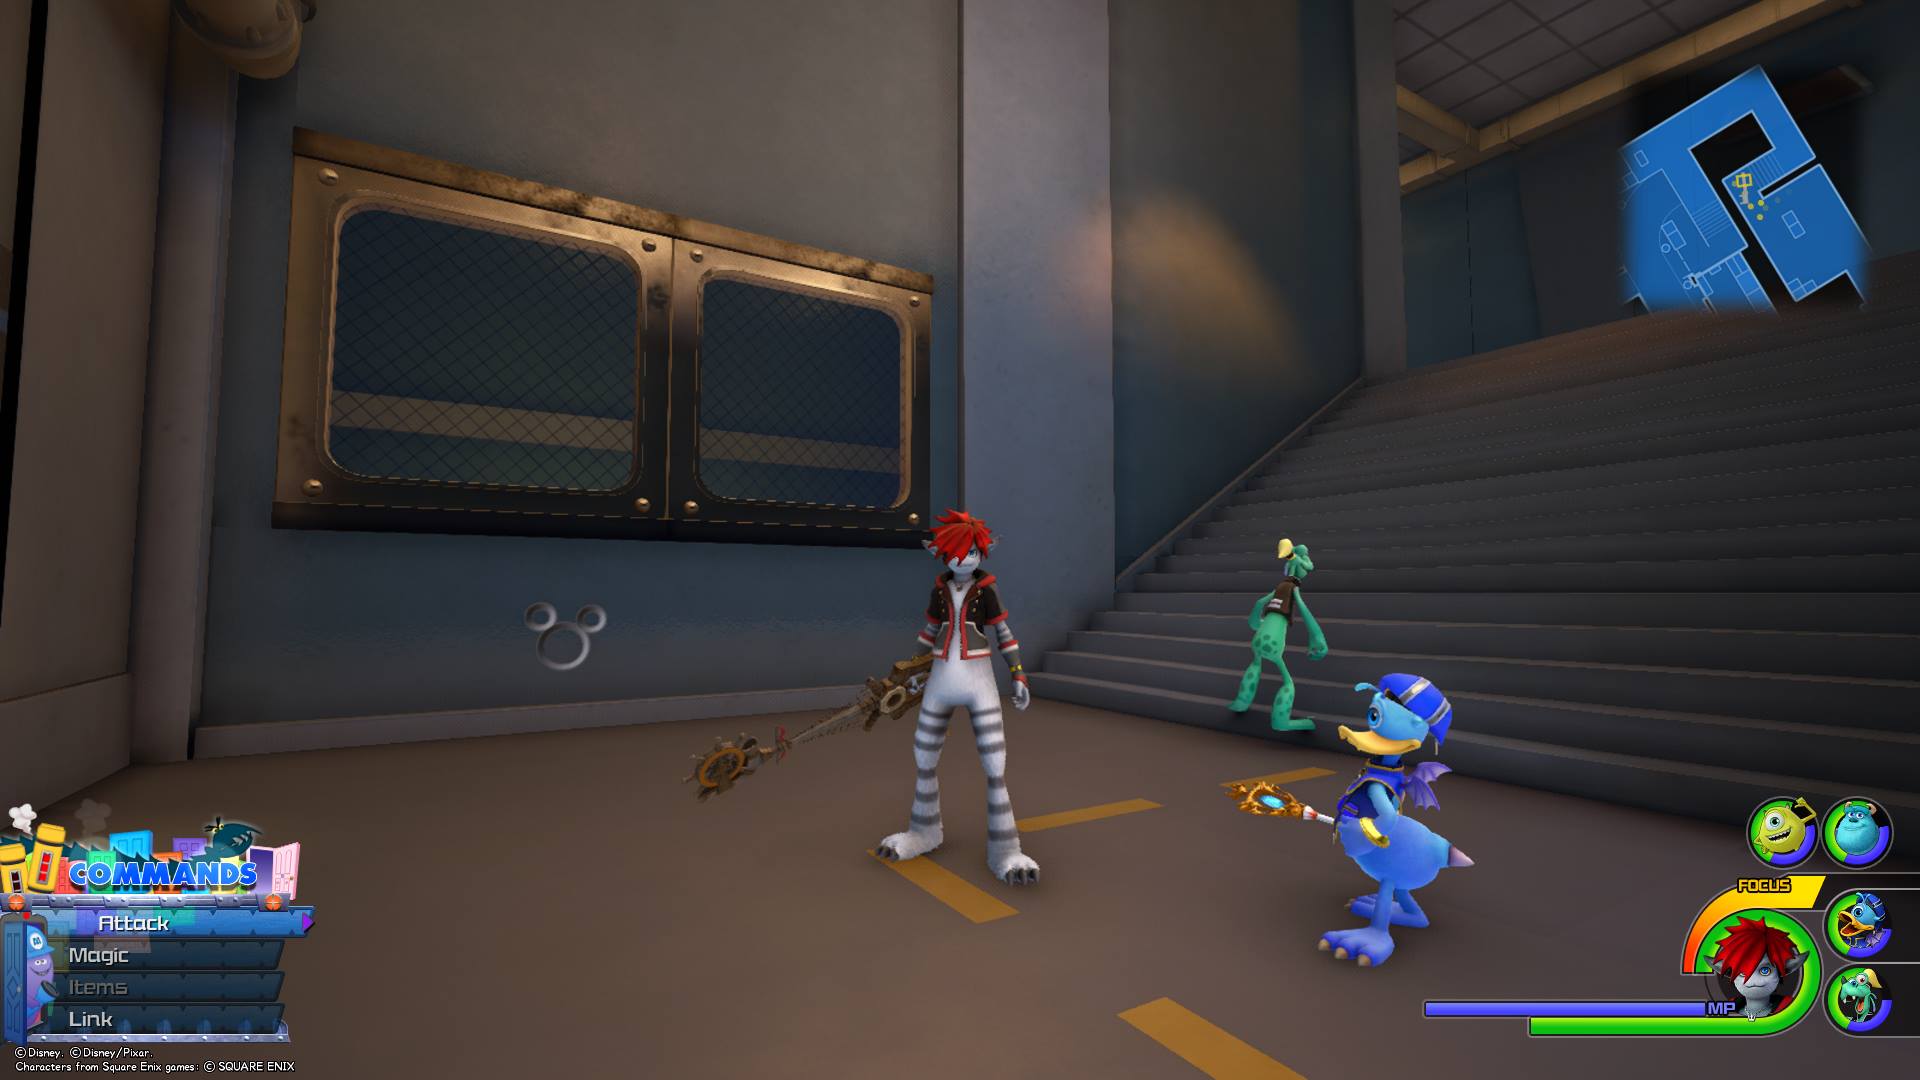
Monstropolis Lucky Emblem No. 1
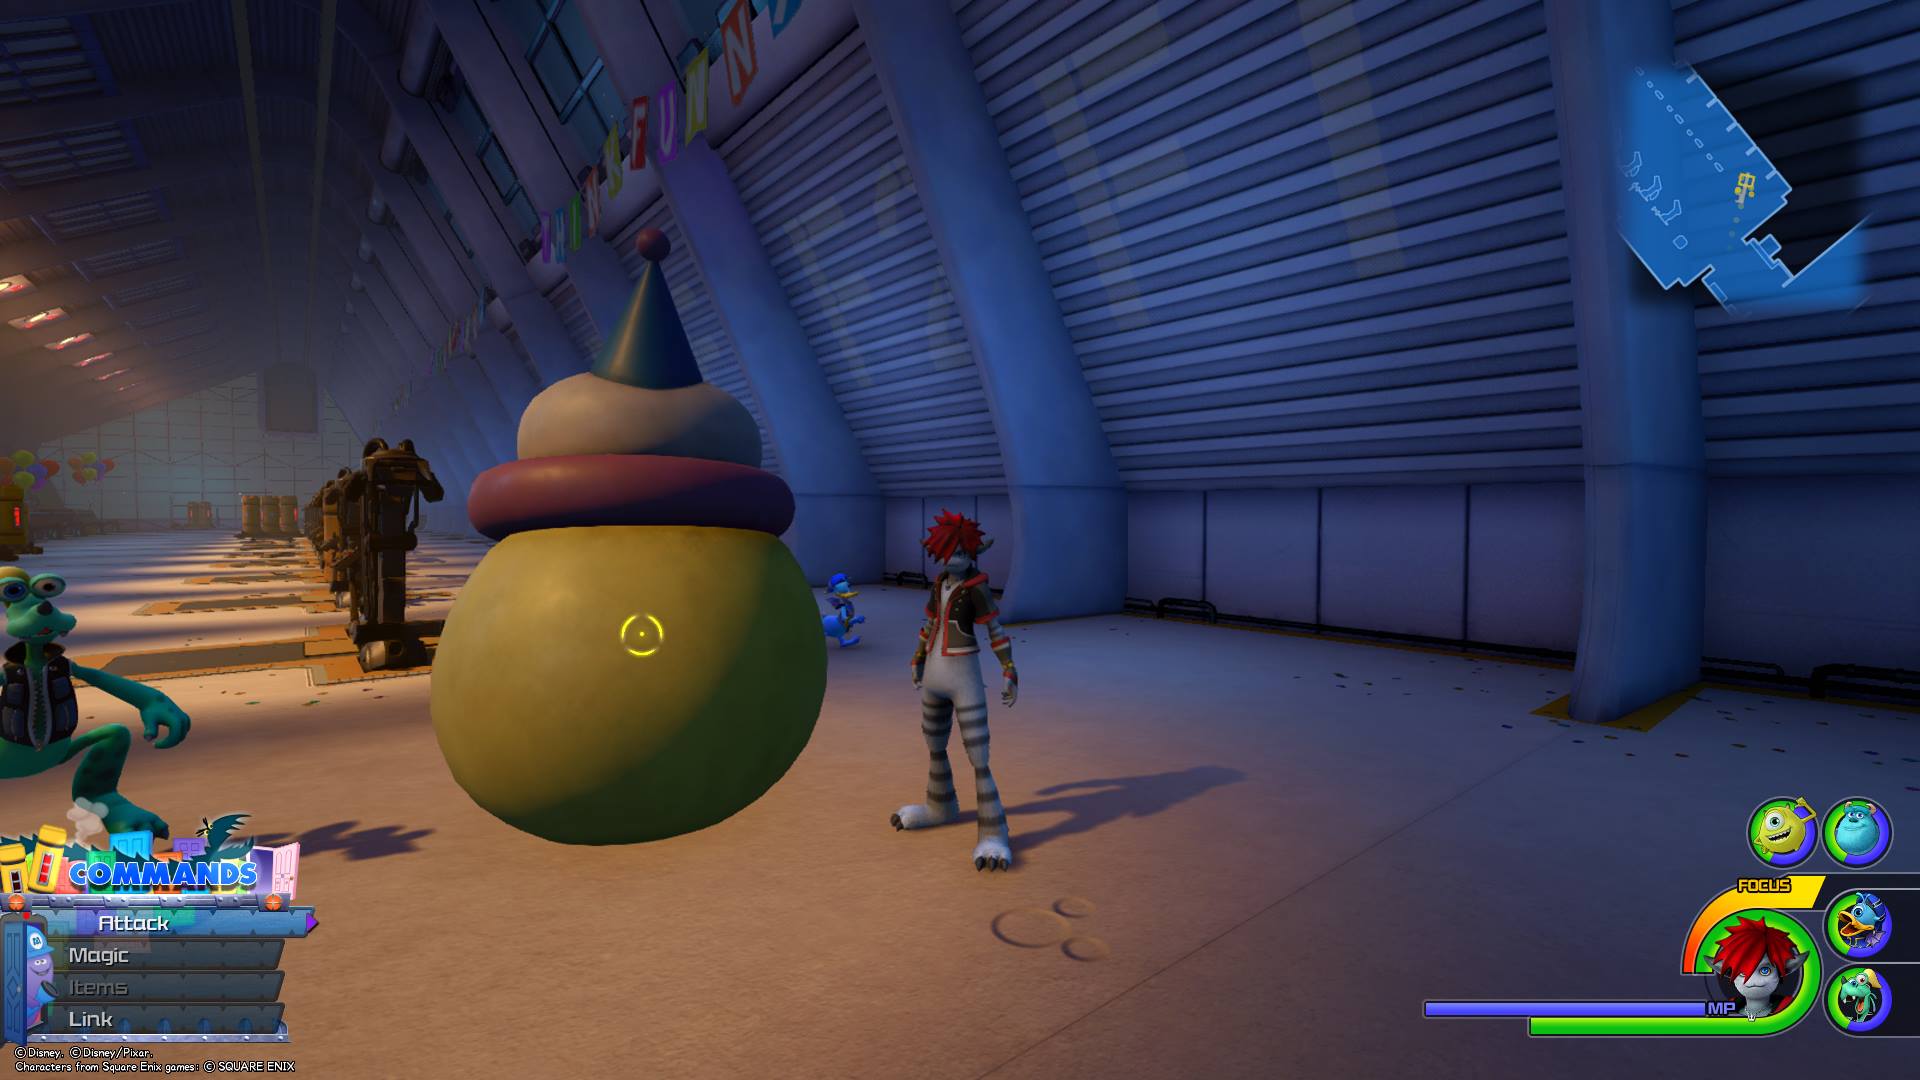
From the Lobby & Offices save point, turn right and follow the path into the Laugh Floor room. Turn right after you enter and attack the large clown toy so that it moves out of the way, revealing the first Lucky Emblem hidden on the floor underneath.
Monstropolis Lucky Emblem No. 2
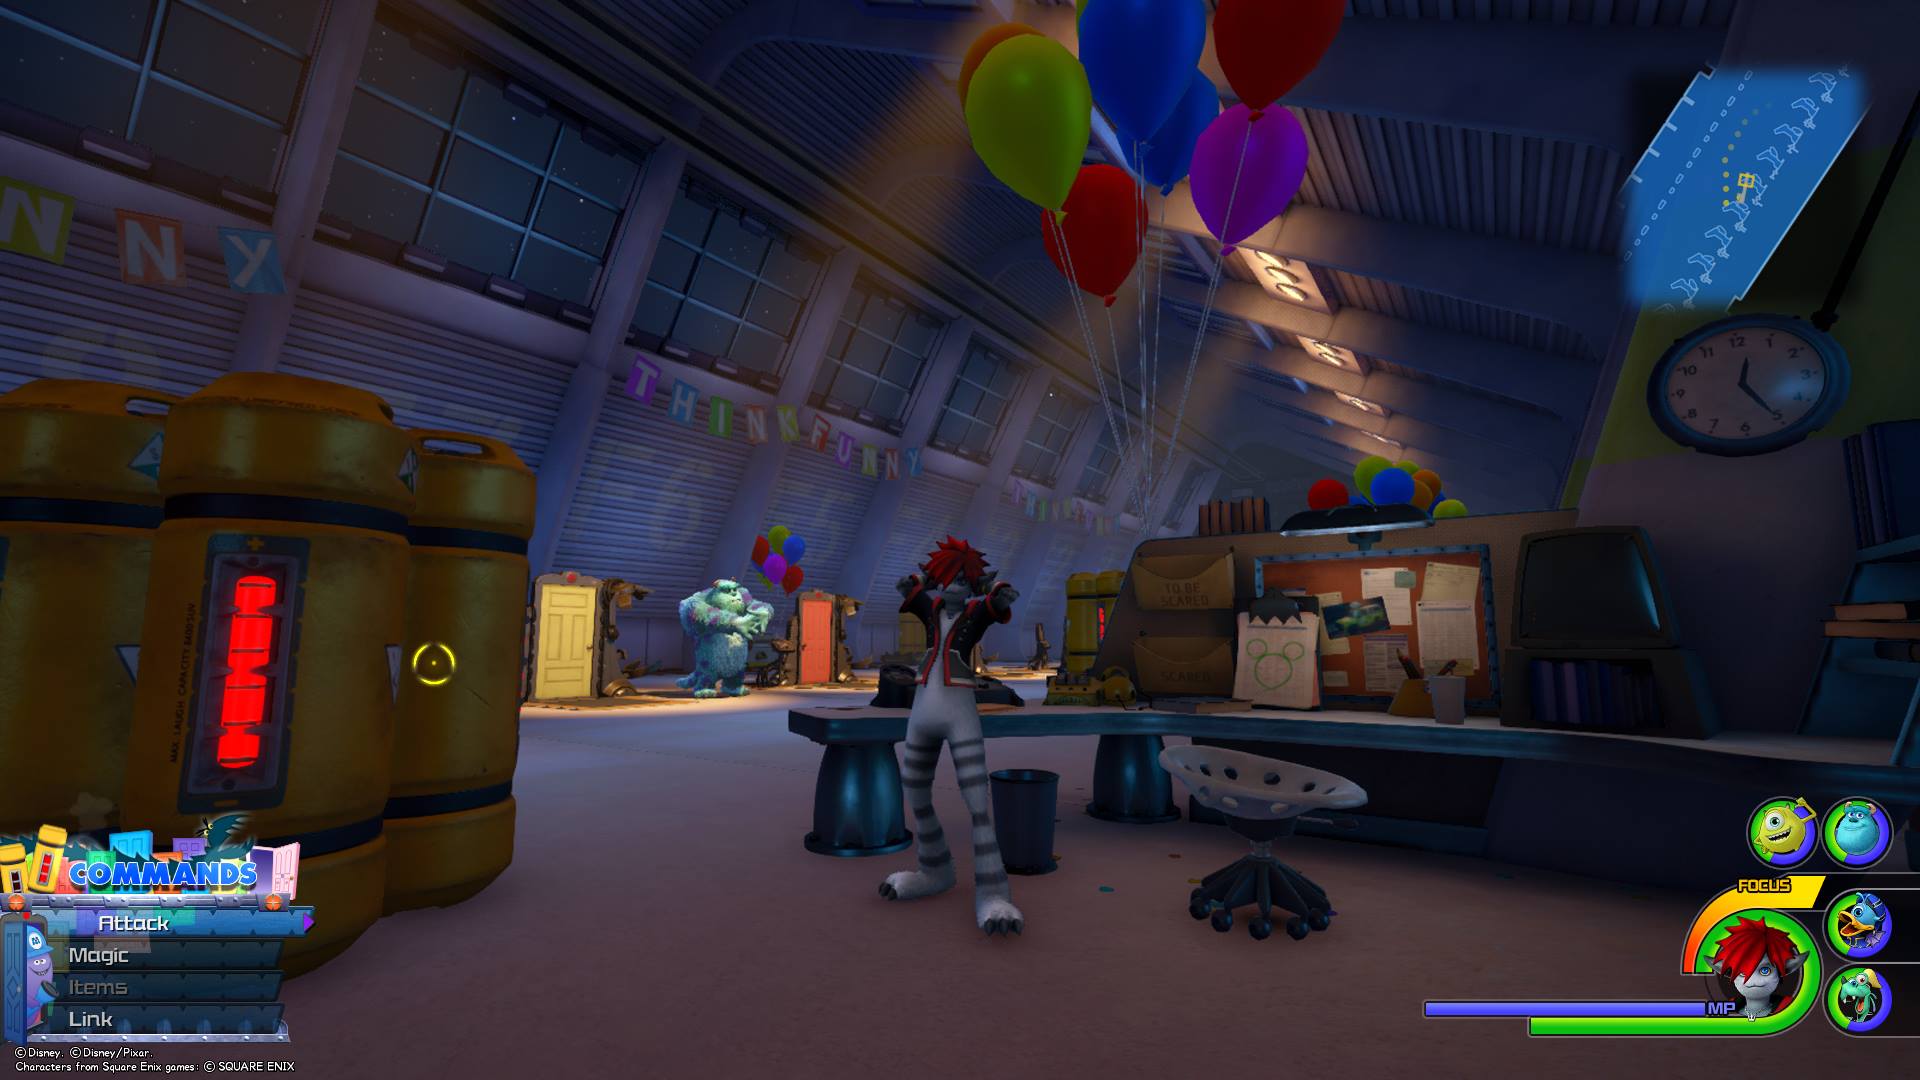
After photographing the first Lucky Emblem, run through the Laugh Floor area until you reach the three doors on Sora’s right. Run over to the desk that’s diagonally across from the third door (it has a bundle of balloons attached to it). The second Lucky Emblem is drawn on a piece of paper that’s on a clipboard at this workstation.
Monstropolis Lucky Emblem No. 3
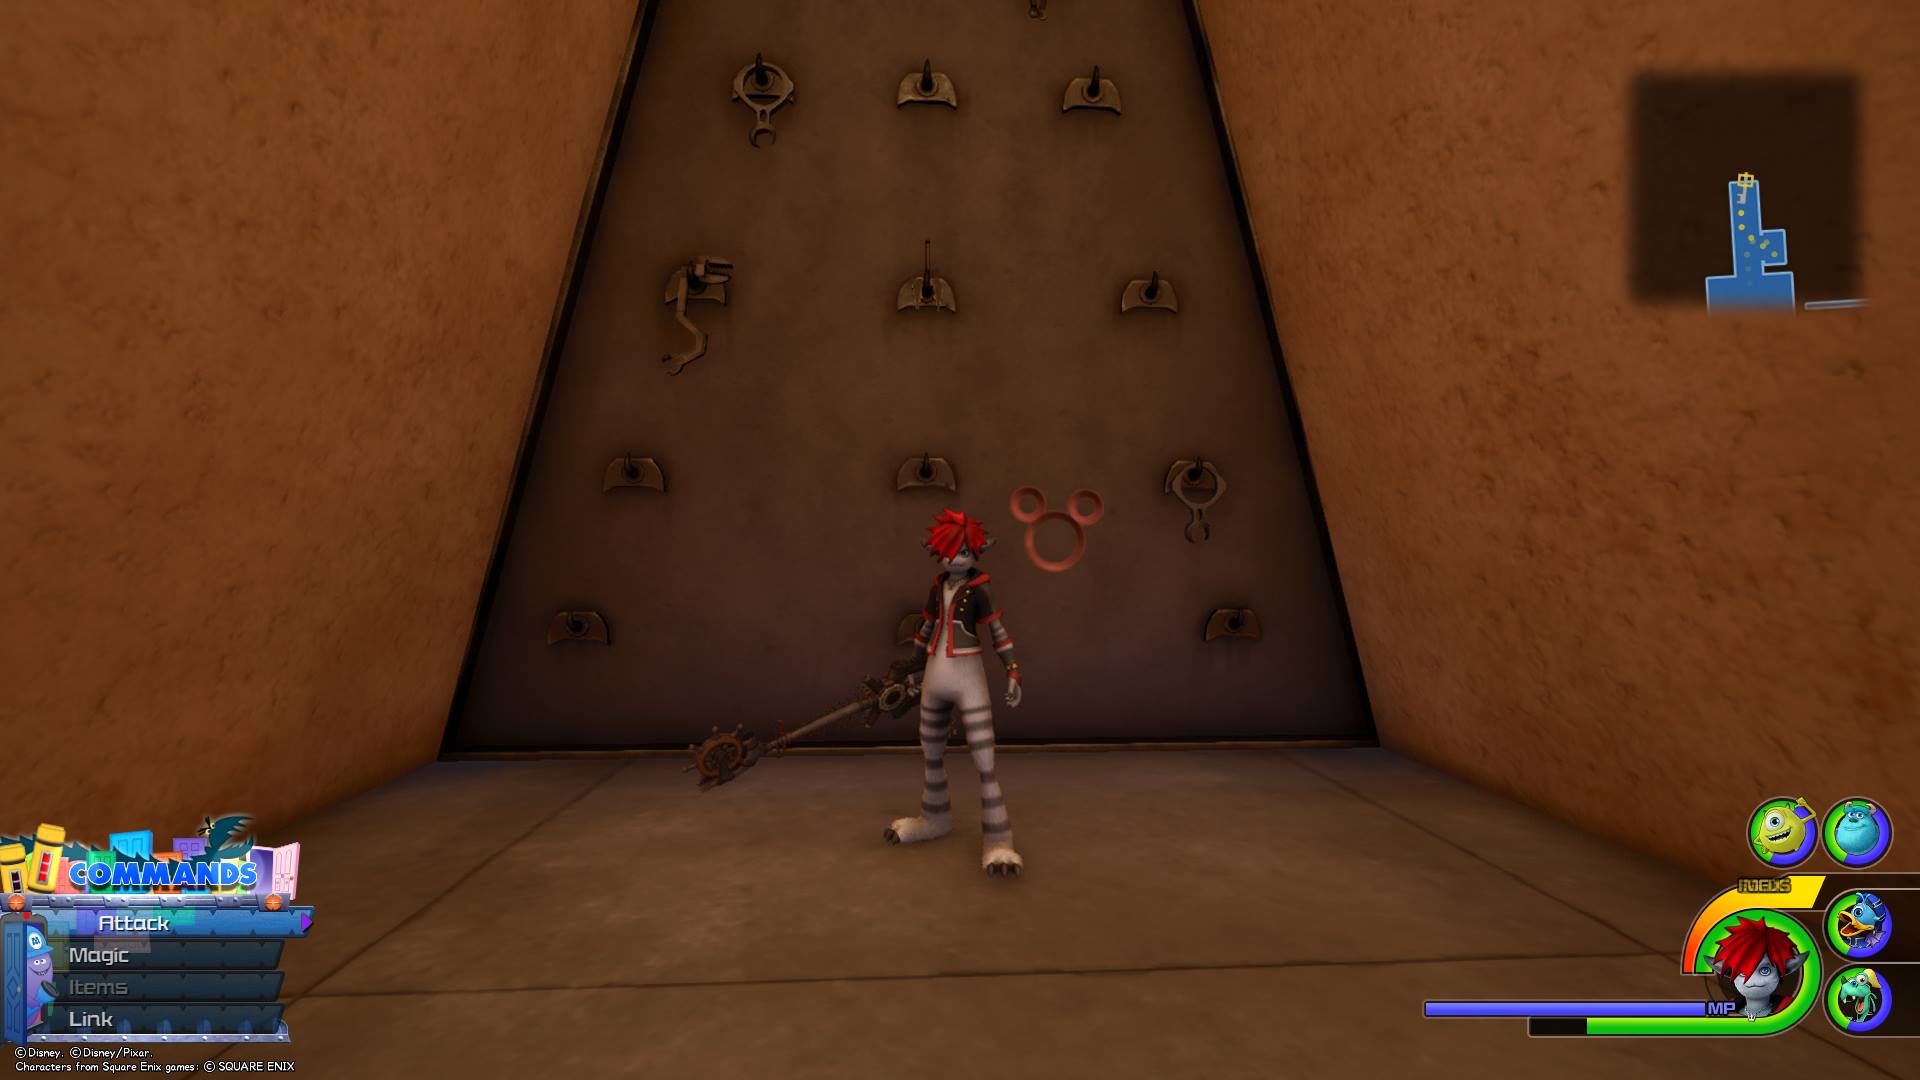
From the second Lucky Emblem, ride the door to make your way deeper into the building. When you’ve finished riding the grind rails for a second time, turn right and run down the hallway until you reach a dead end. You’ll be able to spot the Lucky Emblem on the wall at the end of the path.
Monstropolis Lucky Emblem No. 4
Once you’ve taken a picture of Lucky Emblem No. 3, go through the door and immediately make a right turn. Go to the end of the wall of doors and enter the door at the end. This will take you to the “Upper Level” portion of the building. Once you’ve exited the door, turn around and run through the tunnel until you see a wall of doors in the distance. The fourth Lucky Emblem is made of yellow doors on this wall.
Monstropolis Lucky Emblem No. 5
Go back through the door you took to reach Lucky Emblem No. 4 to return to the “Lower Level” area. Follow the path forward and go through a white door at the end. This will take you to the “Basement” area of The Factory. Follow the path for quite a while until you eventually pass the first conveyor belt and climb a set of stairs leading to a hallway with a large B2 label on the wall.
Once you go down a flight of stairs in this hallway, stop and look to Sora’s right. The fifth Lucky Emblem is on the wall underneath the window.
Monstropolis Lucky Emblem No. 6
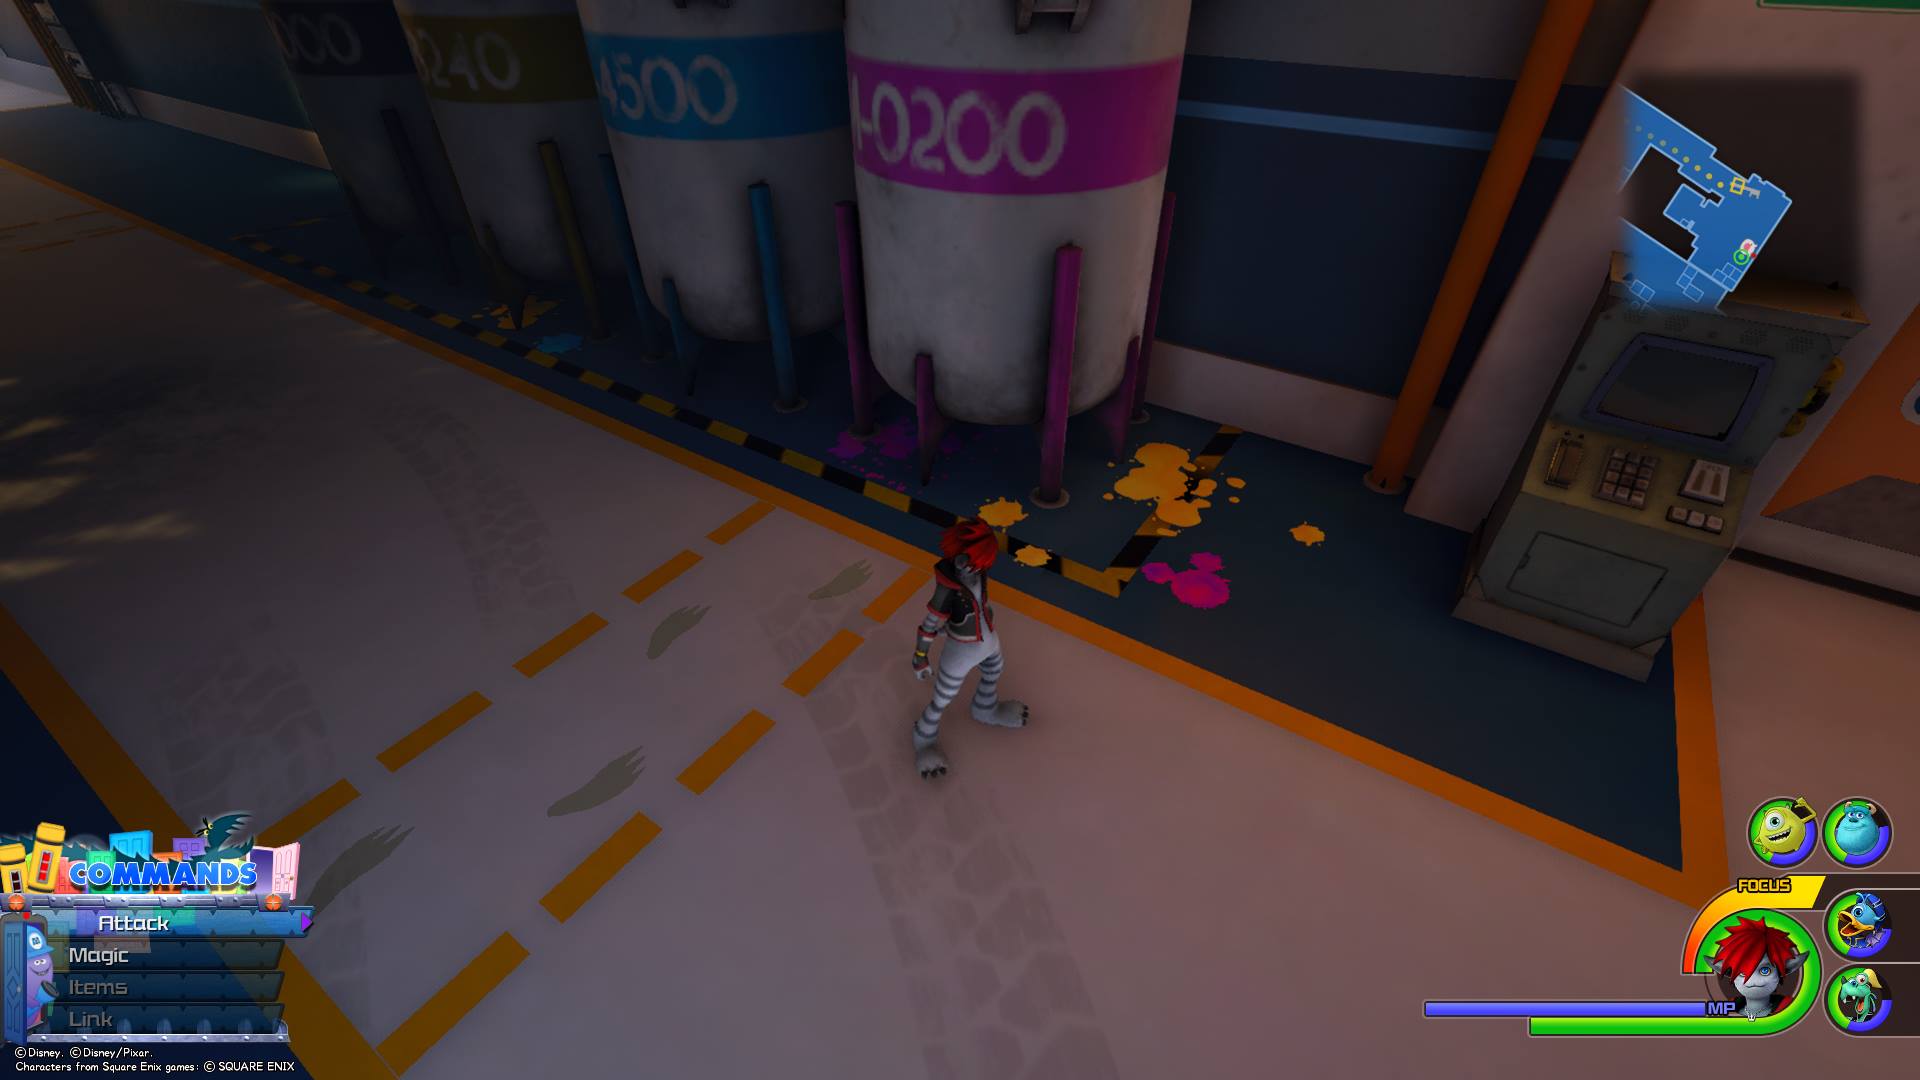
From Lucky Emblem No. 5, keep following the path forward until you reach the room with the Ground Floor save point. As you first enter this area, look at the large paint containers along the wall. Lucky Emblem No. 6 is on the floor next to the pink paint canister. It’s made of pink paint.
Monstropolis Lucky Emblem No. 7
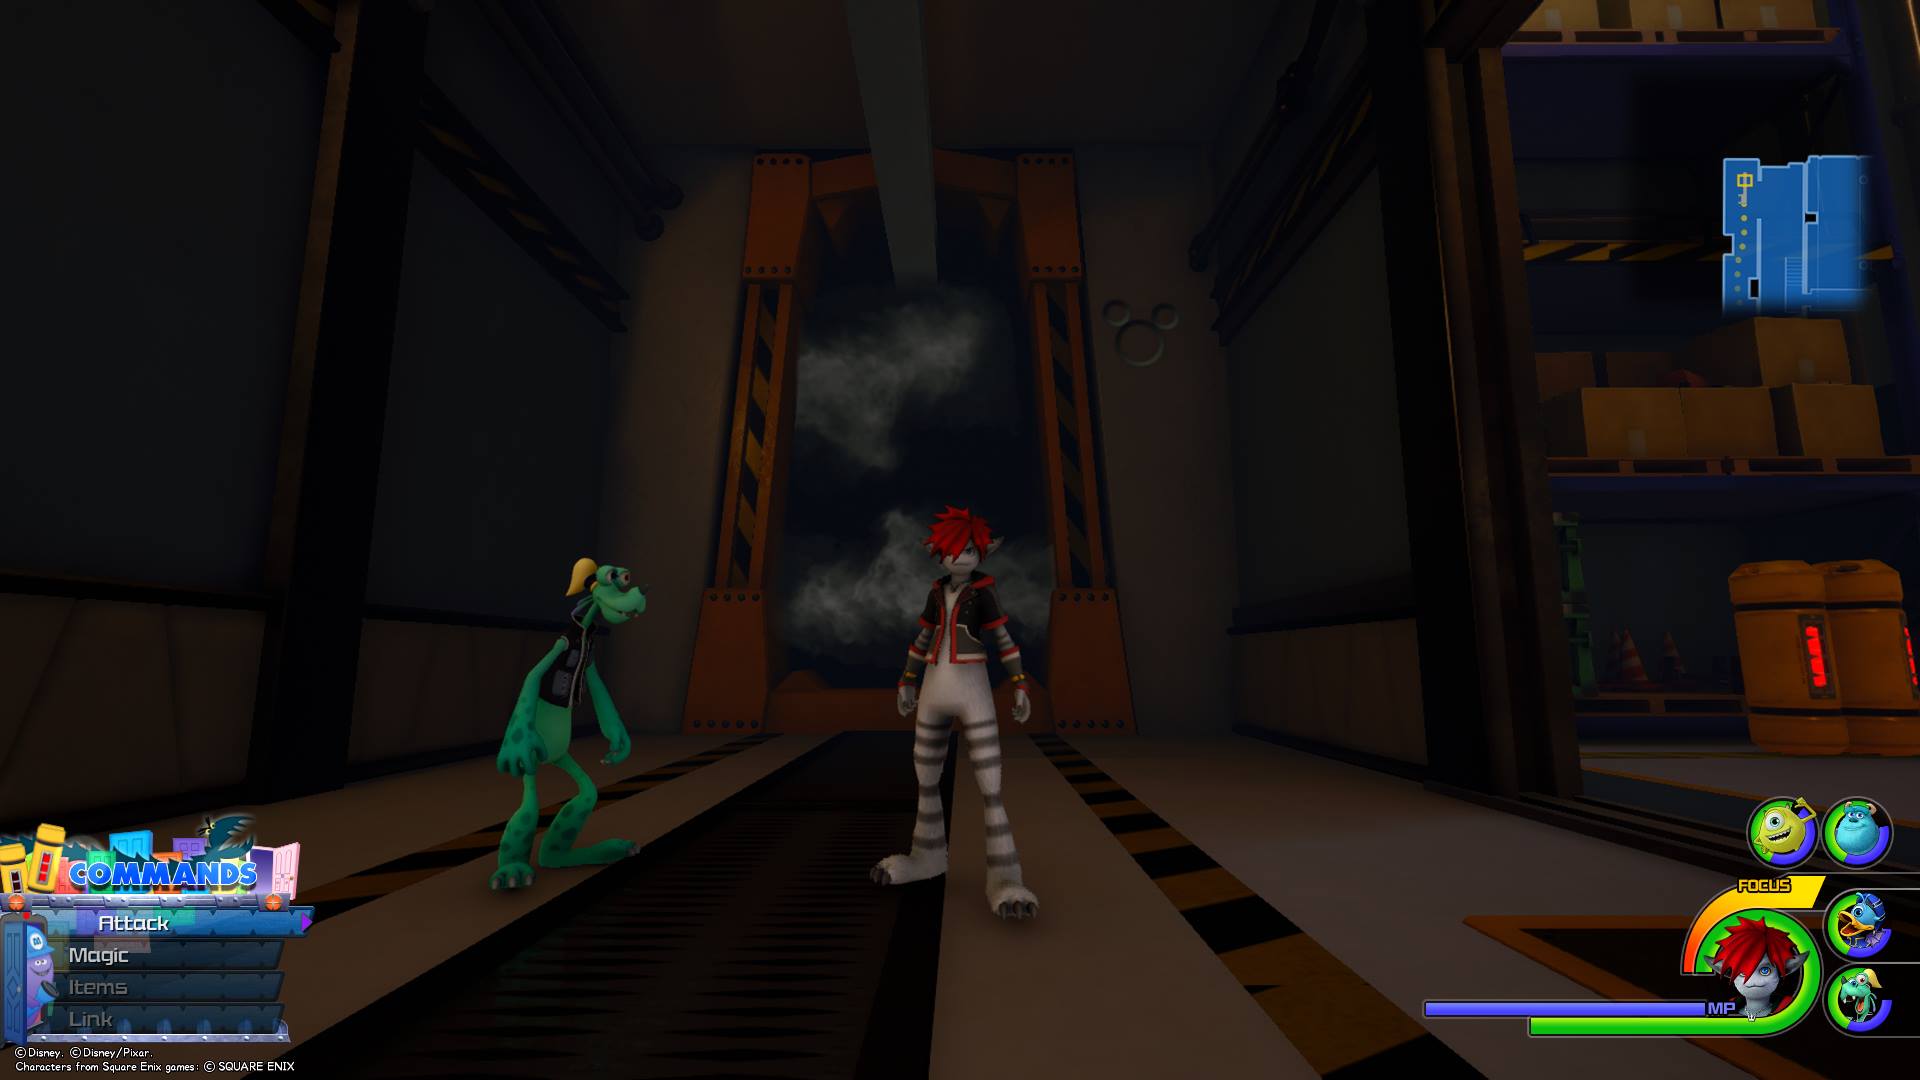
After photographing the sixth Lucky Emblem, take the elevator up to the “Second Floor” area of The Factory. Follow the path, which will eventually take you through a hallway with a large “D2” written on the wall. A bit past this point, you’ll come to a hallway with a large staircase on Sora’s right. Instead of climbing the staircase to progress deeper into The Factory, keep running straight ahead until you come to a large opening on Sora’s left.
Walk through this opening, and look to the right. The next Lucky Emblem is high up on the wall, on the right side of a large gap in the wall filled with steam.
Monstropolis Lucky Emblem No. 8

From Lucky Emblem No. 7, head back the way you came and climb the staircase you passed earlier. Follow the path past the second conveyor belt area and enter The Power Plant. You’ll immediately enter the “Accessway” area containing the Accessway save point. On the same wall as the save point is a desk next to some filing cabinets. The eighth Lucky Emblem is on the right side of the filing cabinets (the side that touches the desk).
Monstropolis Lucky Emblem No. 9
From the room with the Accessway save point, run along the linear path through a brick hallway until you’re taken outside. Keep progressing forward until you eventually make your way through another building and are back outside again. As soon as you walk outside, turn around and you’ll find the next Lucky Emblem on the top of the door frame.
Monstropolis Lucky Emblem No. 10
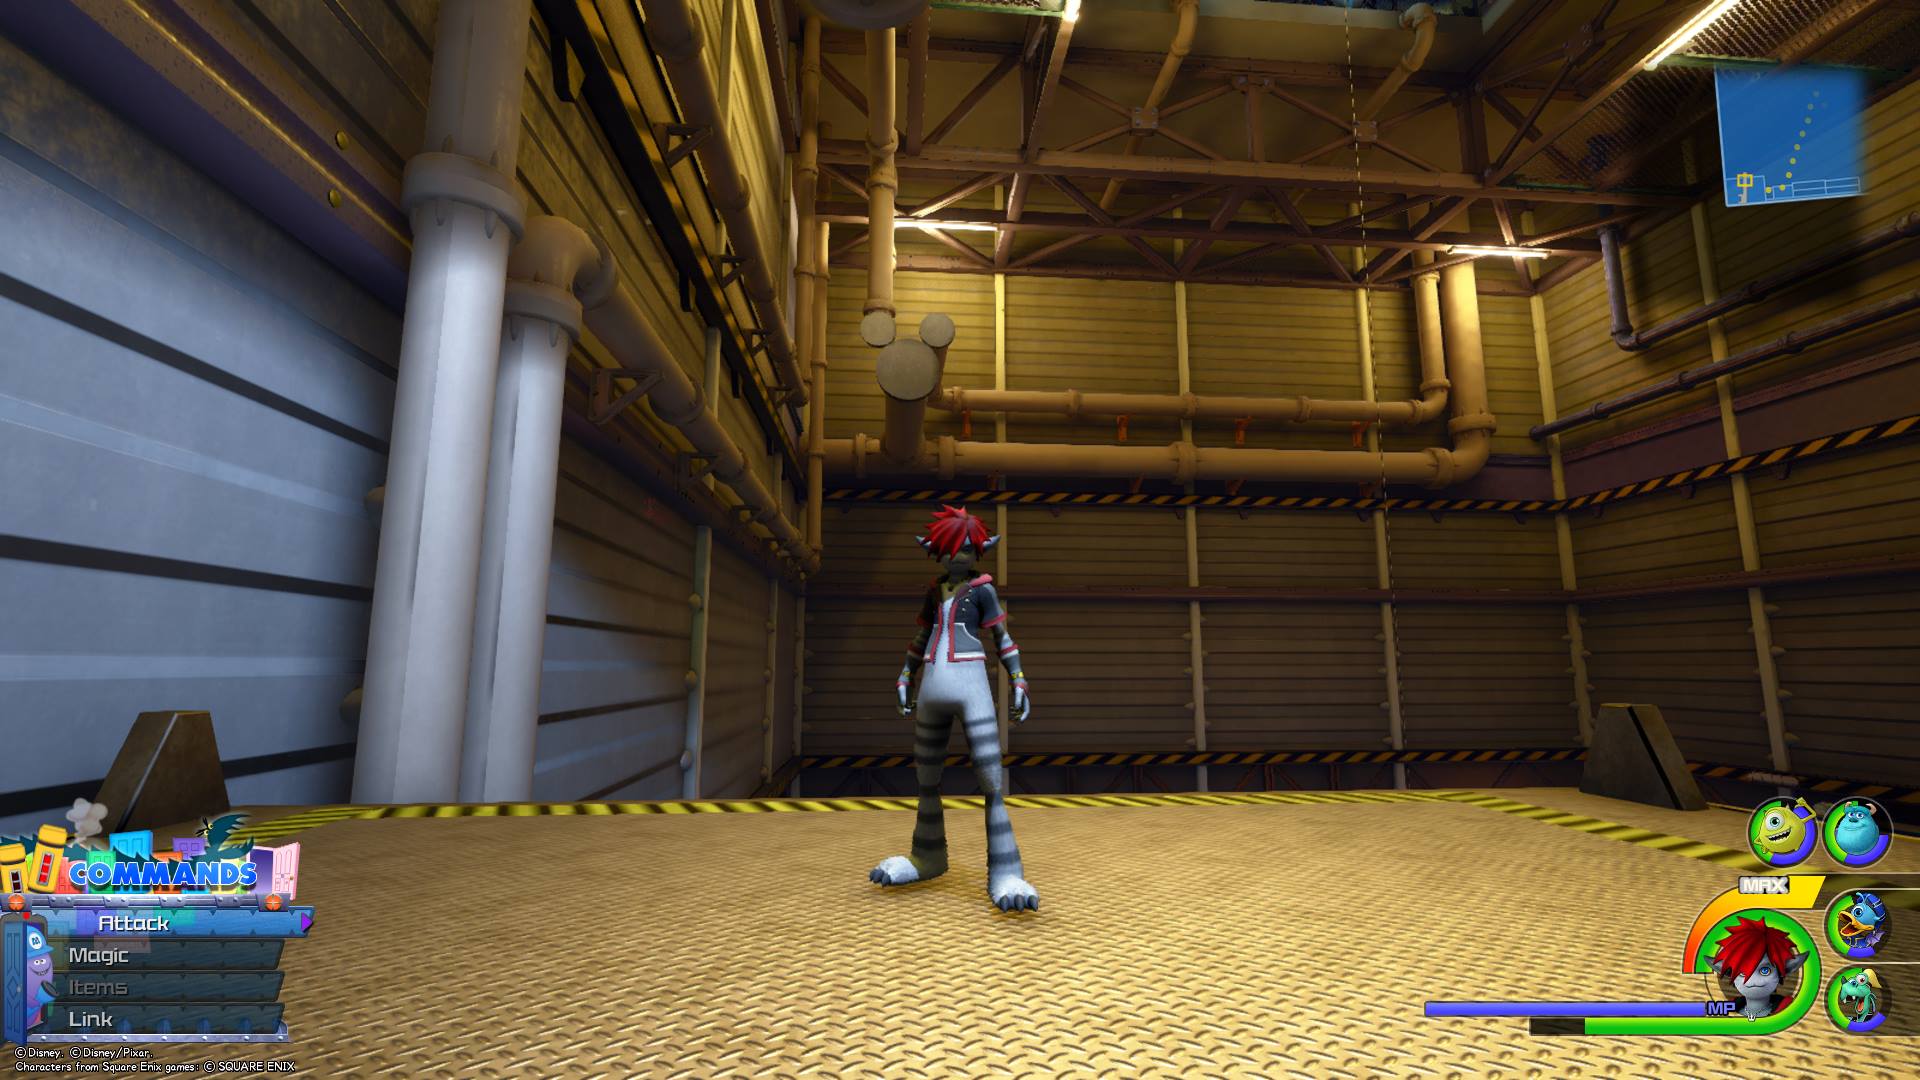
Once you’ve taken a picture of Lucky Emblem No. 10, keep following the path until you reach the top of The Power Plant and take a long dive into the Tank Yard far below you. Climb the blue and white containers in this room and then jump onto the platform next to the them. Position Sora on this platform so that you can see the 10th Lucky Emblem formed by the ends of three pipes attached to the wall and ceiling.
Monstropolis Lucky Emblem No. 11
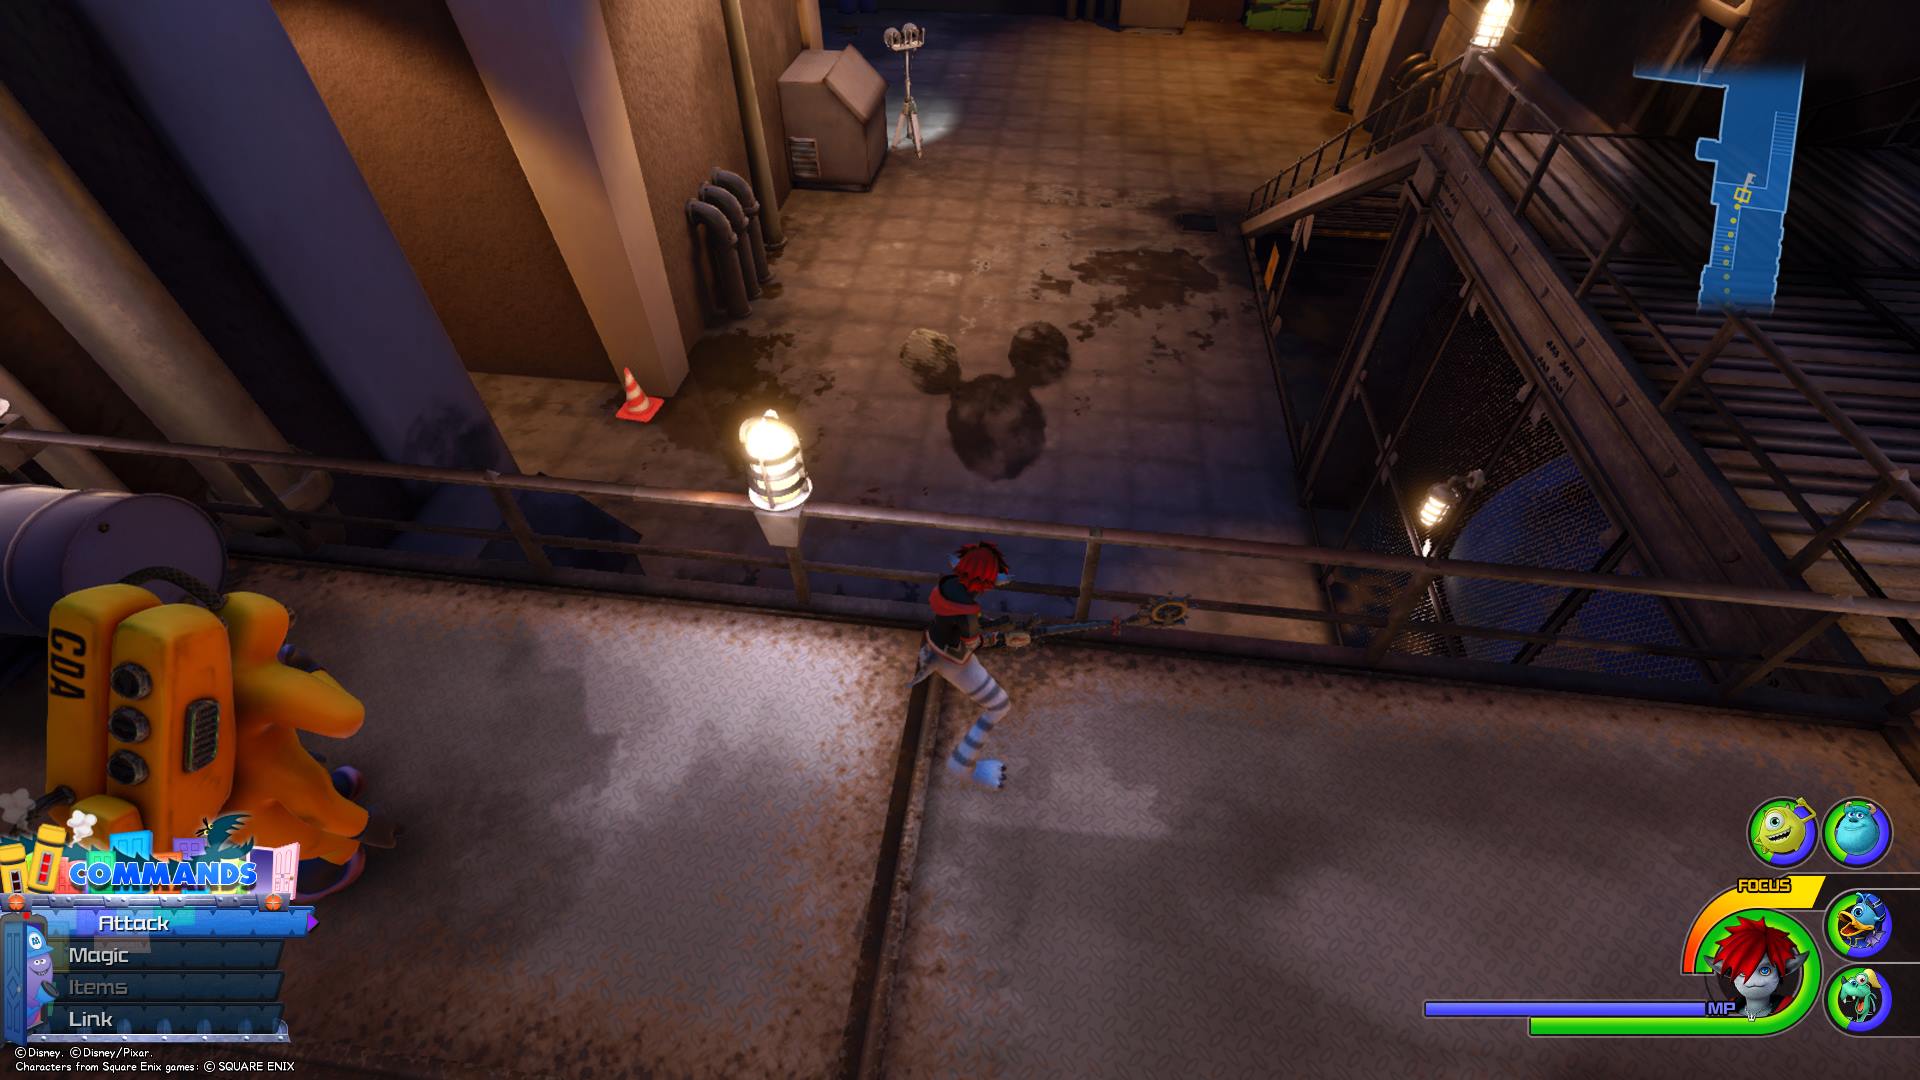
After taking a picture of Lucky Emblem No. 10, head outside and use the rail on the large blue pipe to progress forward. Follow the path into the “Vault Passage” area. As soon as you enter, you’ll need to drop down to a lower walkway where enemies spawn. After dropping down, follow the walkway to the right and climb the staircase that leads to an upper path. Stand next to the CDA member and turn around to face the way you came. You’ll spot the final Lucky Emblem formed out of an oil spill on the ground.