We'll show you where to find all nine Lucky Emblems in the Kingdom of Corona.
One of the many worlds in Kingdom Hearts 3 is Kingdom of Corona, based on the Disney film Tangled. There are nine Lucky Emblems (hidden Mickeys) to photograph in the Kingdom of Corona, and we’re here to help you find each one.
Watch the video below to see where all nine Lucky Emblems are located in Kingdom of Corona, or keep reading to see a picture and text description for each one. For reference, our guide begins from the “Tower” save point.
Special thanks to AllGamers for finding the locations of all nine Lucky Emblems.
Kingdom of Corona Lucky Emblem No. 1
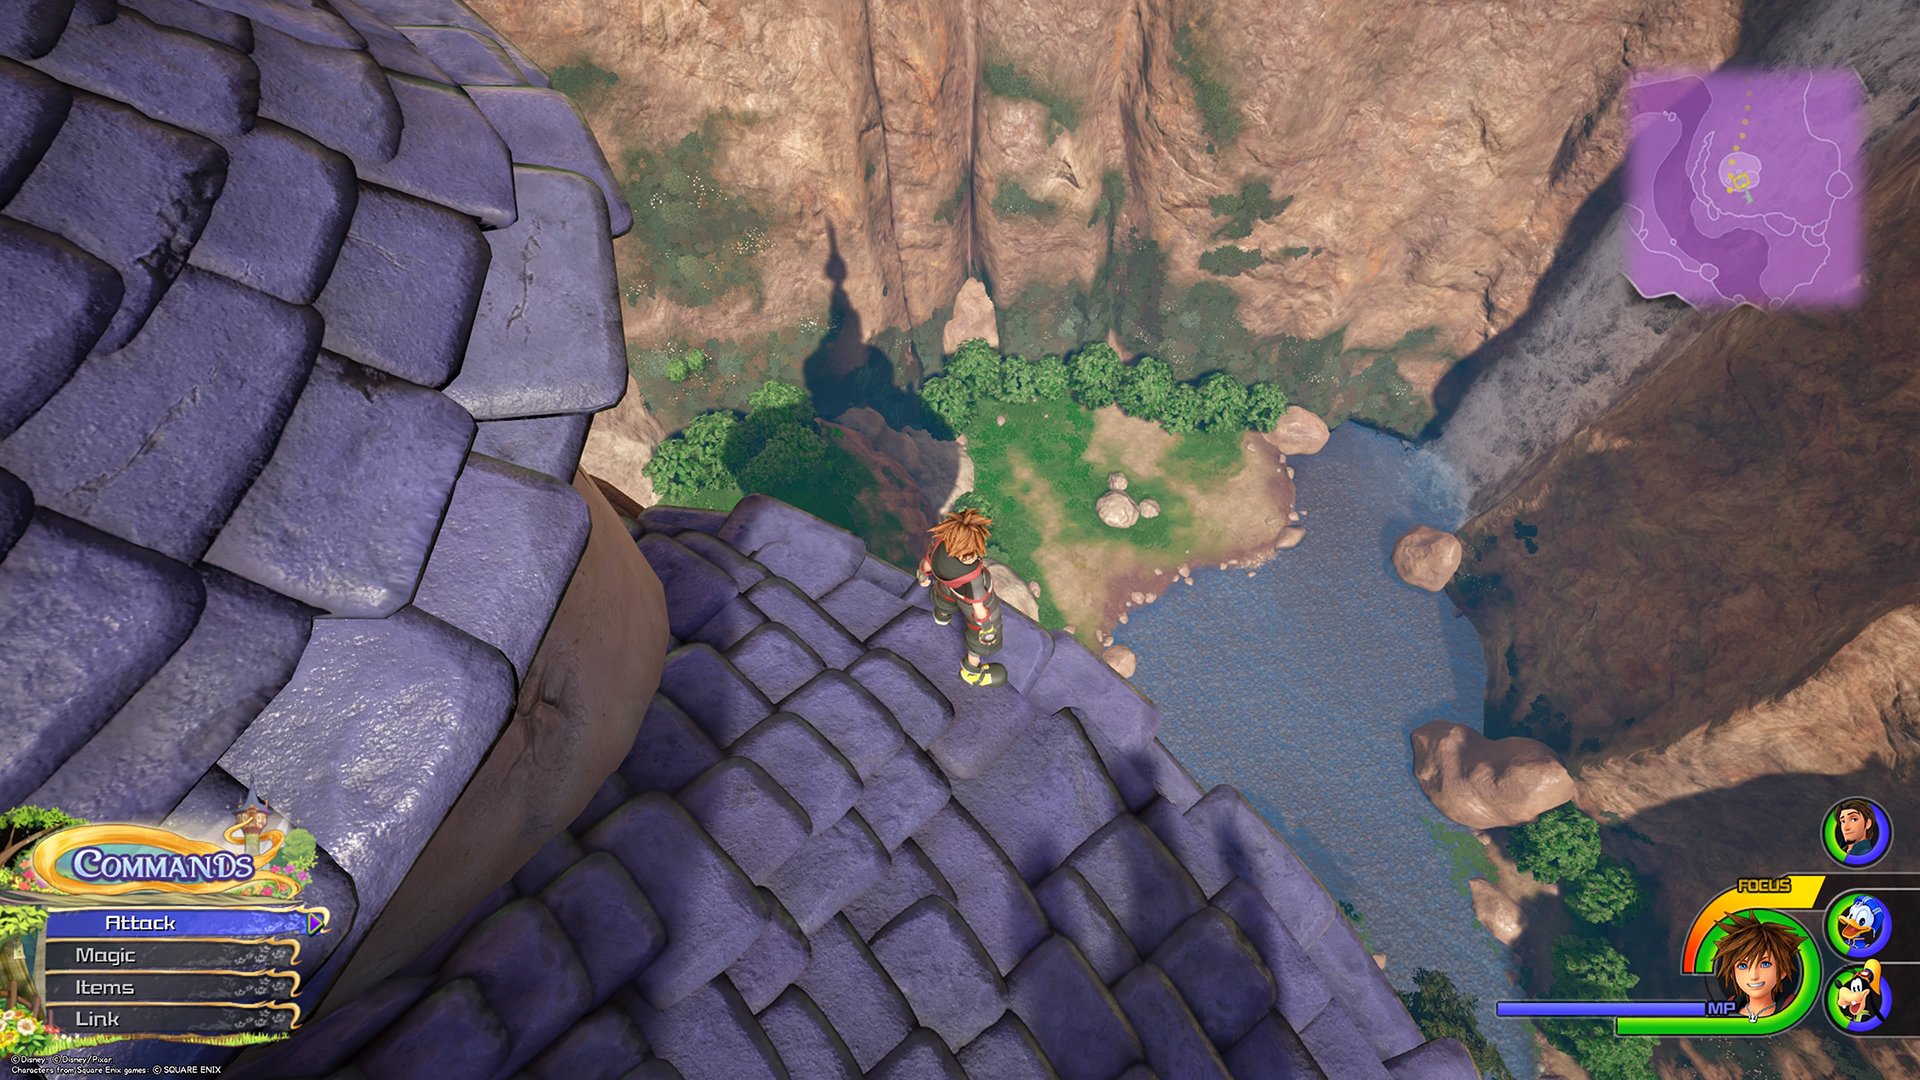
From the “Tower” save point, run to the top of Rapunzel’s tower and look down at the ground near the waterfall. You’ll see the Lucky Emblem formed out of three rocks on the ground.
Kingdom of Corona Lucky Emblem No. 2
From the first Lucky Emblem, you can either run from Rapunzel’s tower all of the way through the forest until you eventually reach the “Marsh” area, or you can go back to the Tower save point and warp to the Marsh save point. In our video guide above, we take the warping method to save time.
From the Marsh save point, run through the marsh, sticking close to the outside edge of the map until you eventually come to a circular pond, surrounded mostly by rock walls, that has a bit more light than the surrounding area. The pond is near the exit of this Marsh area. You’ll find the second Lucky Emblem on one of the rock walls surrounding the pond.
Kingdom of Corona Lucky Emblem No. 3
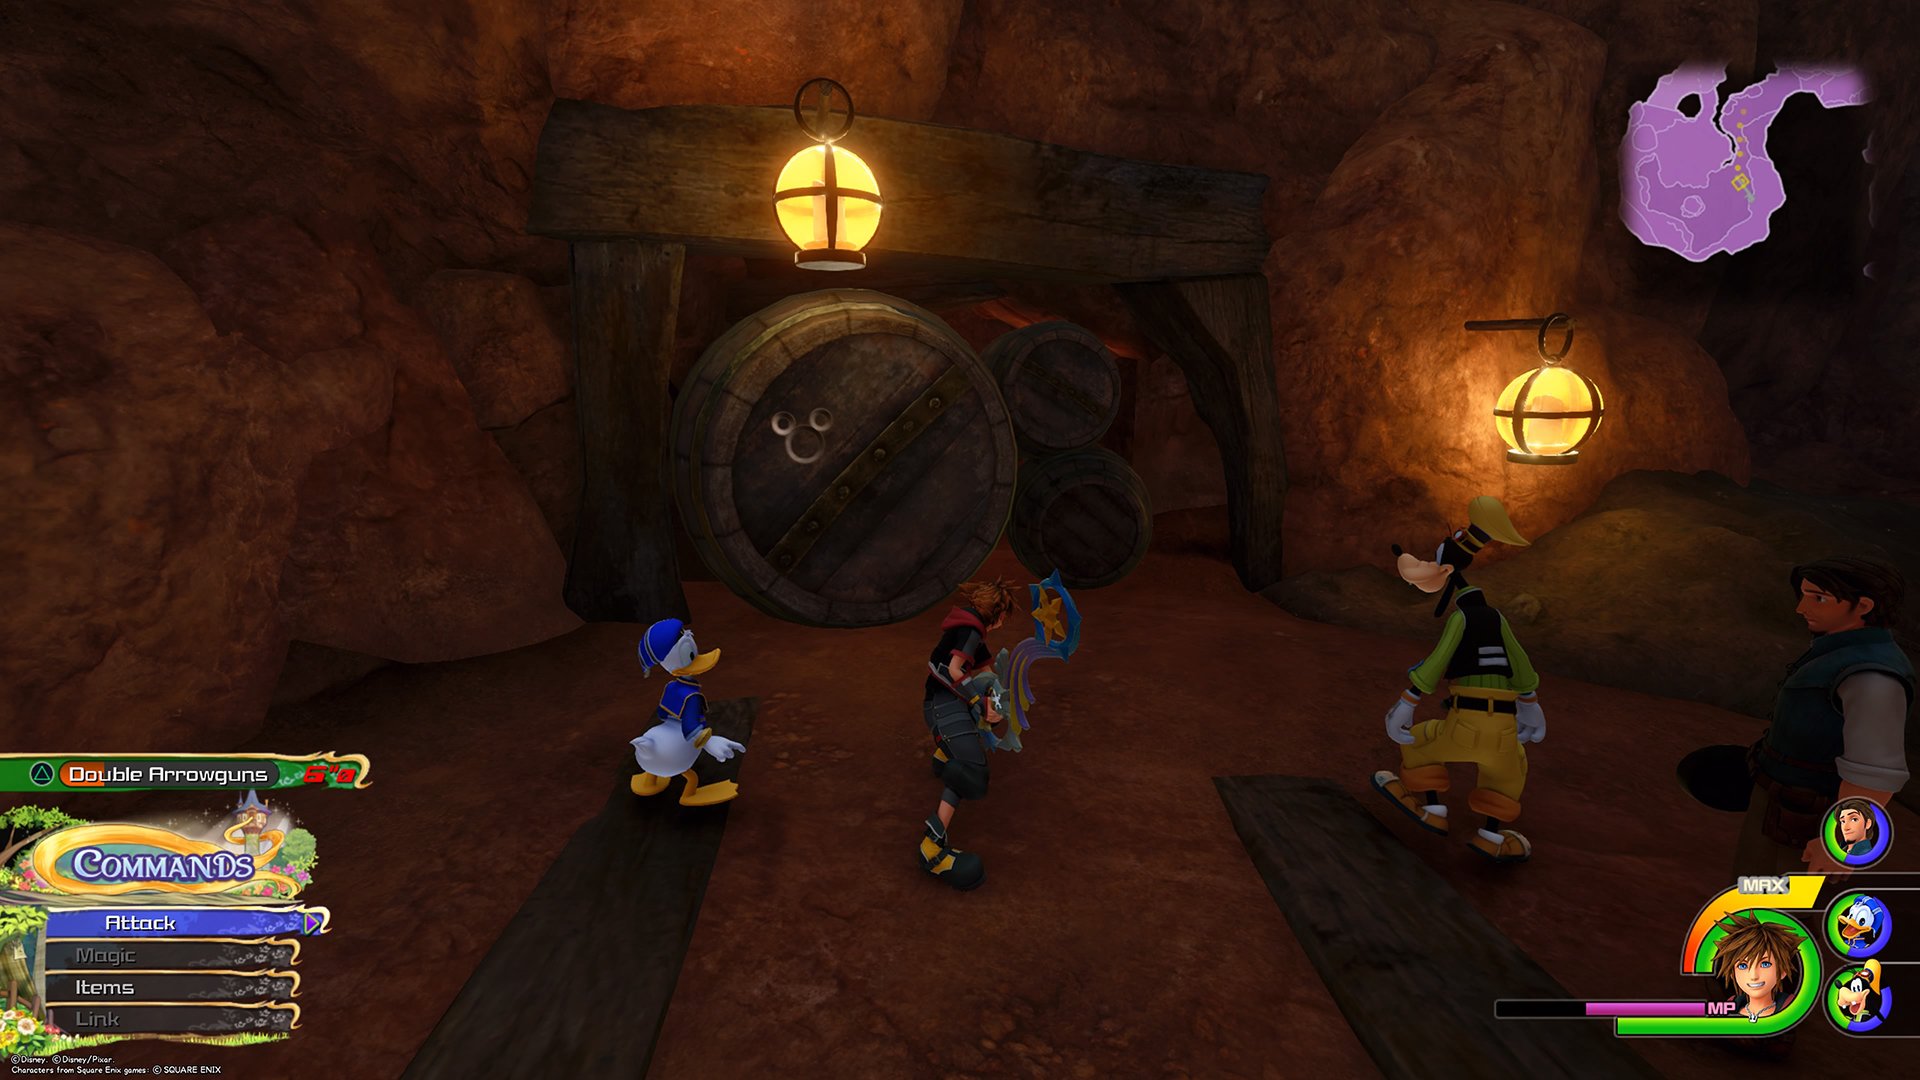
From Lucky Emblem No. 2, exit the Marsh in the direction of The Kingdom. Run past the Campsite save spot and into The Wetlands. Make your way through the Wetlands until you get into the mines. As pointed out by Camzillasmom, if this is your second time visiting Kingdom of Corona, you’ll need to use the Superjump ability to scale one of the tall rock faces in order to reach the entrance of the mines.
Once you enter the mines, look for a large barrel sticking out of the wall on Sora’s left. The third Lucky Emblem is on the end of the barrel.
Kingdom of Corona Lucky Emblem No. 4
From the mines, continue toward The Kingdom (you’ll need to use some careful jumps — or another Superjump — to get out of the Wetlands area). When you get to the bridge, you’ll be able to spot the Lucky Emblem on the end of the railing on the right side of the bridge (before you cross it).
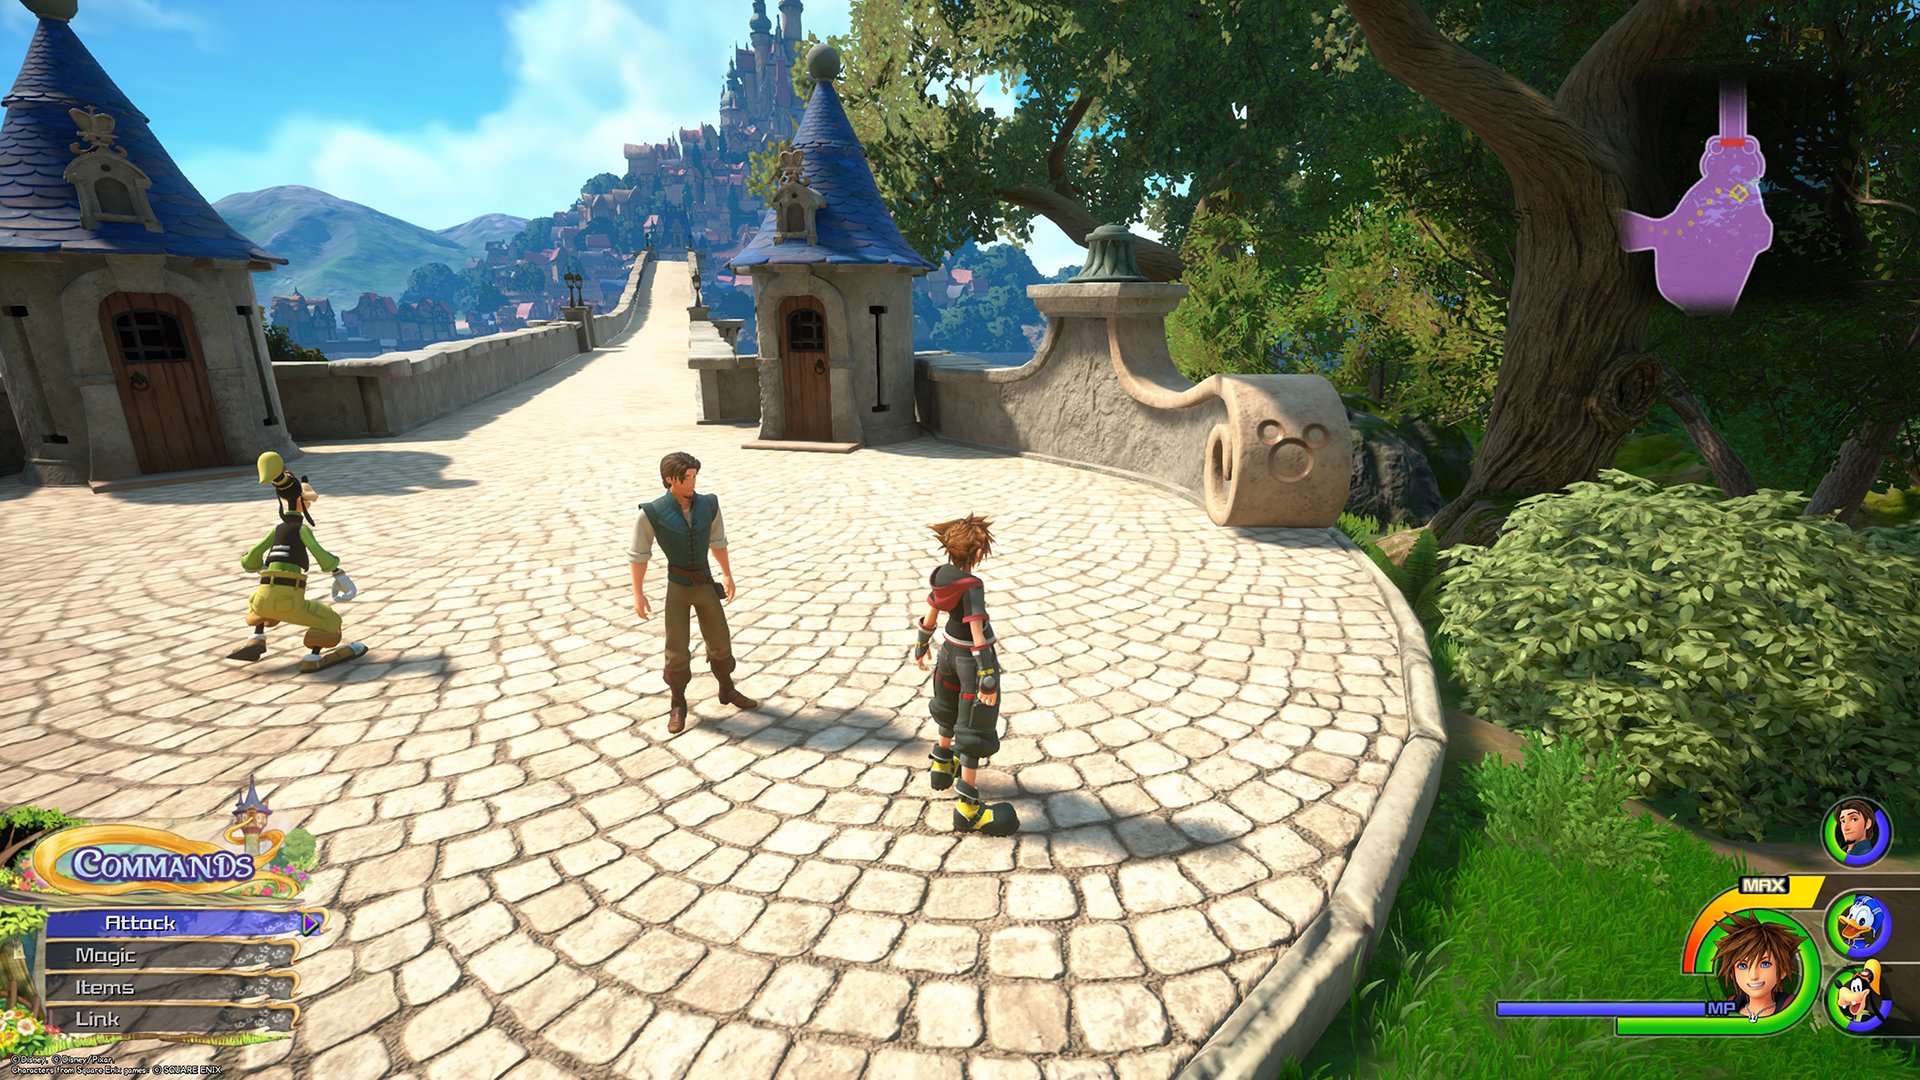
Kingdom of Corona Lucky Emblem No. 5
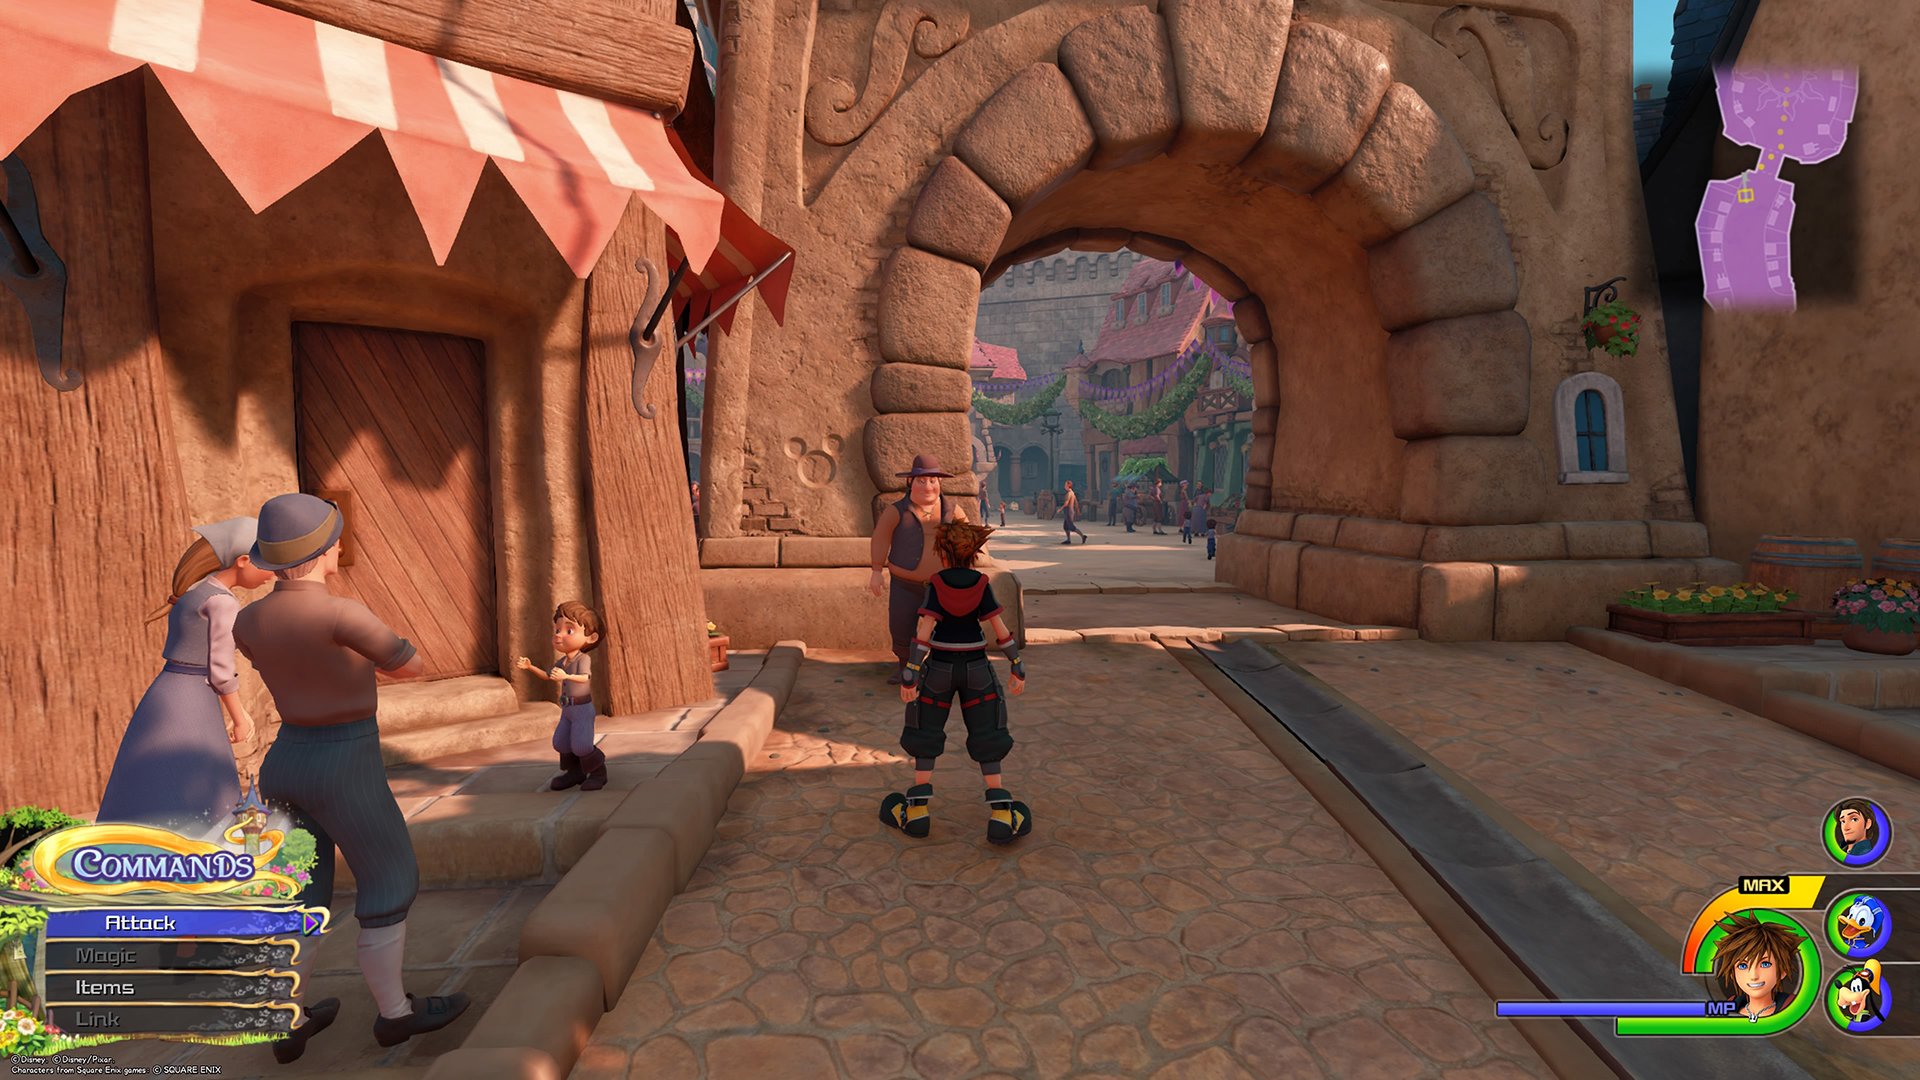
After you enter The Kingdom, run forward until you reach a short stone archway. The fifth Lucky Emblem is on the left side of the archway.
Kingdom of Corona Lucky Emblem No. 6
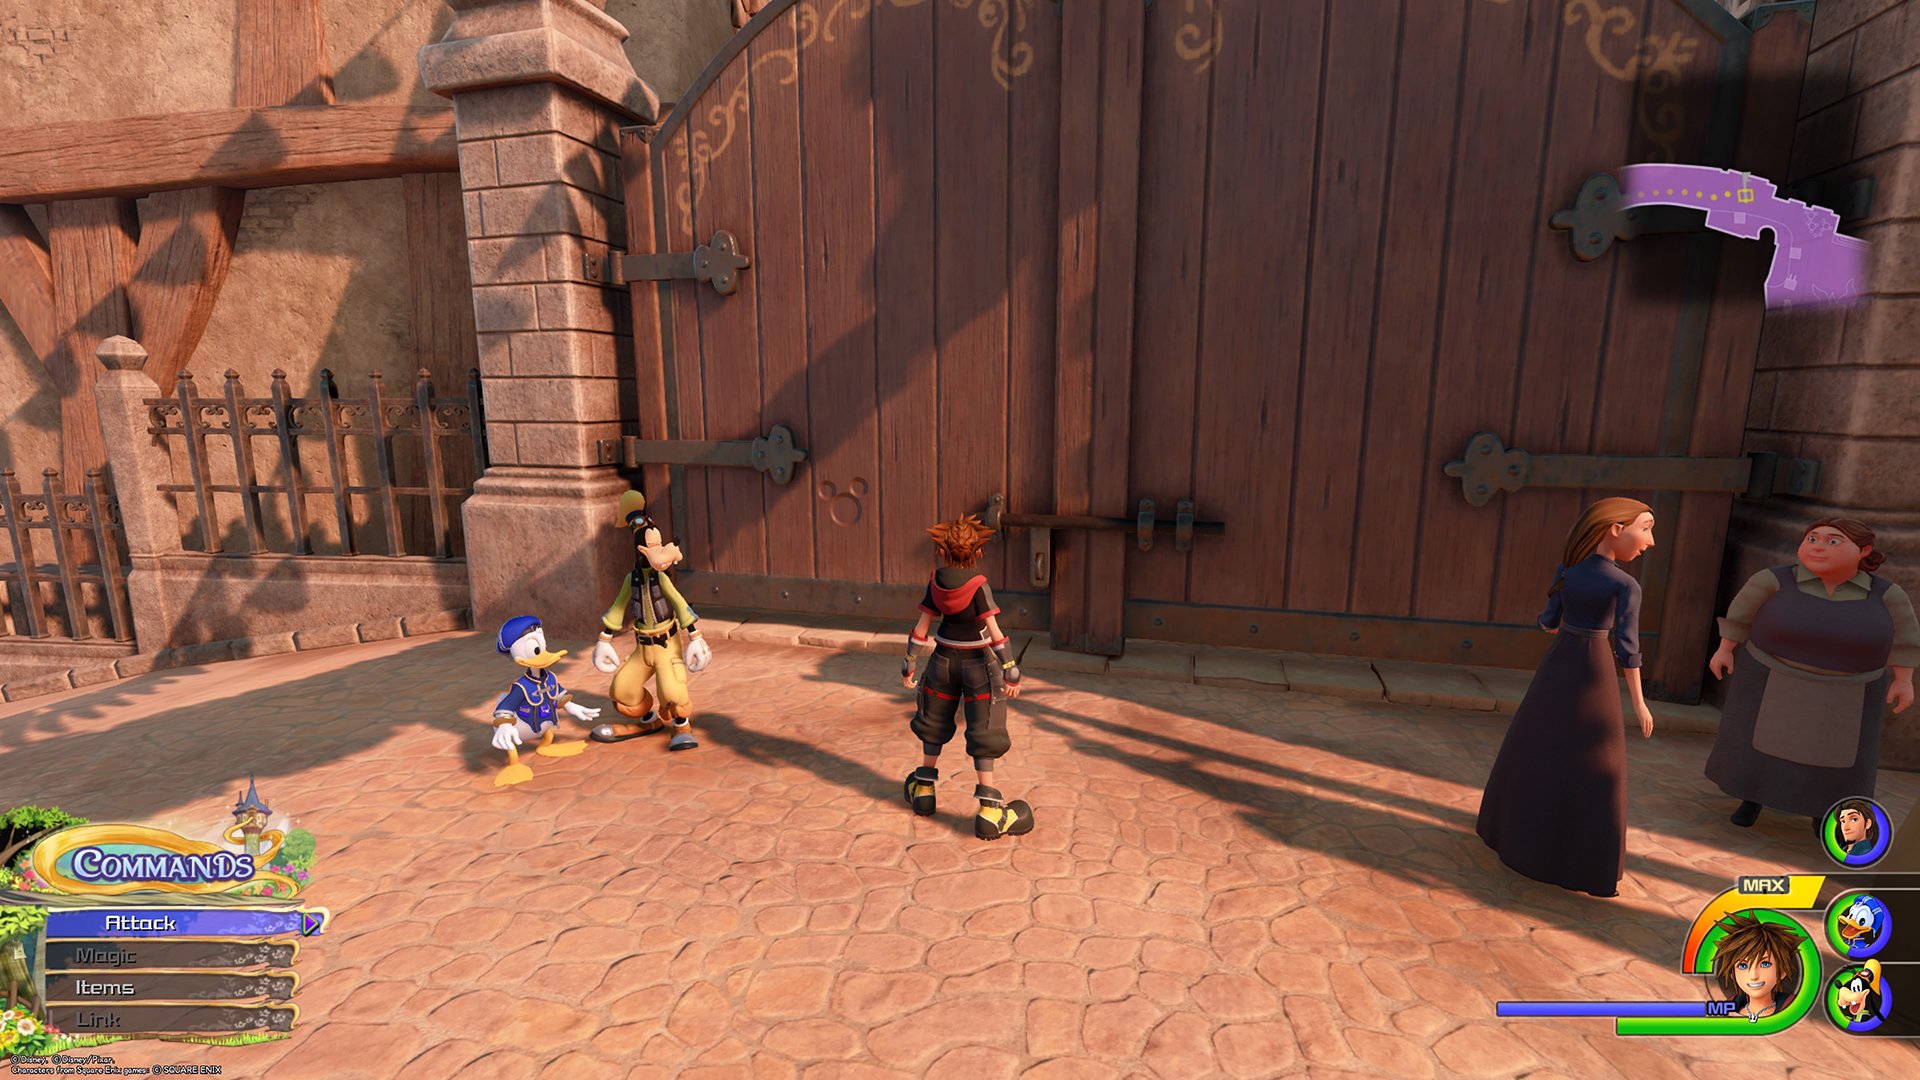
From the fifth Lucky Emblem, make your way further into The Kingdom, and turn left at the picture of the King and Queen with their baby. Stop before you get to the sloped pathway that leads down to the “Wharf” area. You’ll see a large wooden gate to Sora’s right. The sixth Lucky Emblem is on the left door of the gate.
Kingdom of Corona Lucky Emblem No. 7
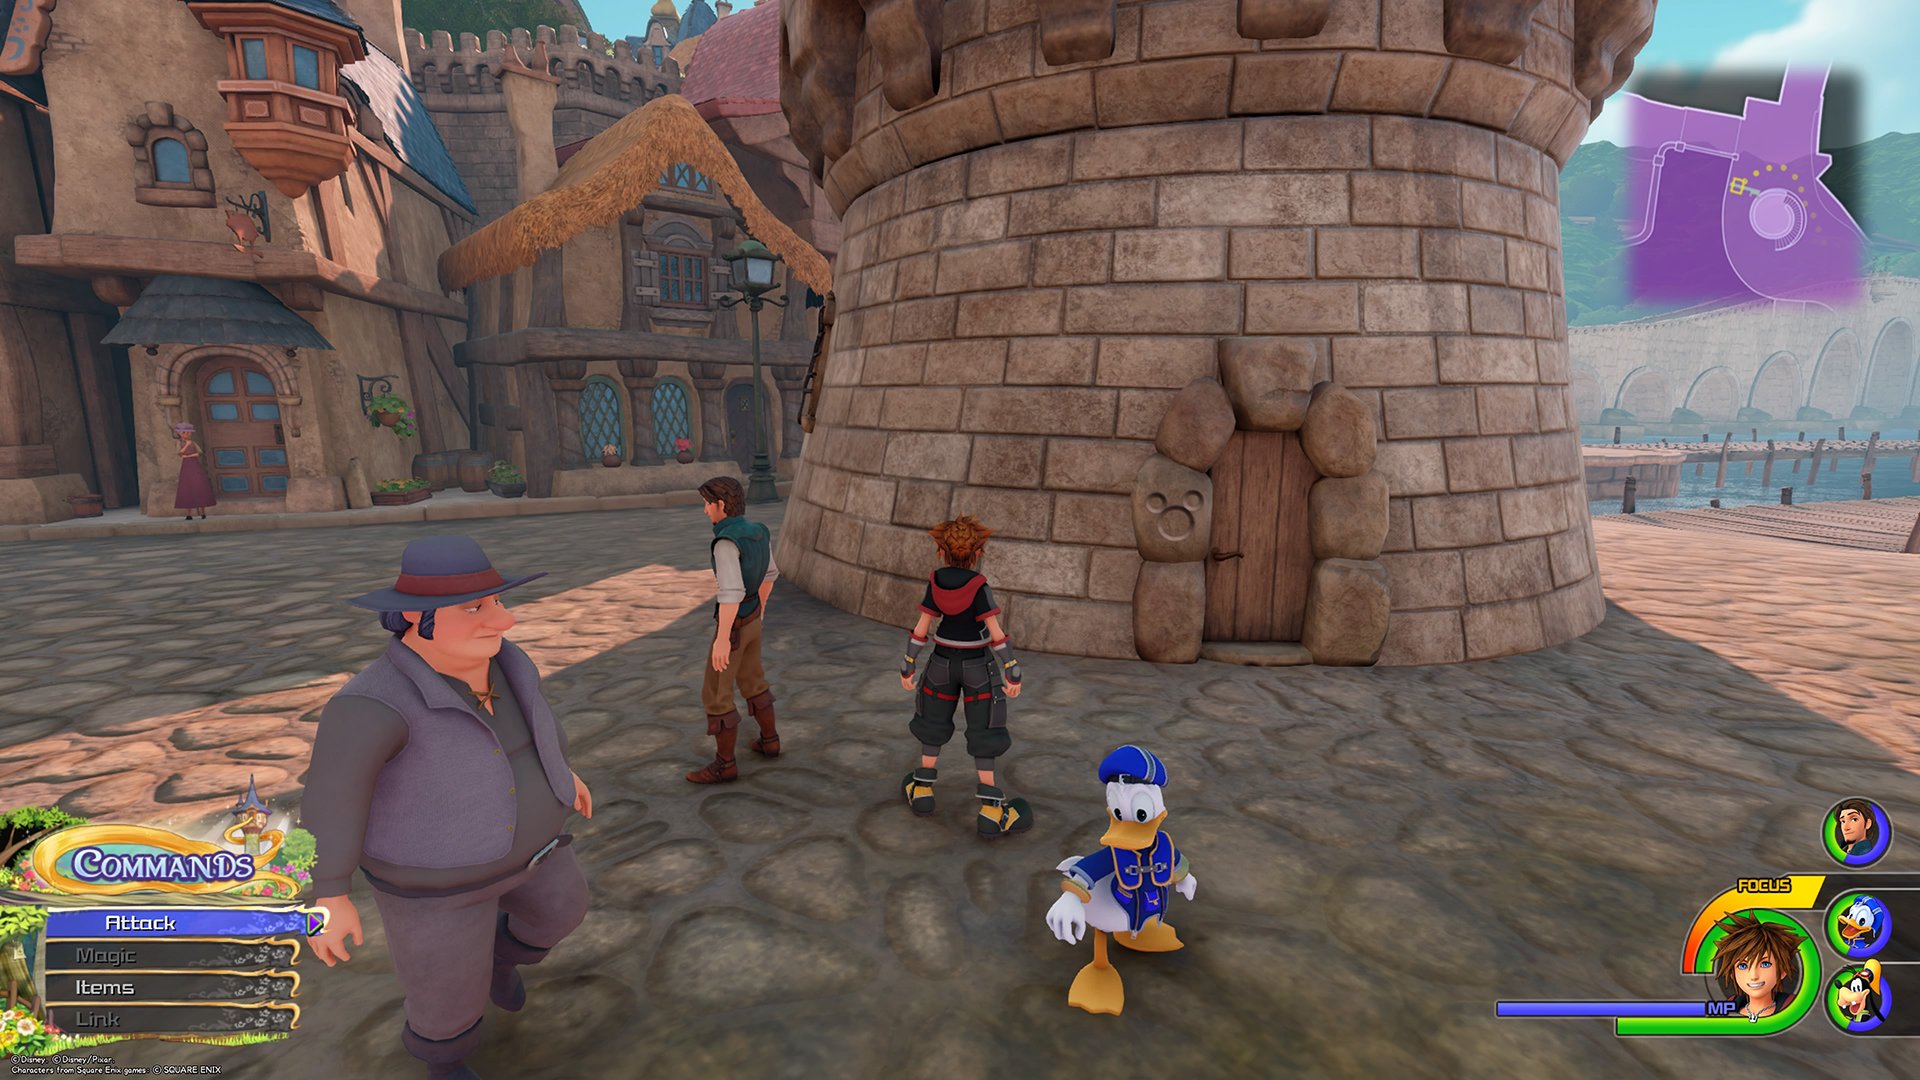
Once you’ve taken a picture of the sixth Lucky Emblem, run down the sloped pathway into the Wharf area near the water. When you get to the bottom of the sloped path, run forward and look at the door on the small circular building in front of you. The seventh Lucky Emblem is embedded in a rock to the left of the door.
Kingdom of Corona Lucky Emblem No. 8
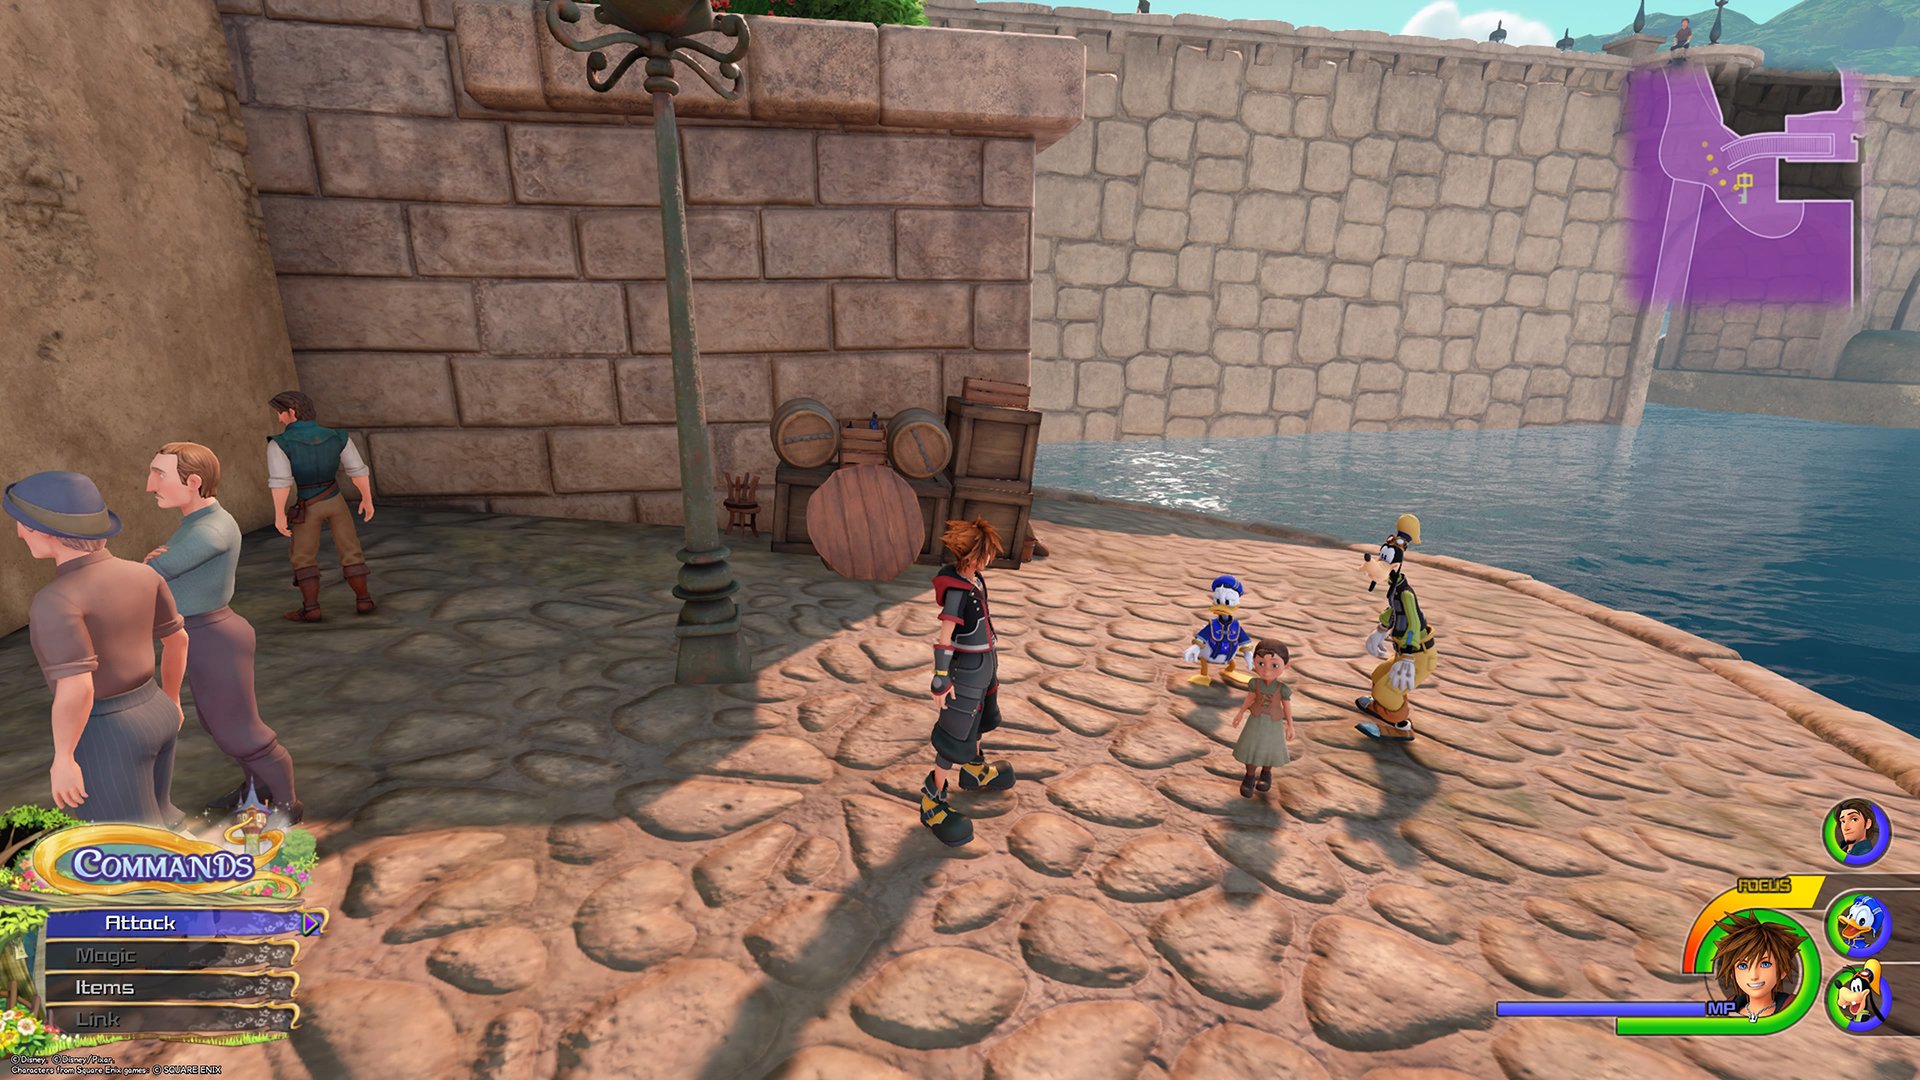
After taking a picture of Lucky Emblem No. 7, keep running forward (not across the bridge) until you see a narrow staircase on Sora’s left. On the right side of the staircase, near the water’s edge, is a stack of boxes and other items. Position Sora so that you can see the Lucky Emblem being formed by two barrels and a table that’s on its side.
Kingdom of Corona Lucky Emblem No. 9
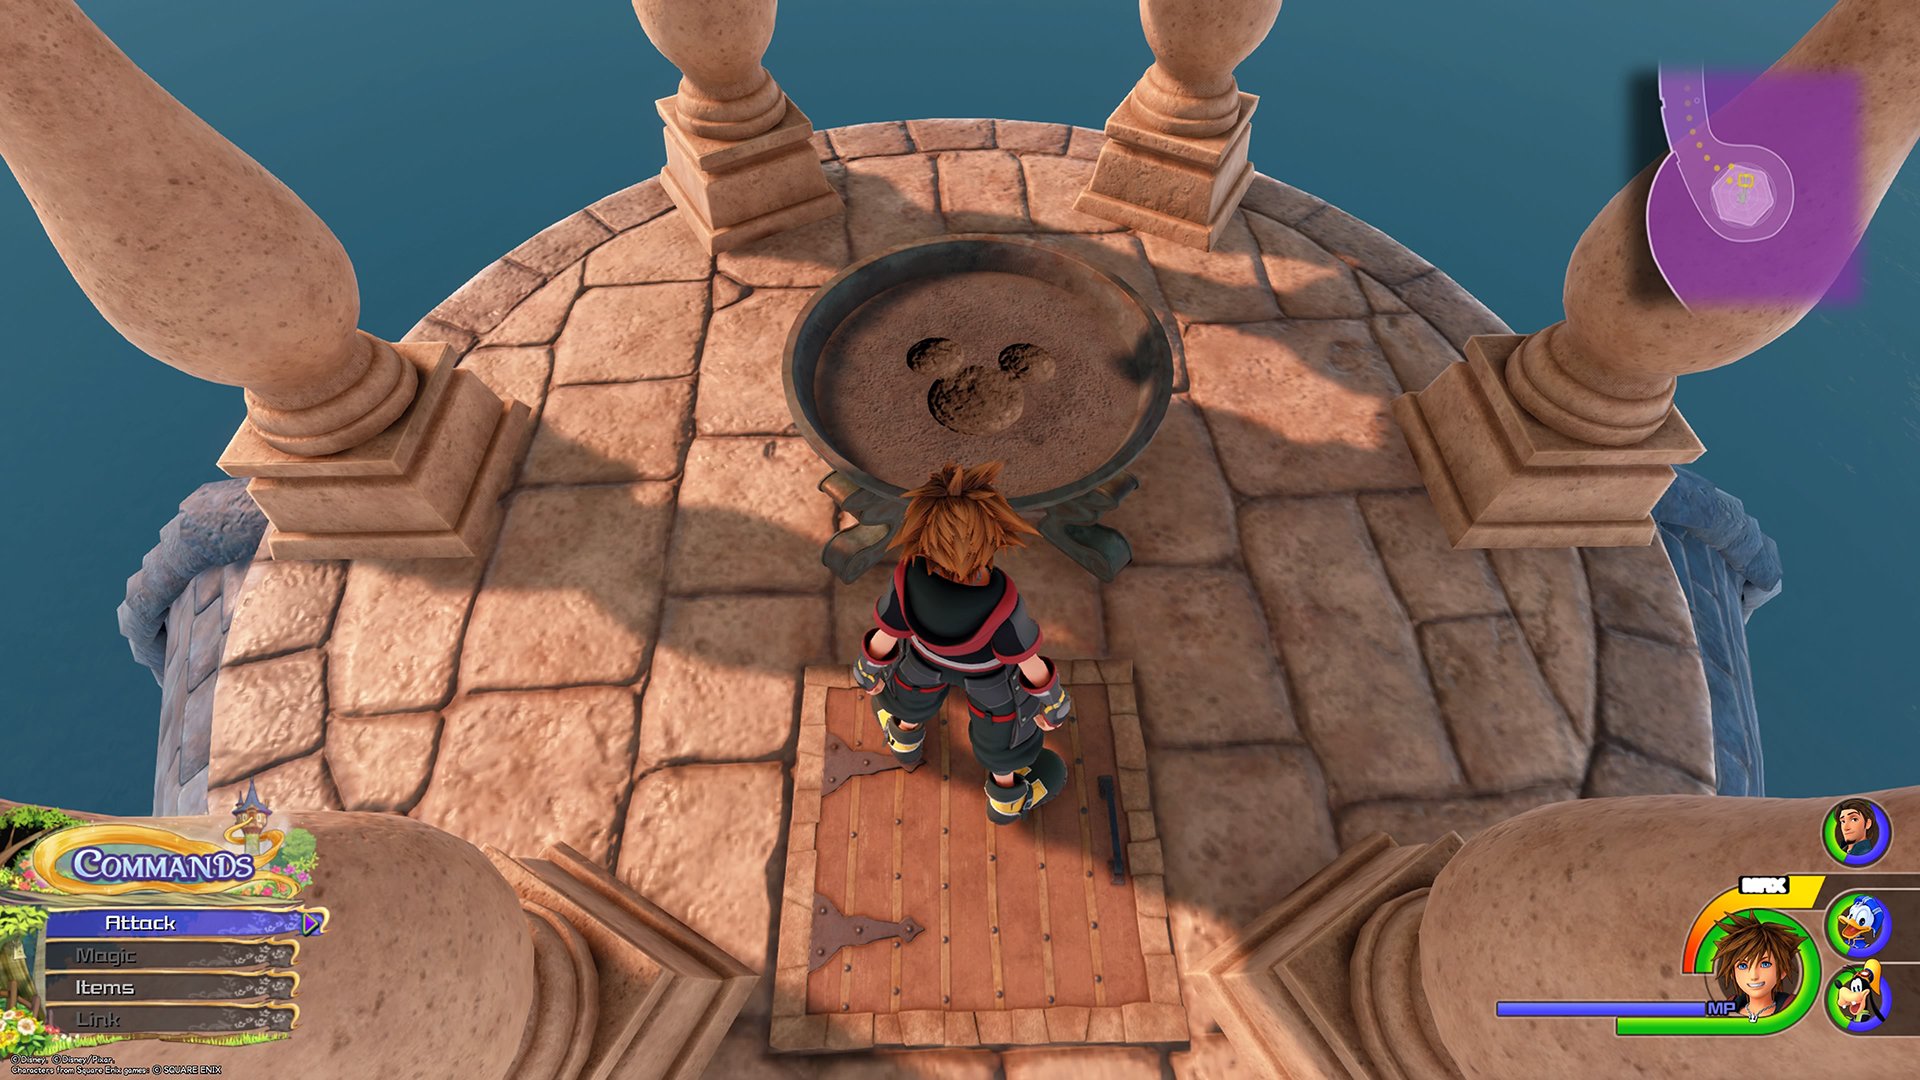
Finally, from Lucky Emblem No. 8, run back to the small circular building where you found Lucky Emblem No. 7, and make your way across the bridge. Run to the Lighthouse in the distance and climb to the top. The last Lucky Emblem is in a bowl at the top of the Lighthouse.
Looking for more Lucky Emblems in Kingdom Hearts 3? Check out our other guides:
Kingdom Hearts 3: Twilight Town Lucky Emblem Locations
Kingdom Hearts 3: Toy Box Lucky Emblem Locations
Kingdom Hearts 3: Olympus Lucky Emblem Locations