Follow this step-by-step process to create an account for your child on PlayStation 4.
The PlayStation 4 allows parents and caregivers to set up individual child accounts for their youngsters, and activate parental controls for each one, which can limit everything from the amount of time a child can play games per day to controlling their access to the console’s internet browser and more.
Follow our guide to set up a child account on your PlayStation 4, and then set parental controls for it. Note: You’ll need to be signed into your own account (an adult’s account) to complete this process.
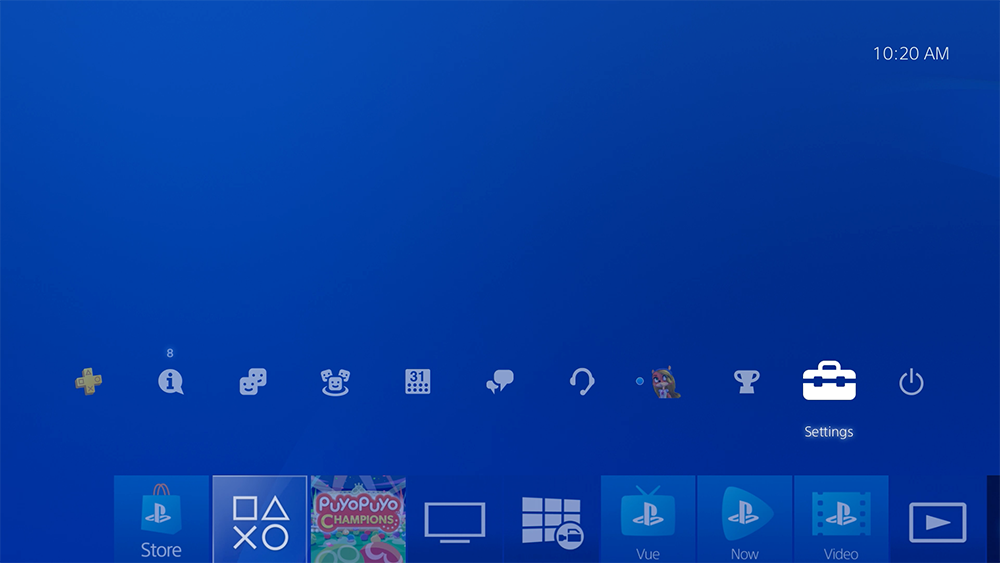
To begin creating a child account, head to the PlayStation 4’s Settings menu. You can access the Settings menu by pressing ‘up’ on the directional pad on your controller while viewing the PlayStation 4 home screen, and scrolling to the right.
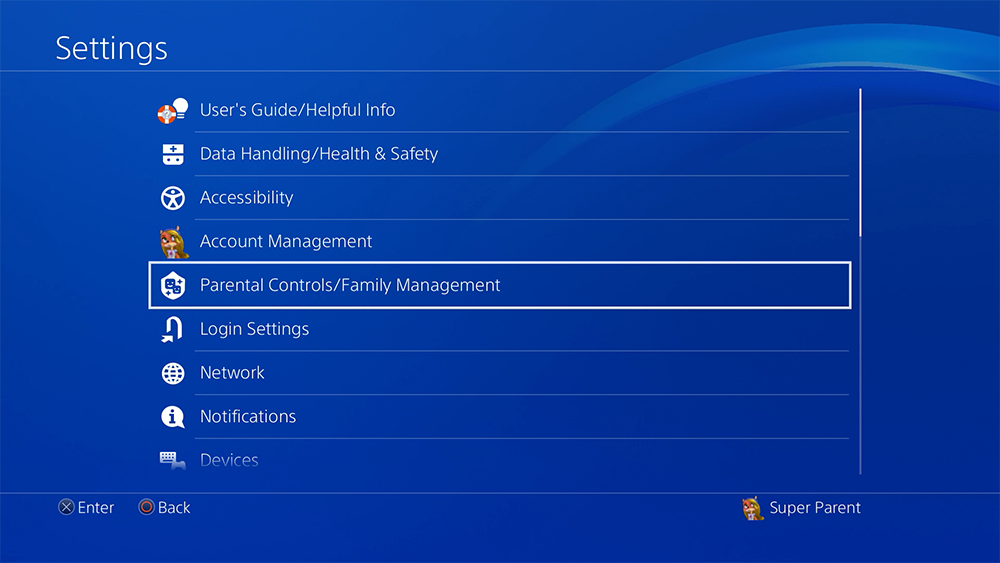
Select “Parental Controls/Family Management.”
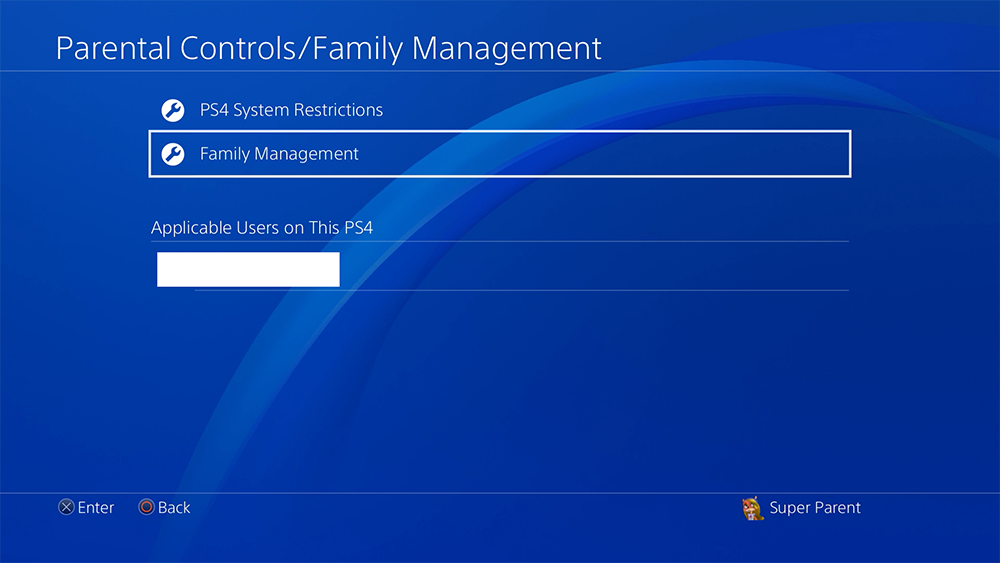
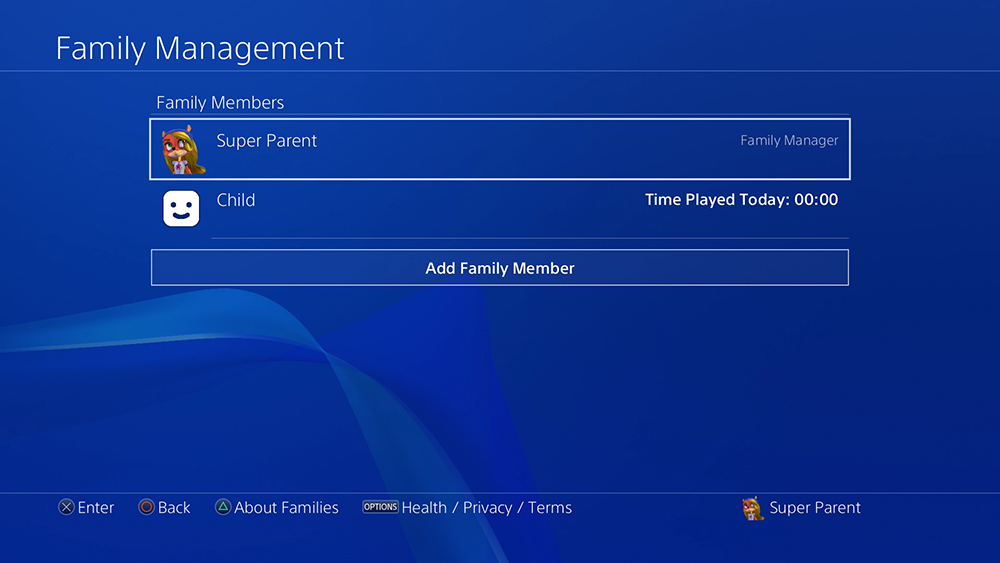
Select “Family Management.” Note: You may need to enter your password after this step.
If this is the first time you’ve added someone to your family on the console, you’ll be taken to a screen that gives you a brief overview of the console’s “Family” system, and the things it allows you to do. Select “Set Up Now” to continue. If you already have multiple members in your family on the console, you won’t see this screen.

If this is the first time you’ve added someone to your family, select “Create User” to begin creating a new child account.
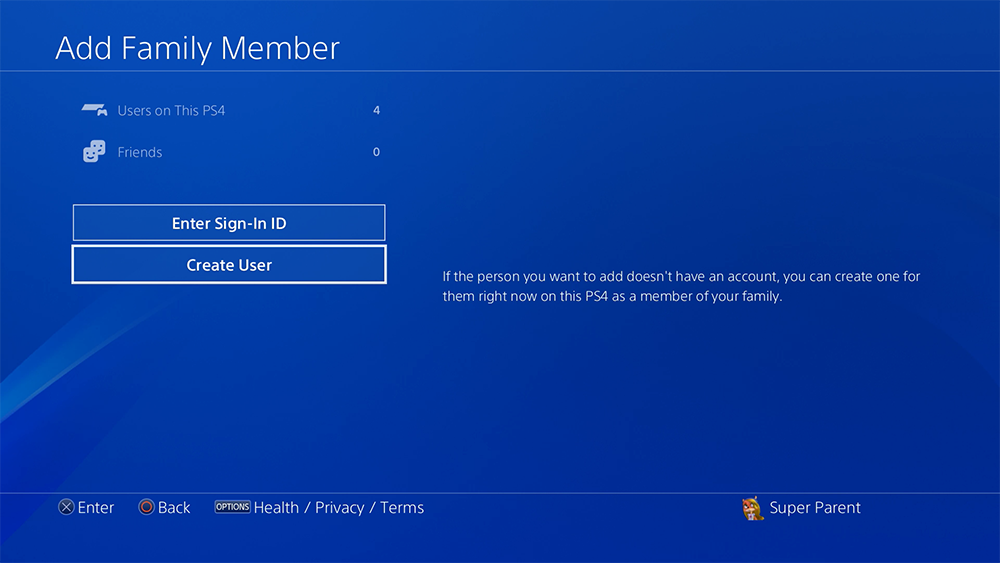
If you already have multiple people in your family on the console, you’ll see the screen below, where you need to select “Add Family Member” first. Then you’ll see the screen above, and you can select “Create User” to continue the process.
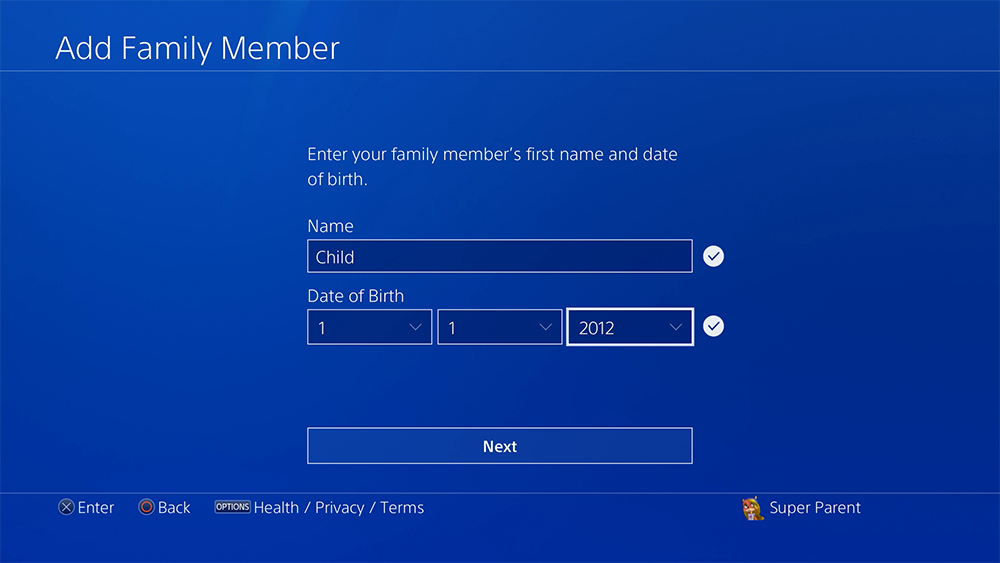
Enter your child’s name and date of birth, and then select “Next.”
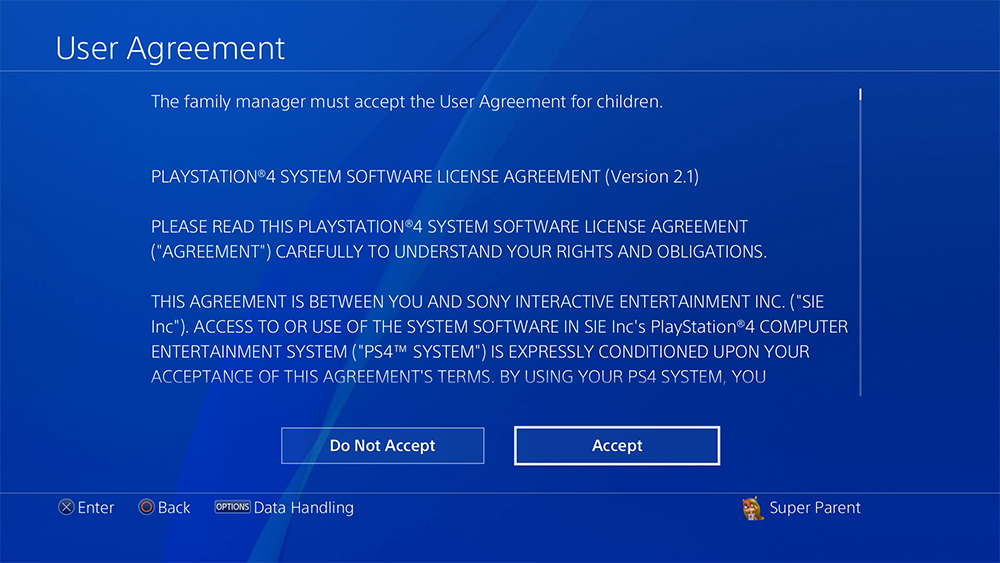
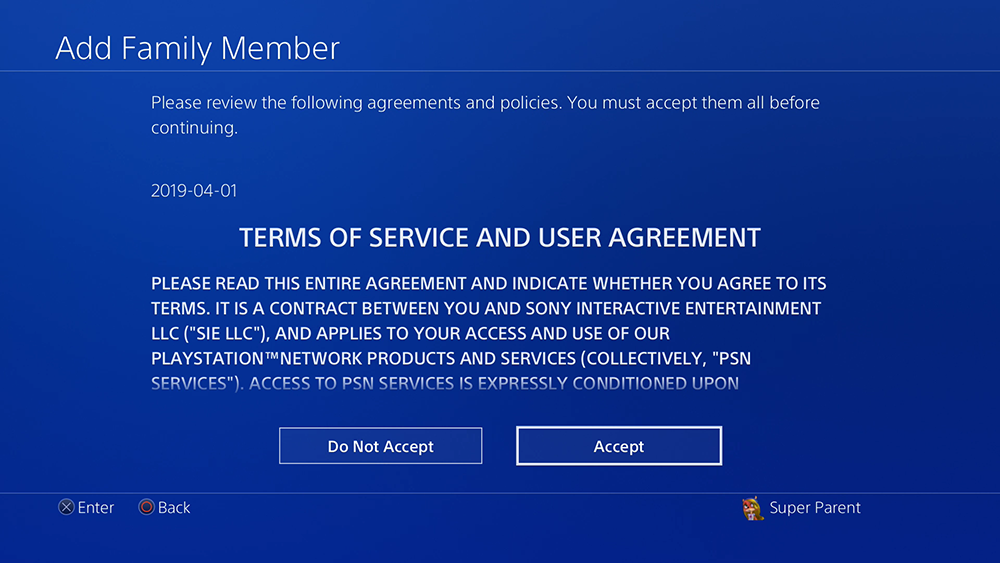
You’ll be taken to a User Agreement page. Select “Accept” to accept the terms of the agreement (you can read the entire Agreement before selecting Accept).
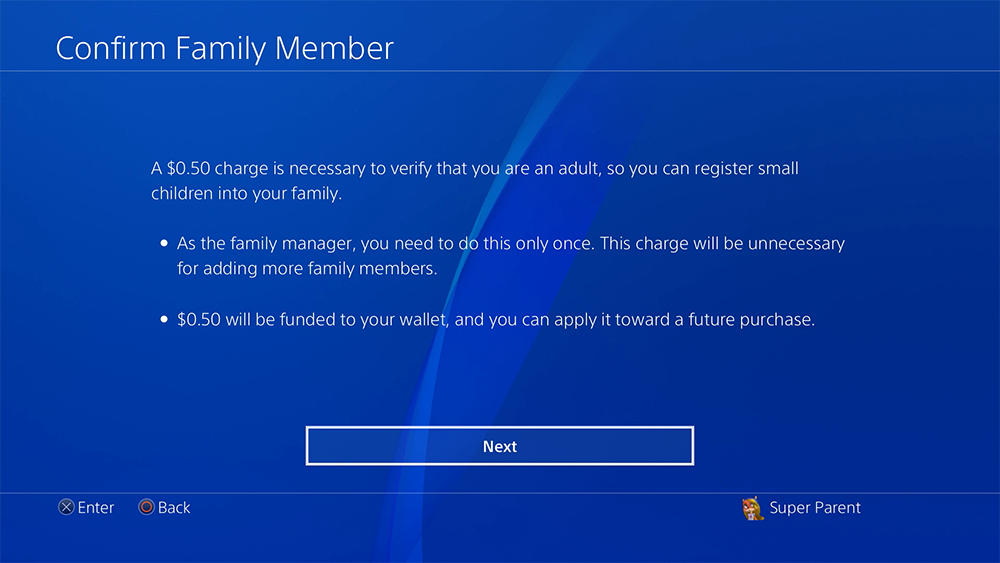
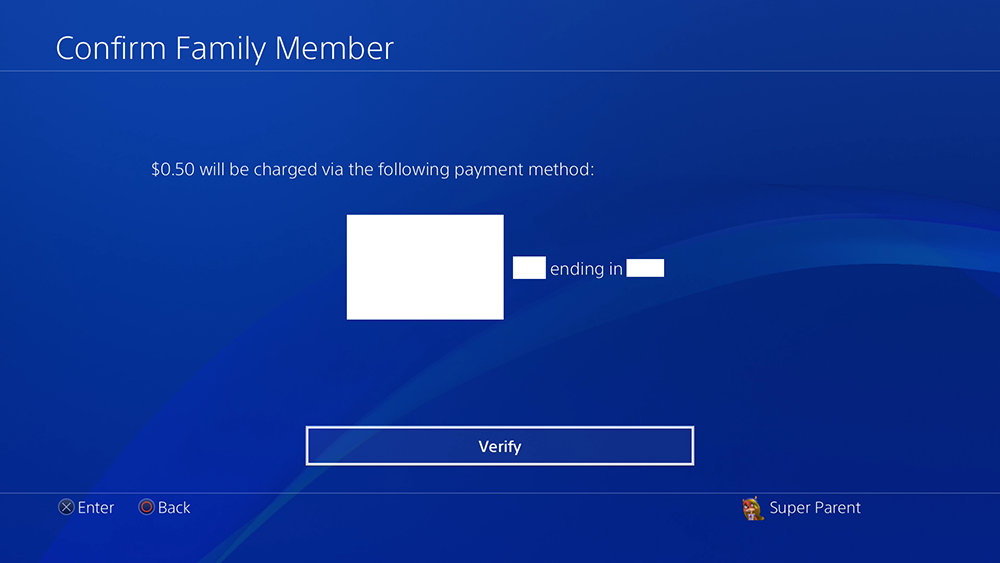
From here, if this is the first time you’ve created a child account, you’ll be asked to pay a one-time fee of $0.50 to confirm that you are an adult creating an account for a child. This money isn’t lost; instead, it’s applied to your PlayStation wallet on the account, and you can use it later on a future purchase (think of it as a $0.50 gift card to the PlayStation store). If you have multiple children, and you need to create multiple child accounts, you’ll only need to pay the $0.50 once. Select “Next” to continue.
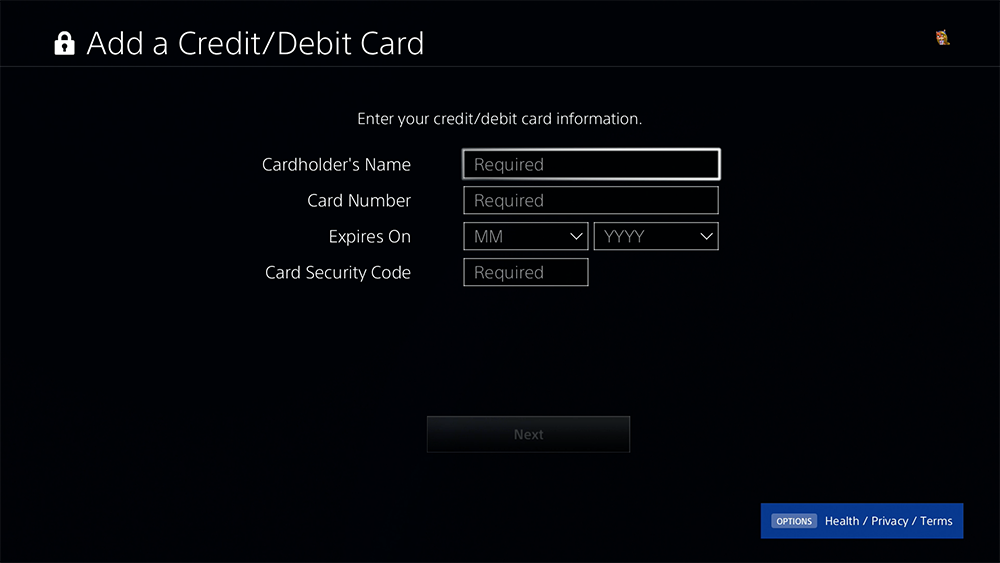
At this point, if you don’t have a payment method saved on your account, you’ll be asked to enter one.
Select “Verify” to confirm your purchase.
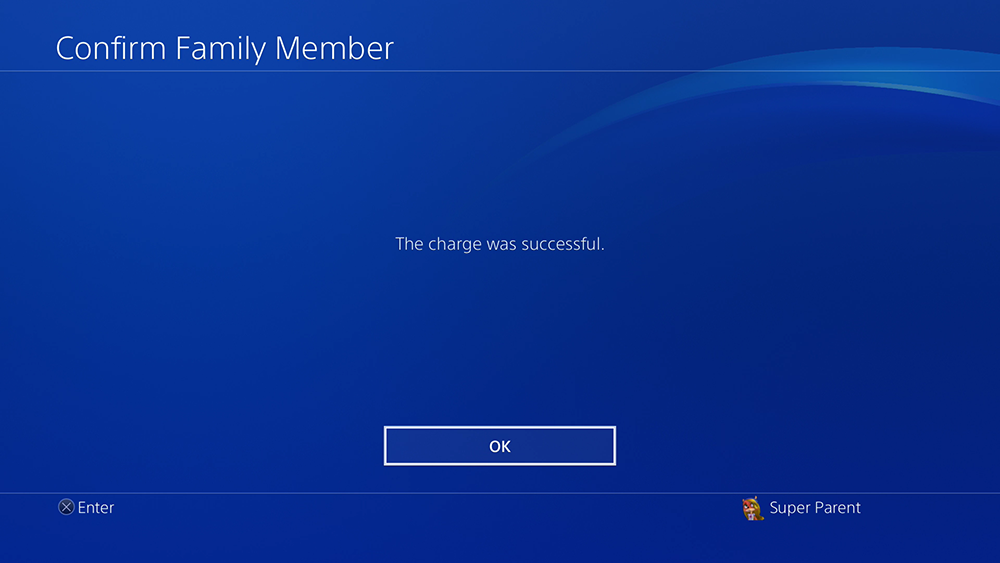
Once your charge successfully completes, select “OK” to continue.
Now that the account has been created, you can set up a variety of parental controls for it. There are four options on the first parental controls screen. Here’s a quick breakdown of each option.
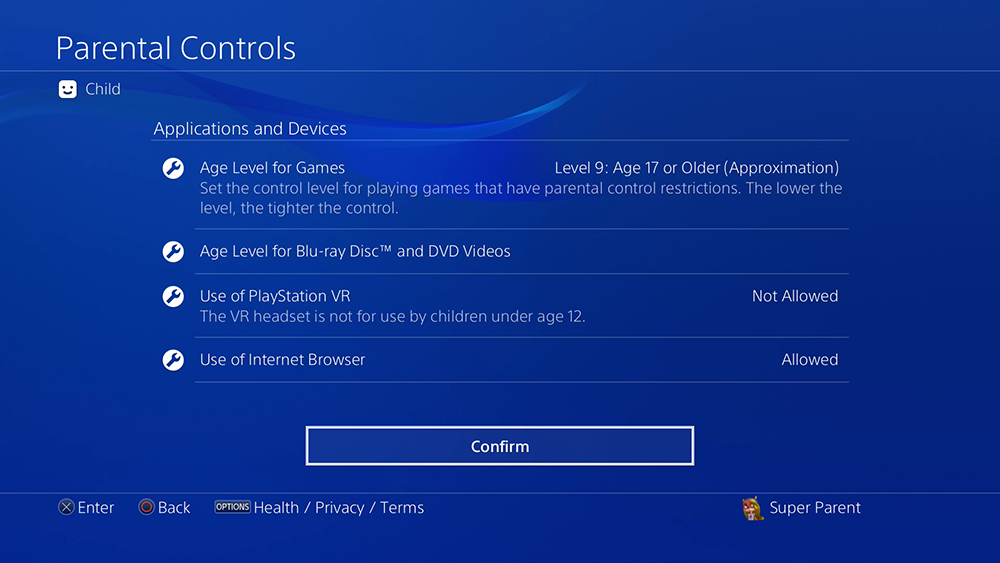
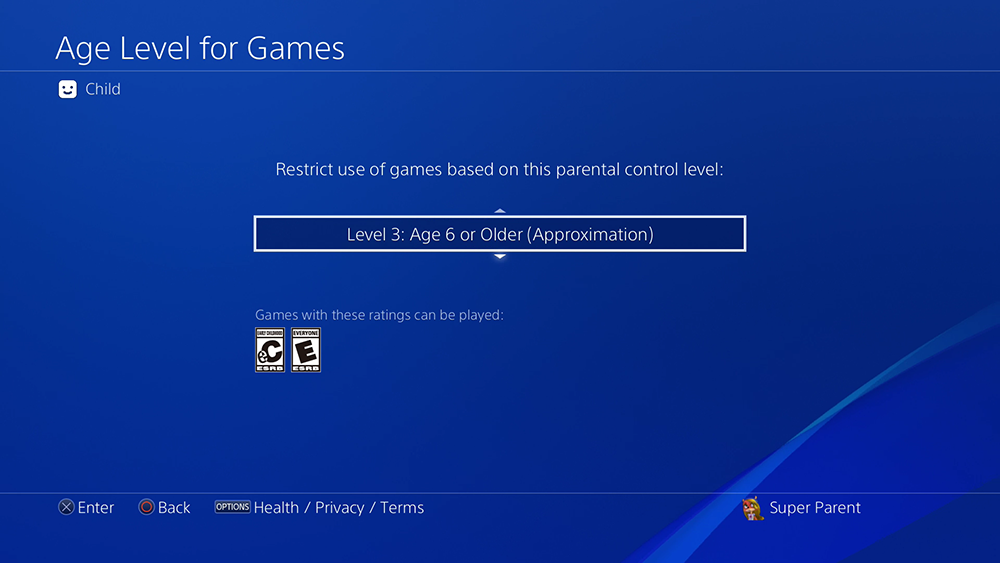
Age Level for Games – Allows you to prevent kids from playing games with certain ESRB ratings, depending on your preference. This uses a numerical scale, with a smaller number resulting in tougher restrictions. For instance, a “Level 9” restriction is for users 17 and older, and would allow games rated EC to M to be played, while a “Level 3” restriction only allows the child to play games with an EC or E rating.
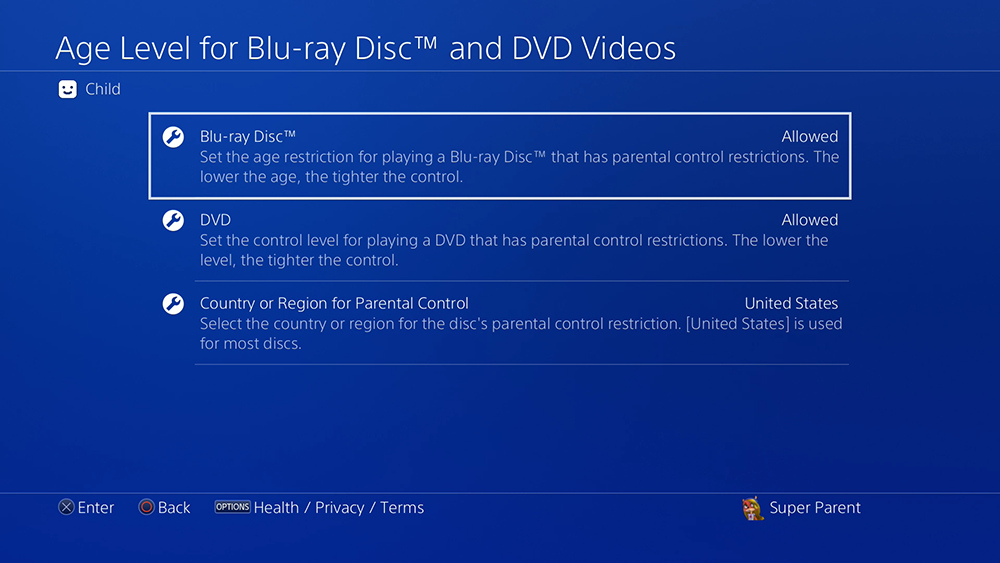
Age Level for Blu-ray Disc and DVD Videos – Allows you to set an age restriction for playing Blu-rays and DVDs that have parental control restrictions. You can also change the country or region for the video’s parental control restriction.
Use of PlayStation VR – Control whether or not your child can use PlayStation VR. Note: The PlayStation VR is not recommended for use by children under the age of 12, but you can manually allow this setting if you wish.
Use of Internet Browser – Control whether or not your child can access the console’s internet browser.
When you’re done with this screen of parental controls, select “Confirm.”
You’ll be asked whether or not you want your child to be able to join PlayStation Network, the console’s online service. Select “Do This Later” to prevent them from joining PlayStation Network, or select “Allow” to allow them to join. Our guide will continue as though you select “Allow.”

If you select “Allow,” you’ll be taken to another screen of parental controls. Here’s what each one does.
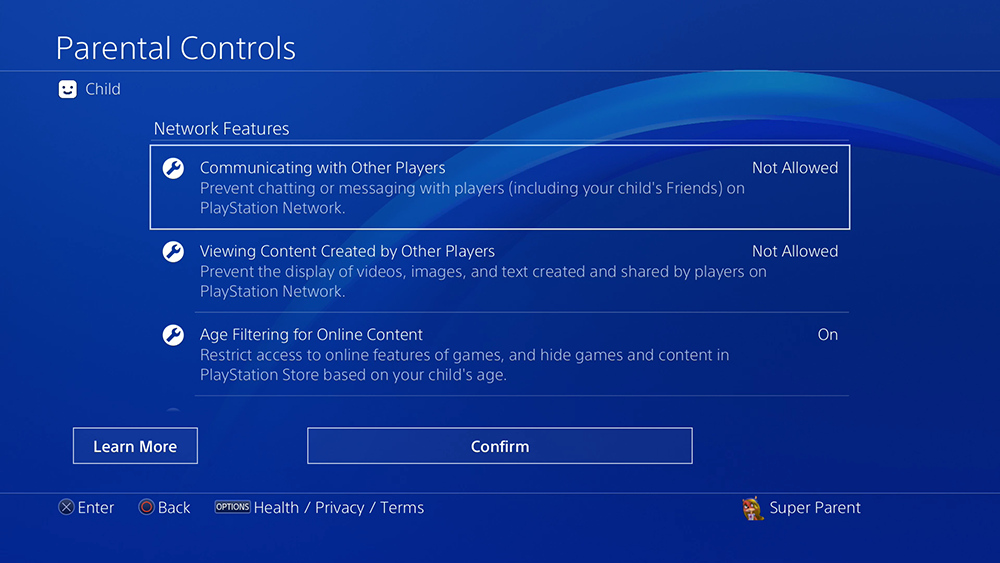
Communicating with Other Players – Control whether or not your child can chat or message other players, including their friends on the console.
Viewing Content Created by Other Players – Control whether or not your child can view videos, pictures, and text created by other players and shared on the PlayStation Network.
Age Filtering for Online Content – Control whether or not an age filter is turned on that will block your child’s access to specific content based on their age.
Monthly Spending Limit – Set the amount of money your child can spend on content in a single month.
When you’re done with this set of parental controls, select “Confirm.”
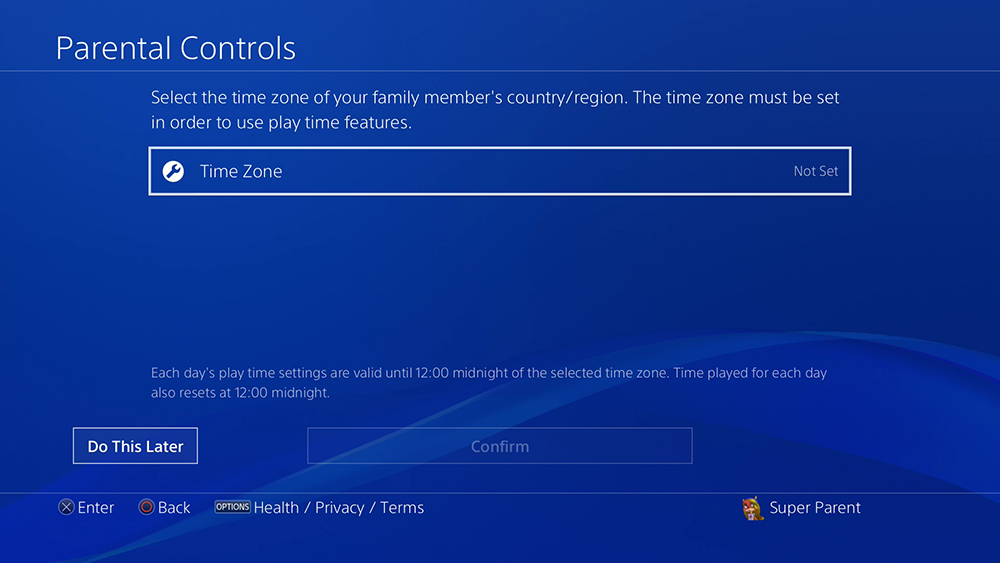
Set your time zone and select “Confirm.” You’ll need to complete this step in order to access the console’s “Play Time” parental controls.
From here, you’ll be taken to a screen that allows you to control the amount of time your child can play games on the console each day. If you want to set this feature up later, select “Do This Later.” If you want to set up the feature now, select “Do Not Restrict” next to “Play Time Restrictions,” and change this to “Restrict.”

You can set up a different restriction for each day of the week (for instance, to give your kiddo extra time to play on the weekends and less time on school nights), or set a blanket schedule for every day. Note: The “Every Day” option is pictured below.

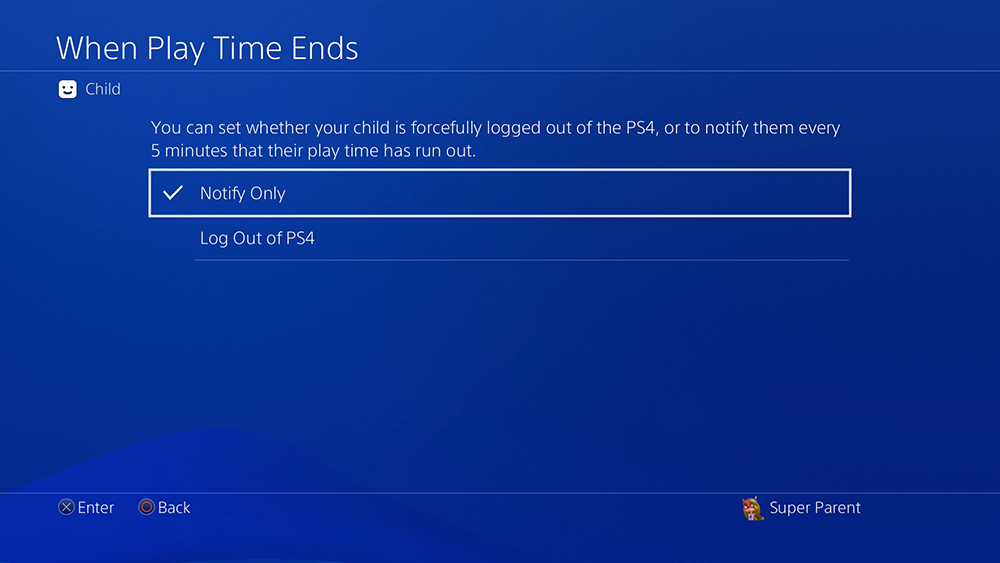
When you choose to restrict your child’s playing time, you can also control what happens when their play time limit has been reached. By default, the console will notify the child every five minutes once their limit has been reached, but you can change it to have the console log them out automatically without their consent.
Whether you choose to restrict your child’s playing time or set this feature up later, select “Confirm” when you want to move on to the next screen.
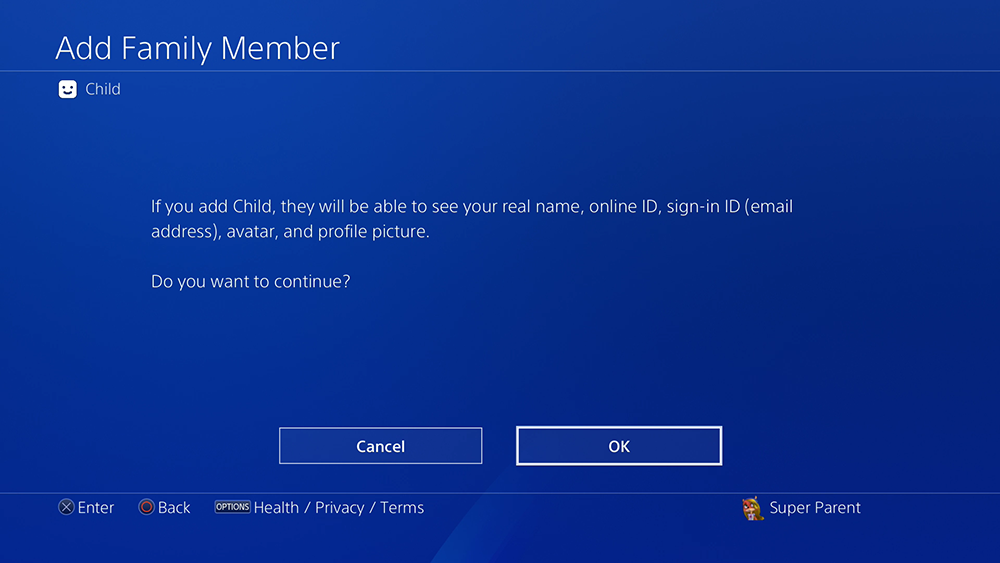
You’ll now be told that, when you create the child account, it will be able to see the real name, online ID, sign-in ID, avatar, and profile picture on your own account. Select “OK” to continue.
Finally, you’ll see more policies that you’ll need to accept to finish the process. Select “Accept” to finish setting up your child’s account.
And we’re done! If you ever need to edit your child’s account or its parental control settings in the future, return to the Family Management menu and select your child from your list of family members.
Do you have any questions about how to set up parental controls on your PlayStation 4? Share them with us in the comments, or tweet us @superparenthq.
Brandy Berthelson has been writing about video games and technology since 2006, with her work appearing on sites including AOL Games, Digital Spy, and Adweek. When she’s not gaming, Brandy enjoys crafting, baking, and traveling with her husband.