Here's a look at the setup process and tutorial, so you know what to expect!
Mario Kart Live: Home Circuit has finally raced onto store shelves, giving fans of all ages the chance to enjoy the Mario Kart franchise in the real world.
With Mario Kart Live: Home Circuit, you can create race tracks in your own home, and use your Switch to race a real world kart around those courses while viewing the racing action on your Switch’s screen.
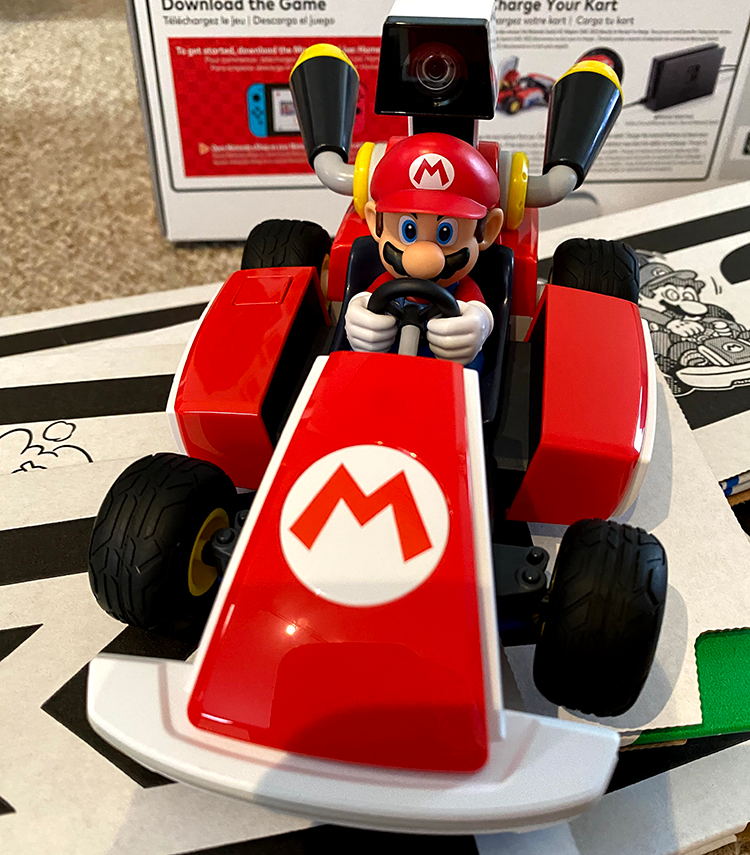
Each kart comes equipped with a camera that outputs to the Switch’s screen so you can see where you’re driving. That is, instead of racing on virtual tracks like in other Mario Kart games, you’ll see the real-world environment on the screen thanks to the camera on the back of the kart.
We had the chance to go hands-on with the Mario version of Mario Kart Live: Home Circuit (a Luigi version is also available, depending on which kart you want to own). Is the game easy to set up? Is the kart easy to drive? Let’s find out!
When you first open the box, you’re told to download the Mario Kart Live: Home Circuit software from the Nintendo eShop. The box doesn’t contain any game software — you have to download the software from the eShop, but it’s available at no additional cost.
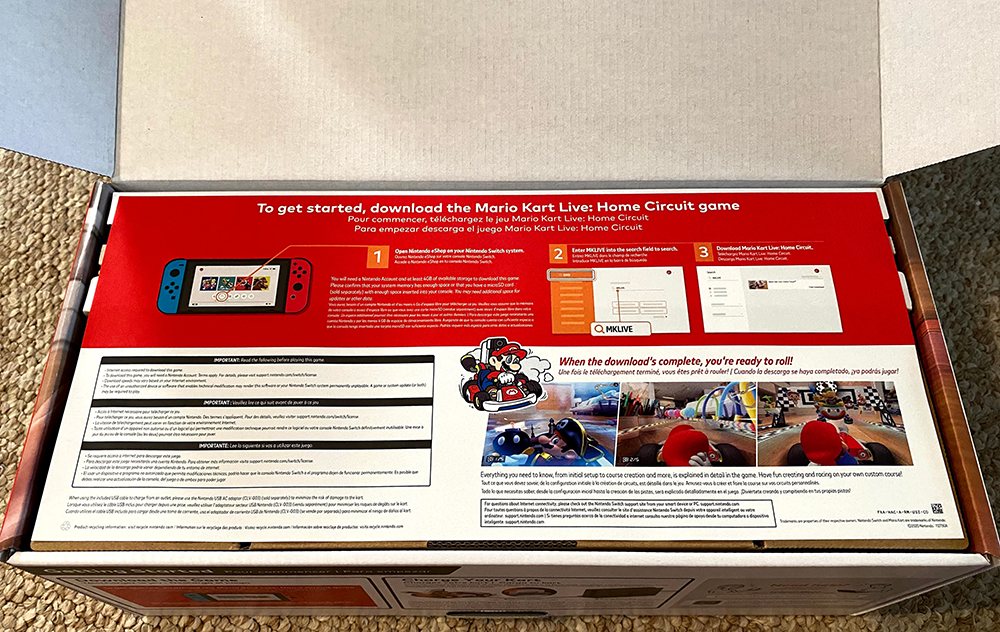
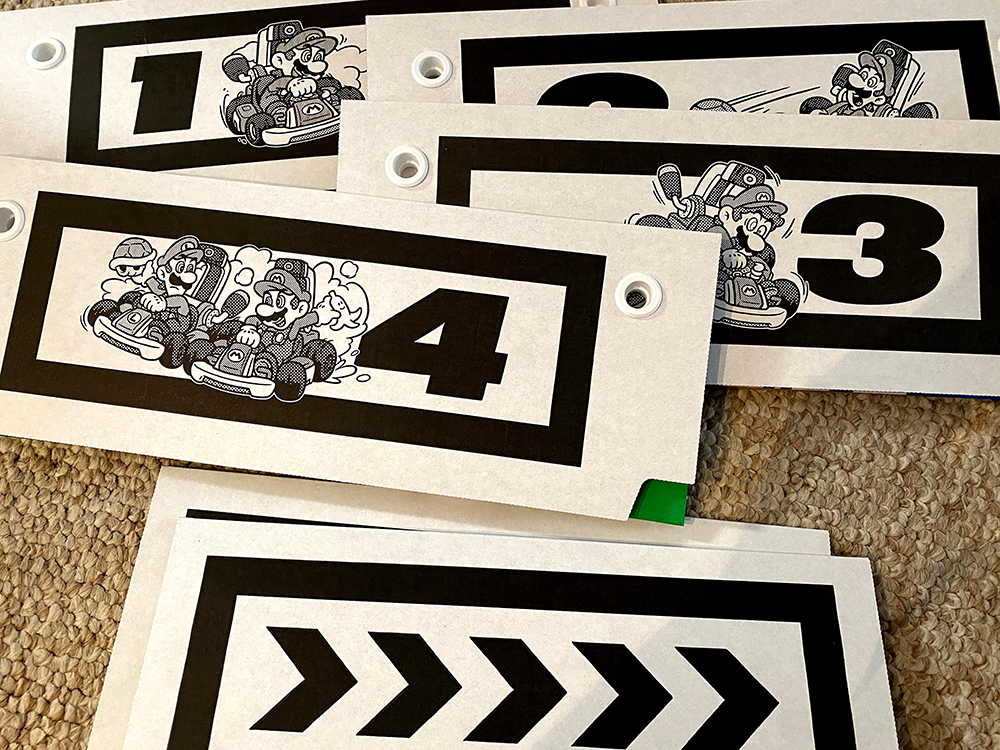
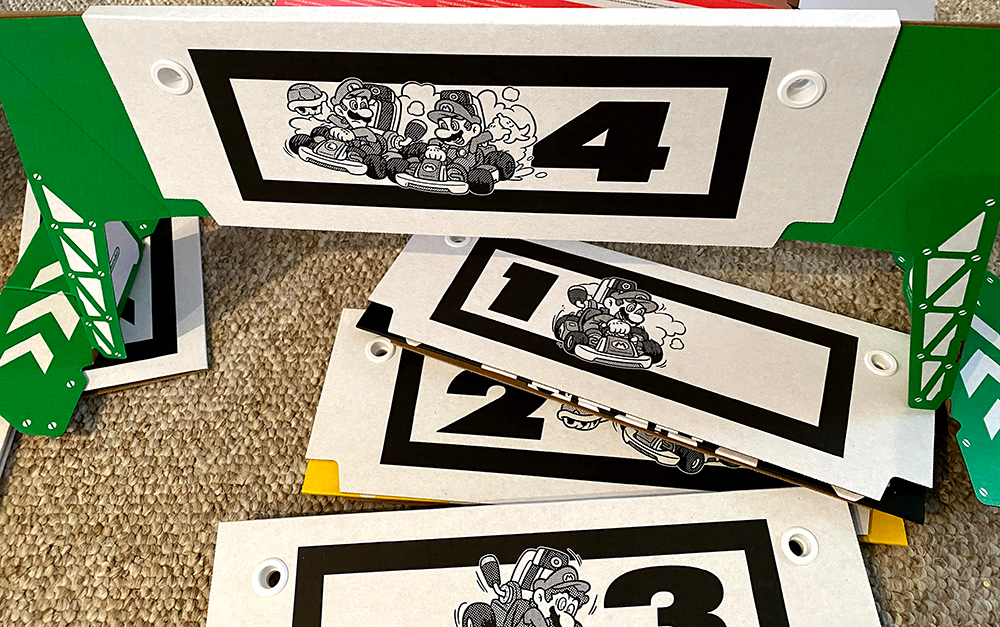
While the software is downloading, you can take the game’s components out of the box. The box contains four numbered cardboard gates, two cardboard arrow sign boards, a USB-C charging cable for the kart, and the kart itself. It’s worth noting that you only receive the USB-C cable — the bundle doesn’t include an adapter to charge the kart through a traditional wall outlet.
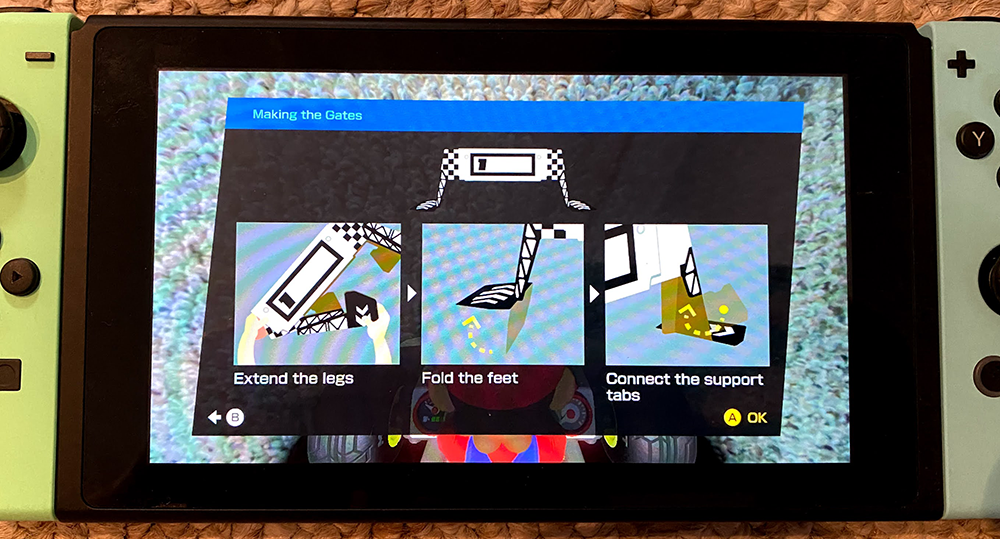
When you’re ready to get started, open the game software and follow the on-screen instructions. The box doesn’t come with a paper manual — all of the instructions are presented through the Switch software.
The game will guide you through the process of turning the kart on (there’s a power button on the top of the kart) and pairing the kart with your Switch (you’ll need to point the kart’s camera at a QR code on the screen). From there, Lakitu, your in-game guide, will lead you through a short tutorial that teaches you how to drive the kart and use in-game power-ups (some of which may affect the kart’s speed in the real world).
Now, it’s time to build your first track. You’ll need to follow the on-screen instructions to unfold and set up each of the four numbered gates, though it’s a pretty easy process to figure out on your own. Each gate has two legs that are permanently attached, which you can swing out from inside the top of the gate (where they’re stored), and then fold in the proper way to make the gate sturdy enough to stand upright on the floor.
There are large cardboard flaps at the bottom of each gate, which Nintendo recommends you cover with books or other heavy objects. This will hold the gates in place if you accidentally hit them (we learned the hard way — don’t skip this step).
Once you’ve put the gates together, you’re asked to place them around the room to create your first course. Lakitu will cover your virtual wheels in paint and ask you to drive the kart through each gate in numerical order to create a race track. This is where you can let your creativity shine. That is, even if you place two gates really close to each other, you can take a long detour as you drive from one gate to the next to create the course of your dreams.
To put it another way, course creation is more about the physical route you drive with the kart, and not the location of the gates. So long as you drive through the gates in numerical order, the path you take between the gates is up to you.
Now that you’ve created your first course, you’ll be introduced to Bowser Jr. and the Koopalings, who will serve as your in-game opponents. You can take them on in your first race by driving around the course you just created.
After you’ve finished your first race, the full game experience will become available to you. You can create new courses in as many different designs as you can think of, and test your racing skills in multiple game modes, like Time Trials and Grand Prix. If your family has multiple Switch consoles and multiple copies of Mario Kart Live: Home Circuit, you can even race against each other in multiplayer races. Just keep in mind that a course can only have four gates, even if you technically own eight or more.
In our experience, Mario Kart Live: Home Circuit is really simple to set up, and the kart is also easy to control. In addition, while the game’s promotional materials showed the kart being driven on hardwood floors, in our experience, the kart handles short carpeting and rugs without a problem (though you may have a different experience, depending on your carpet’s pile).
Nintendo recommends playing in an area that’s at least 10 feet by 12 feet. Obviously, the more space you have to create courses in your home, the more creative freedom you’ll have, but even so, we were able to successfully create and enjoy a small circular course in a much smaller space than Nintendo recommends.
Mario Kart Live: Home Circuit is available now for $99.99. The game is rated E for Everyone by the ESRB.
Disclosure: Nintendo gave SuperParent a copy of Mario Kart Live: Home Circuit for coverage purposes.
Brandy Berthelson has been writing about video games and technology since 2006, with her work appearing on sites including AOL Games, Digital Spy, and Adweek. When she’s not gaming, Brandy enjoys crafting, baking, and traveling with her husband.